
Baffles and Bubblers for Mold Cooling: When Straight Drilling Fails
Table of Contents
A 6 mm core pin 130 mm long stood 21 mm from the nearest straight water line. The tip ran 96 °C against 58 °C at the base in a steady-state check. A 0.9 mm boss wall stayed soft for 6 extra seconds every shot.
The tool then ran a 63 s cycle to protect one hot corner. Nobody blamed the resin or the press. The mold could not put water where the heat was, and straight drilling had already failed.
Two mold components fix that class of problem without printing a single insert. A baffle is a thin blade set into a drilled hole, so the water rises on one side and returns on the other. A bubbler is a tube pushed to the bottom of a blind hole, so the water discharges at the tip and returns up the annulus. Both raise local velocity, both cut the steel-to-water delta-T, and both cost a fraction of a conformal insert. This guide covers the selection rules, the numbers behind them, and the failure modes that show up 200,000 shots later.
The Snapshot
- Straight drilling is practical to a depth of roughly 10x the bore and a core length-to-diameter ratio under 3. Beyond those limits a through-line passes too far from the hot face to matter.
- Baffle rules: blade thickness 0.8-2.0 mm typical and blade-to-hole clearance 0.05-0.1 mm per side. The top gap between blade edge and hole bottom runs 1-2 mm.
- Bubbler rules: tube outside diameter at 40-60% of the hole bore with a 1-1.5 mm annular gap per side. The tip sits 3-6 mm off the hole bottom.
- Flow targets: 1.5-3 m/s in the gap, Reynolds number above 10,000, and a supply-to-return delta-T of 2-5 °C on each circuit.
- Series circuits multiply pressure drop by the core count and stack the temperature rise. Parallel circuits cut pressure drop but leak flow toward the easiest path.
- Component cost is typical: baffles $10-60 each and bubblers $15-80 each, against $3,000-20,000 and 1-2 weeks for a printed conformal insert.
The Deep Core Where Straight Drilling Fails
A drill bit goes in a straight line between two accessible points. That single constraint decides whether a core can be cooled at all. A 130 mm slender core often offers no second accessible face for an exit hole. The bore becomes a blind hole with no return path. Water enters, stalls, and leaves through the same port without sweeping the tip.
Depth ratio is the first hard limit. A conventional twist drill holds position to roughly 5-8x its diameter before wander and chip evacuation push it off line. Gundrilling extends the reach to maybe 20-30x the diameter, but the entry must be flat and the setup cost runs into hours of machine time. The practical window for a simple drilled cooling line sits near 10x the bore.
Core slenderness is the second limit. Above a length-to-diameter ratio of about 3, a straight hole leaves too little steel on the hot side of the cavity. The wall of a 6 mm pin ground to 0.9 mm at the tip cannot host an off-axis line at all. That is where baffles and bubblers enter the design.
The three replacement options, in cost order. A baffled blind hole recovers most of the lost heat transfer for the price of a blade and one extra drilling operation. A bubbler does the same job in a narrower bore and reaches the very bottom of a pocket. A printed conformal insert solves off-axis and multi-spot geometry that no straight line can shadow, at a premium of $3,000-20,000 and 1-2 weeks typical.
| Core condition | Straight drilled line | Baffled hole | Bubbler | Printed insert |
|---|---|---|---|---|
| Bore available | 6-12 mm | 6-16 mm | 4-10 mm | 2-8 mm |
| Reachable depth | 10x bore typical | 10x bore, blind | 20x bore, blind | Contour following |
| Surface spread at trial | 10-20 °C | 5-10 °C | 4-8 °C | ±3-5 °C |
| Added cost per core | $50-300 | $60-360 | $65-380 | $3,000-20,000 |
| Added lead time | Base route | 0-2 days | 0-2 days | 1-2 weeks typical |
← swipe to scroll →
Table note: Costs are typical industry figures for a single deep core in a mid-size tool. Spread values are typical trial readings, not guaranteed results, and improve when flow and circuit layout are verified.
The left column of that table is the decision input. When the core can host a 6 mm hole and the hot zone sits on the axis, a baffle or bubbler matches a printed insert. If the hot zone sits off the axis, or three separate spots need water, printing wins because only a curved line can shadow the contour.
This article stays on the two conventional routes. It does not repeat the straight-line layout rules covered in our drilled channel design guide. The conformal print route is covered separately in the conformal cooling guide.
Baffle Anatomy: Standoff, Fit and Flow Gap
A baffle is a strip of metal that splits a drilled hole into two half-circuits. The blade stands across the bore, so the water column is forced up one side and back down the other. Heat transfer improves because the same flow crosses the hole at roughly twice the velocity. The water also sweeps the hole bottom instead of shortcutting across the top.
Three fits decide whether a baffle works or just wastes machining time. The first is the blade-to-hole clearance along the bore wall. A gap of 0.05-0.1 mm per side is typical. A larger gap lets water bypass the blade, which drops the velocity on the pressure side and creates a dead zone on the other.
The second is the top gap, the distance between the blade edge and the hole bottom. This value runs 1-2 mm typical. Too large and the flow crosses over the top with almost no restriction, so the bottom of the hole never sees fast water. Too small and the blade chokes the circuit, because the return path must pass the same narrow opening.
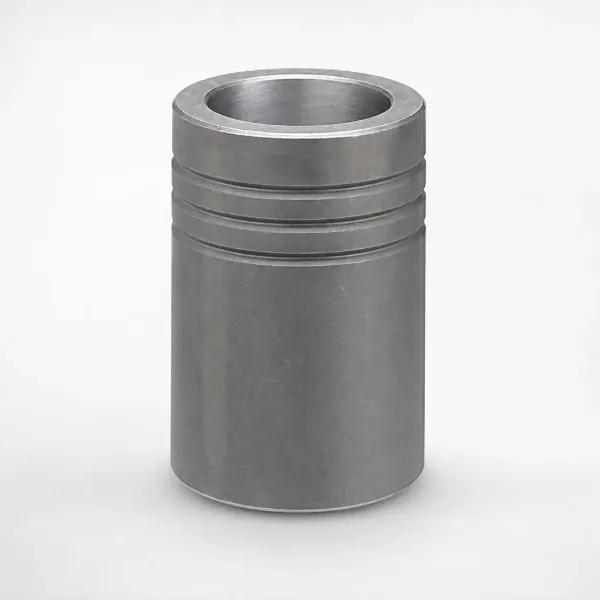
The third is blade thickness, which runs 0.8-2.0 mm typical. A thinner blade leaves more open area for flow and fits a small bore. It also flexes more under the pressure difference across the two halves of the circuit. A blade that flexes for 500,000 cycles fatigues at the slot root. That is the most common in-service baffle failure, and thickness is the cheapest thing to change at the design stage.
Insertion method matters as much as geometry. The blade is either pressed into a milled slot or pinned by a set screw. Either seat must resist the 0.5-2 bar differential across the two sides of the hole. A loose blade shifts, opens a bypass path and loses most of its effect. On deep cores, seats are usually milled 1-2 mm deeper than the blade so a shim can be added during a trial.
Baffles work best where the hole axis is close to the hot face along its whole length. They do not fix an off-axis hot spot, because the blade still lives inside a straight bore. If the temperature map shows the hot band running away from the hole, the answer is a new hole location or a printed insert. A thicker baffle will not fix it.
Single Baffle vs Double Baffle
A single baffle uses one blade and creates one up leg and one down leg. It is the default on bores from 6 to 10 mm because the flow area is already small, and adding metal would choke the circuit. On an 8 mm bore with a 1.5 mm blade, each leg keeps roughly 3 mm of width. The local velocity is about double the un-baffled value at the same flow rate.
A double baffle uses two blades, usually arranged to force a cross-flow pattern across the bore. The water enters between the blades, moves outward, and returns on the two outer legs. This pattern raises wall contact along more of the circumference, which helps when the heat load is wide rather than local. It also multiplies pressure drop, because the flow now passes two narrow openings instead of one.
Selection rule of thumb. Use a single baffle for bores under 10 mm and for one local hot spot. Use a double baffle for bores from 10 to 16 mm where the hot band spans a wide arc, and accept the higher pressure drop. Above a 16 mm bore, a bubbler or a spiral insert usually beats a double baffle on both heat pickup and manufacturability.
Flow area is the number to check before choosing. Compute the open area on each leg after the blades are placed. Then confirm the velocity lands in the 1.5-3 m/s band at the pump flow you have. A double baffle in an 8 mm bore with two 1.5 mm blades leaves under 2 mm per leg. That pushes velocity above 4 m/s, and pressure drop rises by roughly 4x against the single-blade version.
Baffle Materials: Brass, Stainless and Copper Alloys
A baffle is a heat path as well as a flow splitter. The blade touches the bore wall, so heat leaves the steel through the blade and then into the water. Thermal conductivity therefore matters as much as resistance to corrosion and wear. The three practical choices differ by more than a factor of ten on that first number.
Brass is the default. It machines easily and cuts to a repeatable 1-2 mm thickness. A brass blade is also soft enough that it cannot score the bore when pressed in. Its weak points are dezincification in aggressive or high-chloride water and erosion at the blade edge where local velocity peaks. On a clean closed loop with treated water, brass gives years of service at the lowest cost.
Stainless steel is chosen for corrosion resistance and for tools that sit idle. Its thermal conductivity is roughly an order of magnitude below brass, so a stainless baffle mostly splits flow and transfers little heat through the blade. That is acceptable on a short baffle in a big bore with high flow. It is a poor choice on a deep core where the blade is the main conduction path.
Copper alloys, and specifically beryllium copper mold alloys, sit at the top of the range. They conduct several times better than brass and hold useful hardness for a thin blade. The cost runs 3-6x brass typical, so they are reserved for two cases. One is a hot spot that survives every layout change. The other is a short-cycle tool where each second of cooling time has value.
| Baffle material | Thermal conductivity | Typical hardness | Relative cost | Best fit |
|---|---|---|---|---|
| Brass (CuZn) | 100-120 W/m·K typical | 80-120 HV | 1x | General deep cores, treated water |
| Stainless 304 | 15-17 W/m·K typical | 180-200 HV | 2-3x | Corrosive or idle tools, flow splitting only |
| Beryllium copper | 100-200 W/m·K typical | 30-40 HRC | 3-6x | Hot spots, short-cycle tools |
| Copper C110 | 380-390 W/m·K typical | 40-60 HV | 2-4x | Prototype hot-spot tests, low-run tools |
← swipe to scroll →
Table note: Conductivity and hardness are typical published values for wrought stock and vary by temper. Cost is relative to brass at the same blade size, based on typical industry pricing.
Two secondary rules matter at the specification stage. Match blade material to the mold steel to avoid a galvanic pair in a wet circuit. A copper alloy pressed against a stainless core in untreated water corrodes the less noble side. Then confirm the blade thickness the supplier can actually hold. A 0.8 mm brass blade and a 0.8 mm beryllium copper blade differ sharply in stiffness and service life.
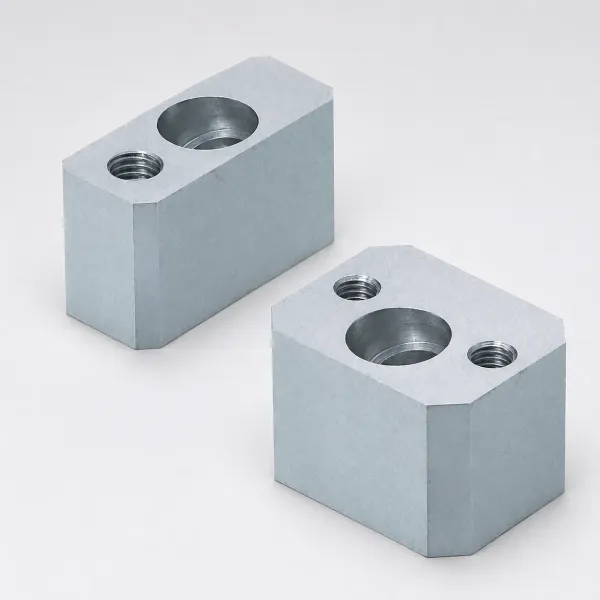
Where a copper alloy baffle is used, pair it with a water treatment regime and a cleaning interval. The better conductivity raises the heat load on the blade and its seat. Corrosion products from the blade then land in the 1-2 mm gap that controls flow. The cooling channel cleaning guide covers the scale and flow recovery steps for exactly that scenario.
Bubbler Tube Design: Diameter, Tip and Immersion
A bubbler is a tube that reaches the bottom of a blind hole and discharges there. Water travels down the inside of the tube, leaves at the tip, and returns up the annular gap between the tube and the bore wall. The discharge point is the whole point of the design, because the coldest water now meets the hottest steel instead of stalling at the entry.
Tube diameter is set as a fraction of the hole, not as an absolute size. The outside diameter runs 40-60% of the hole bore typical. A 6 mm hole therefore takes a 3.5-4 mm tube, and an 8 mm hole takes a 4.5-5 mm tube. That ratio leaves an annular gap of 1-1.5 mm per side, which is the passage that actually sets heat pickup and pressure drop.
The purpose of the 40-60% ratio is to make the annulus the controlling area. If the tube is too small, the gap is wide, velocity falls, and the flow stops scrubbing the bore wall. If the tube is too large, the gap chokes the return path and the pump cannot deliver the flow the circuit needs.
Tip position. The tube tip sits 3-6 mm off the bottom of the hole typical, which is roughly 0.5-1x the bore. A tip that touches the bottom blocks the discharge and forces water through a nearly closed opening. A tip 20 mm short of the bottom leaves the deepest steel effectively uncooled. The return flow slows as it climbs away from the tip.
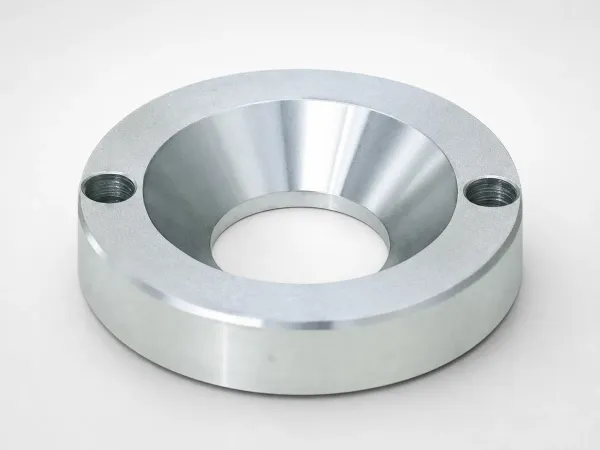
Immersion length is the next field on the drawing. Set the tip within 10 mm of the deepest hot band on the core. On a 130 mm pin with a hot 0.9 mm tip boss, the bubbler should reach 125-127 mm deep, not 100 mm. A supplier-stocked bubbler is cut to length and deburred at the tip. A burr creates a jet that erodes one spot on the bore wall.
The inside bore of the tube is rarely the weak link. A 4 mm outside diameter tube has about a 3.2 mm inside diameter. At 3 L/min that internal passage runs 6.2 m/s and a Reynolds number near 25,000. The annulus in the same circuit runs 3.2 m/s at a Reynolds number near 8,000, so the annulus is the side that needs flow. Size the tube for the gap, not for the internal bore.
Two mounting details decide service life. Use a threaded fitting where the tube passes through the plate, in 1/8 BSP or the equivalent. The tip can then be pulled for inspection and descaling. Then confirm the tip stays concentric within about 0.5 mm of the hole axis. A tipped bubbler aims the jet at one wall and thins the steel land over a few million cycles.
Bubbler Clearance: Core Pins, Ejectors and Thin Steel
A bubbler hole is a large bore in the middle of a core that also has to hold ejector pins, a core pin seat, and a steel land over the cavity face. Every one of those features competes for the same volume of steel. The layout has to be resolved before the first drill touches the block. A bubbler cannot be moved by 2 mm once the core is machined.
Steel land over the hole. Keep at least 1.5x the hole diameter of steel between the bubbler bore and the cavity face. A 6 mm bore therefore needs 9-15 mm of steel in front of it. Below that, the land deflects under typical 30-80 MPa cavity pressure, and a bright witness mark appears on the part before the tool cracks.
Web between holes. Keep 3-5 mm of steel between any two bores typical. A thinner web between a bubbler hole and an ejector pin hole risks breakthrough at pressure, and a breakthrough connects two water circuits. The failure is quiet at first. It shows up as a flow imbalance and a hot spot, long before it shows up as a leak.
The most common conflict sits between the bubbler and the ejection pattern. A deep core pin often doubles as an ejector, and the bubbler needs the same axis. Three resolutions exist.
Move the bubbler off axis and accept a small temperature penalty. Convert the pin to a sleeve that carries the bubbler inside it. Or move the point of ejection to a boss or rib where the steel is thicker.
Access for service is a design feature. A bubbler pressed into a core that sits behind a welded or permanently bolted plate stack can never be replaced. Put the fitting on the accessible face, or place the bubbled section in a removable insert. On a hot core, that decision separates a 30 minute tube swap from a full core replacement.
Below a 4 mm bore, the geometry turns against the bubbler. A 4 mm hole leaves only a 2.5-3 mm tube, and the 1.5x land rule demands 6-9 mm of steel in front of it. On a pin that is 6 mm across, that budget does not exist. This is the boundary where a printed insert with a contoured line becomes the cheaper answer over the life of the tool.
Flow Rate and Reynolds Number: The Turbulence Gate
Velocity and turbulence decide heat pickup, not coolant temperature alone. In the turbulent regime the water film at the wall keeps breaking down, so heat crosses the steel-to-water boundary quickly. In the transitional and laminar regimes that film thickens and heat transfer falls by roughly 3-5x typical.
The industry gate is a Reynolds number above 10,000 for strong turbulence, with transition beginning around 4,000. Water near 30 °C has a kinematic viscosity near 0.8 mm²/s, so the required velocity for a given passage follows directly from its hydraulic diameter. A narrow passage therefore needs more velocity and more flow than a wide one to reach the same regime.
The annulus is a narrow passage. A 1 mm gap behaves, for flow purposes, like a 2 mm channel, because the hydraulic diameter of a thin annulus is twice the gap.
Now run the numbers on a real bubbler. A 6 mm hole with a 4 mm tube leaves a 1 mm gap and a 2 mm hydraulic diameter. At 3 L/min the annulus runs 3.2 m/s at a Reynolds number near 8,000, which is transitional and weak. At 4 L/min it runs 4.2 m/s at a Reynolds number near 10,600, which crosses the gate.
The same arithmetic explains why bubblers feel flow hungry. A plain 6 mm drilled line crosses the 10,000 gate at only 3 L/min. Its hydraulic diameter is 6 mm, and its wall is smooth and continuous. A 1 mm annulus in the same bore needs 4 L/min to reach the same regime. The narrow gap that improves local heat pickup also demands a bigger pump.
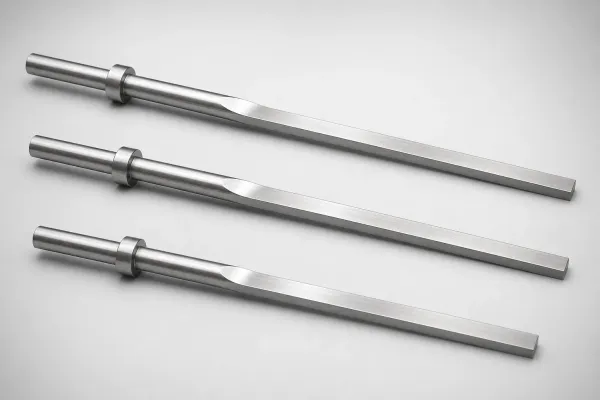
Practical flow targets land at 1.5-3 m/s in the passage and 2-4 L/min per baffled or bubbled deep core. Beyond roughly 5 m/s the gain flattens, and erosion at the tube tip and the baffle edge accelerates. Brass and copper alloys lose metal fastest exactly where the jet lands, which is the top few millimetres of the bore.
Confirm the regime on the bench, not on paper. Measure flow at the outlet in L/min, then read supply and return temperatures. A circuit running 2-3 °C apart at steady state is picking up heat well. A circuit running 10 °C or more apart is either starved of flow or passing through a short circuit. Either way the pump curve and the passage area are the first two things to check.
Series vs Parallel Circuits: Pressure Drop and Delta-T
Circuit topology decides how flow and heat are distributed across the tool. Series connections run water from one core into the next, so every core shares the same flow and pressure drop adds up. Parallel connections split the flow at a manifold, so each core sees the supply temperature but the easiest path takes the most water.
Series strengths and limits. Series guarantees the same flow through every core, which is why it suits two to four matched cores on a small tool. The penalty is temperature stacking.
If each core warms the water by 3 °C, four cores in series return water 12 °C hotter than it arrived. The last core then cools with warm water. Keep the total supply-to-return delta-T per circuit inside 2-5 °C typical, or split the loop.
Parallel strengths and limits. Parallel cuts pressure drop and lets one pump feed many cores. In return, flow balances only if the resistances match. A bubbler with a 1.5 mm gap next to one with a 1 mm gap will take noticeably more water, and the tight one starves. Balance with equal hose lengths from a manifold, matched restrictors, or individual flowmeters.
Pressure drop lives in three places at once. The passage itself, the fittings and hose, and the manifold. On small circuits the fittings and hose often account for 20-40% of total loss typical. A design that ignores plumbing usually misses its flow target on the machine. Measure at the machine, because a bench pump curve does not include the tool plumbing.
Sizing rule. Sum the design flow for every core and check that against the pump. Sixteen bubbled cores at 2.5 L/min need 40 L/min total. That is why large tools use a manifold with per-circuit flowmeters instead of one long series loop. On a tool that size, a single starved bubbler can hold the cycle at a level the other fifteen cores cannot recover.
One discipline covers both topologies. If flow cannot be measured and adjusted circuit by circuit, the cooling design cannot be verified or tuned. That statement holds for a two-core pilot tool and for a 32-cavity automotive connector mold.
Machining Routes: Angled Ports, Plugs and Cross Drilling
A baffled or bubbled circuit is built from straight holes that intersect at angles. The designer chooses entry faces, then cross-drills to reach the bore, then seals the surplus openings. Each extra operation adds setup time, and each unsealed intersection creates a path that steals flow from the core the circuit is meant to cool.
Angled holes. A side entry at 15-45° reaches a hot band that a perpendicular hole misses. Shallow angles below 15° are risky, because the drill flexes and wanders. Spot with a flat mill first, then start the drill on that flat so the entry stays on line.
Cross drilling. Feeder lines meet the main bore at right angles or at a slight angle. Every intersection must be sealed except the intended path. A press-fit ball plug in a 5-10 mm seat is the standard answer typical. Use threaded NPT or BSP plugs where a port may need to be opened again for service.
Plug seats. Make the seat at least one plug diameter deep typical. A shallow seat can be pushed out by circuit pressure. A plug that moves turns a sealed line into an open leak inside the tool, where it is hard to see. Seat the plug below the surface where possible, so a plate face or insert cannot work it loose.
Baffle slots. Mill or wire the slot 0.05 mm wider than the blade thickness. Cut the shoulder depth 1-2 mm deeper than the blade length. That spare depth allows a shim during a trial if the top gap measures wrong. On cores at 50 HRC or above, wire EDM is the reliable route for the slot.
Deburr every intersection and every drilled port. A 0.2 mm burr at a bore junction creates a local hot spot and a place for scale and debris to collect. Hold hole depth to about ±0.5 mm, because the top gap that controls the baffle sits inside the 1-2 mm band. Drill tolerance eats most of that allowance.
Cost lands in the setup, not in the metal. A baffled or bubbled blind hole adds roughly $60-380 per deep core over plain drilled cooling typical, dominated by the extra grinding and drilling operations. Design the port locations so they can be reached in the same setups as the rest of the core. That step pushes the cost toward the low end of the range.
Additive vs Conventional: Where the Boundary Sits
The choice between a baffled or bubbled hole and a printed insert is a geometry question first and an economic question second. If a straight line can serve the hot band, the conventional route costs a fraction of the print and adds no lead time. If the hot band curves away from any straight axis, only a contoured line will reach it.
Choose a baffle or bubbler when three conditions hold. The hot band runs roughly along a straight axis. A bore of 5-12 mm fits inside the core with the 1.5x steel land intact. And one or two hot spots carry most of the cycle time, rather than a distributed pattern across a large surface.
Move to a printed insert when any of these appear. The hot zone sits off the hole axis and cannot be rotated into reach. More than two separate hot spots need water. The part demands a surface band tighter than ±5 °C across a complex contour. Or the cycle target requires a 15-40% cut that only contoured lines deliver.
The cost gap is wide and worth stating plainly. A baffle or bubbler set for one deep core runs $60-380 typical, with 0-2 days added to the mold schedule. A printed conformal insert runs $3,000-20,000 and 1-2 weeks typical. On a tool with eight deep cores, the conventional route can cover most of the heat load for the price of one print.
Runner life separates the two routes as well. A brass or beryllium copper baffle tolerates millions of cycles and can be pulled, cleaned, and reinstalled. A printed face in aged maraging steel at 50-54 HRC typical wears faster on glass-filled resins. Its channels also cannot be rodded out once the geometry tightens.
A hybrid often wins. Print or machine a contoured insert for the one hot pocket, then feed it with baffled and bubbled support lines in the surrounding steel. That combination captures most of the cycle gain while keeping the maintenance cost of the conventional circuit.
Failure Modes: Breakage, Blockage and Short Circuits
Baffles and bubblers fail in a small number of recognizable ways, and each one leaves a temperature signature. Reading that signature early is cheaper than finding the cause after a scrap spike. In most cases the delta-T per circuit tells you what happened before any part inspection does.
Baffle fatigue fracture. A blade under 0.8 mm thick, unsupported across more than 100 mm typical, flexes with every shot and cracks at the slot root. The blade then travels downstream and blocks a narrow passage, so one circuit loses flow while the rest look normal. Thickness and support depth prevent it.
Baffle rotation or loosening. A press fit that relaxes lets the blade rotate out of position, which opens a bypass across the top. The symptom is a gradual change, not a step. The delta-T climbs from 3 °C toward 8-10 °C over a few weeks, and the hot spot slowly returns.
Blockage at the top gap. The 1-2 mm gap between blade and hole bottom is the tightest point in the circuit. Scale, debris, and corrosion products collect there. Flow falls below 1 L/min and the core goes hot. Hard water can deposit at 2-3 mm per year typical, so a gap at the low end of the band can close in months.
Short-circuiting past the blade. Blade clearance above 0.1 mm per side or a worn seat lets water bypass the split. Velocity on the pressure side drops, and the far side of the hole becomes a dead zone. The fix is a properly sized blade and a slot that holds it.
Bubbler tip erosion and backing out. Velocity peaks at the discharge point, so brass thins there and the tip deforms. A press-fit or threaded tube that moves loses its 3-6 mm standoff and starves the top of the bore. Stainless and copper alloy tips last longer where the velocity is highest.
Cavitation near the tip. A high pressure drop combined with water close to its boiling point at the pump produces vapour pockets that collapse against the bore wall. The audible sign is a gravel-like rattle at the tool. The damage shows as pitting on the bore and the baffle edge.
Galvanic corrosion. A copper alloy blade against a stainless or high-chrome core in untreated water drives corrosion on the less noble surface. Products land in the gap, flow falls, and the failure looks like blockage. Match materials or treat the water.
Verifying the Circuit at Trial
Verification starts with flow, because every other number follows from it. On the trial machine, connect one circuit at a time and measure outlet flow in L/min. A baffled or bubbled deep core should pass 2-4 L/min typical. A reading under 1 L/min means a blocked gap, a bottomed-out bubbler, or a closed valve.
Then read temperatures. Fit a probe on supply and return of each circuit and log the delta-T at steady state. The target band is 2-5 °C for a well-fed circuit. A circuit at 10 °C or more either runs starved of flow or leaks past a baffle. Both conditions leave the same hot corner on the part.
Scan the open cavity while the tool is hot and note the spread. A camera reading within 5 °C of the mean across the core is a healthy result. A 10-20 °C swing points straight at a layout problem. Confirm camera readings with a contact probe on the steel, since polished surfaces and oxide layers distort infrared values.
Finally, verify on the parts. Weigh 10-20 consecutive shots to check packing stability. Measure flatness or a critical dimension on the CMM against the drawing tolerance. That could be ±0.05 mm on a panel or ±0.005 mm on a tool dimension. Compare the cycle time against the quoted number.
Repeat the check after run-in. Re-measure flow and delta-T after 40-80 hours of production, then at three and six months. A cooling circuit that starts at 3 °C and drifts to 7 °C needs cleaning, not a new layout. That interval is the single most useful maintenance signal a mold can carry, and it costs only a flowmeter reading.
DieStrike reviews core cooling layout, steel land, and component selection in its DFM pass before any steel is cut, with feedback returned within 24 hours. For tools with deep cores, the review flags where a baffle or bubbler cannot meet the cycle target. The printed route is then priced before the quotation is issued, not after the first trial.
FAQ: Baffles and Bubblers
Q1. When should I use a baffle instead of a bubbler?
Use a baffle when the bore passes through the core and the hot band lies along that axis. Use a bubbler when the hole is blind and the hot steel sits at the bottom of a deep pocket. A baffle needs a blade slot and a return path, while a bubbler reaches 20x the bore deep with a tube. Baffles are cheaper, bubblers reach further.
Q2. How much flow does a bubbler need?
About 2-4 L/min typical per deep core. The gate is a Reynolds number above 10,000 in the annular gap. A 6 mm hole with a 4 mm tube leaves a 1 mm gap. That gap runs 3.2 m/s at 3 L/min and 4.2 m/s at 4 L/min. Only the higher figure crosses the gate, so plan the pump around the second number.
Q3. Can a baffle fix a hot spot that sits off the hole axis?
No. A blade lives inside a straight bore, so it improves heat pickup along that bore, not beside it. If the temperature map shows the hot band 5-10 mm off the hole axis, move the hole or use a printed contoured line. Adding a thicker blade to that circuit changes nothing measurable on the part.
Q4. What is the smallest hole that suits a baffle or bubbler?
Roughly 5-6 mm typical for a baffled hole and 4 mm for a bubbler. Below that, the tube or blade leaves no usable flow area, and the 1.5x steel land rule cannot be met on a small core. Printed inserts take over below 4 mm, because a contoured 2-3 mm line still fits inside a slender pin.
Q5. How often should baffles and bubblers be inspected?
Check flow and delta-T monthly and pull the components at 3-6 month intervals typical. Baffles come out of their slots and bubblers unthread, so both can be inspected and descaled without stripping the tool. Replace a baffle showing a crack at the slot root and a bubbler with a deformed or eroded tip.
The Bottom Line
Baffles and bubblers cover most deep-core cooling for $60-380 per core and 0-2 days of schedule, against $3,000-20,000 and 1-2 weeks for a printed insert. They fail on off-axis hot spots and bores under 4 mm, and they fail quietly when the top gap blocks or a blade loosens. Verify flow per circuit at trial, then pick the route with the numbers. Send your core layout to our engineering team for a cooling review.
KEEP READING
Related Reading
5 Mold Cooling Channel Design Tips for Faster Cycles
Straight drilled lines, channel-to-cavity distance, bore selection and turbulent flow targets for tools that a standard drill can cool.
Read articleArticleHow to Design Conformal Cooling Channels: Layout Rules and When It Pays
When baffles and bubblers run out of reach, printed inserts add $3,000-20,000 and 1-2 weeks for typical 15-40% cycle cuts.
Read articleArticleHow to Clean Mold Cooling Channels: Scale, Rust and Flow Recovery
How to pull baffles and bubblers, descale a blocked circuit, and recover flow before a hot spot turns into a scrap rate problem.
Read articleServiceMold Design & DFM
24-hour DFM feedback on core geometry, cooling layout and whether a baffled or bubbled circuit can hold the cycle target.
Read articleNEXT STEP
Ready to Start Your Mold?
Send us your element dimensions or part numbers — our team responds within 24 hours with pricing and lead time.

Written by
Ray ChanMold Buyer's Guide Author · Precision Mold Manufacturing Specialist. Ray helps global importers, distributors and OEMs source factory-direct molds and mold parts.