
5 Mold Cooling Channel Design Tips for Faster Cycles
Table of Contents
A 16-cavity connector mold passed its T1 trial with a 43-second cycle. The customer's cost model assumed 30 seconds. Cavity 9 ran 9°C hotter than cavity 3. In the first production week, 6,400 housings failed dimensional check. The 2.0 mm pins had warped 0.11 mm out of position. The steel was correct. The cooling circuit was not. The channels sat 3.4 diameters from the cavity surface. The coolant flowed laminar. The layout copied an older mold instead of following the drawing rules.
Cooling is a mold shop decision. The channel layout is drawn, drilled, and tested before the mold ships. It decides cycle time, part flatness, and shrinkage consistency for the life of the tool. This article lists 5 cooling channel design tips that DieStrike applies on connector, automotive, and thin-wall molds. Every tip carries a number you can verify on the mold drawing or at T1 sampling.
The Snapshot
- Cooling consumes 50-70% of the injection molding cycle (typical industry figure), so a 10% cut in cooling time shortens the total cycle by about 5-7%.
- Channel centerline to cavity surface holds at 2-2.5x the channel diameter, or 16-30 mm for a standard 8-12 mm bore.
- Standard channels run 8-12 mm. Deep cavities and slim cores drop to 4-6 mm at roughly 13-98x the pressure drop of a 10 mm bore.
- Turbulent flow needs coolant at 1.5-3 m/s, about 9-10 L/min for a 10 mm channel at 2 m/s (typical).
- Conformal cooling from 3D printed inserts cuts cooling time 30-50% at a 20-50% insert cost premium (industry figures).
The Cooling Failure Cost
Cooling time scales with the square of the wall thickness. A 4.0 mm wall takes roughly 4x longer to cool than a 2.0 mm wall at the same conditions (typical). For most housings, cooling is 50-70% of the total cycle, so the cooling circuit is the largest single lever on press throughput.
Uneven cooling produces uneven shrinkage. Shrinkage differences of 0.1-0.3% across a part can warp a flat cover 0.5-1.0 mm out of flat (typical). Sink marks appear where hot spots keep thick sections molten during packing. One hot cavity corner forces the operator to extend hold time for the whole part, which raises the cycle for every other cavity.
The cost math is direct. Press time runs $40-80 per hour typical. A 10-second penalty on a 30-second cycle is a 25% capacity loss. On a 24/5 schedule that is 40-60 hours of lost press time per month per mold. Reworking a drilled circuit costs $500-3,000 typical plus 2-5 days of downtime (industry figures).
The verification standard is measurable. A balanced tool holds cavity surface temperature spread within 5°C, measured with thermocouples or an IR camera at T1 (typical practice). DieStrike checks the cooling layout during DFM review, and the feedback returns within 24 hours.
Tip 1: Channel to Cavity Distance: 2-2.5x Diameter
The first rule is the most violated. The cooling channel centerline sits 2-2.5x the channel diameter from the cavity surface (typical). For a 10 mm channel that is 20-25 mm of steel between the coolant and the molded part.
Why the Rule Exists
A channel closer than 1.5x diameter cools the surface harder but weakens the steel and creates a cold spot right at the part face. A channel farther than 3x diameter loses heat removal fast, because conduction through steel falls with distance. The 2-2.5x band balances heat transfer against structural margin.
The distance shows up in temperature. Each extra 5 mm of steel between channel and cavity adds roughly 5-10°C at the cavity surface for the same coolant temperature (typical estimate). That is the real cost of a lazy layout, paid on every cycle.
Pitch and Edge Margins
Parallel channels space at 3-5x the channel diameter (typical). For a 10 mm channel, pitch runs 30-50 mm. Tighter pitch cools better but weakens the plate and multiplies drilling cost.
Channel to parting line and to the mold edge keeps at least 3-5 mm of steel (typical). Less than that risks a leak or a blown plug at the parting line. Drill breakouts get plugged and welded, which adds $100-500 per plug (typical) and a stress point in the plate.
Cooling is densest where the heat is. The gate region and any thick boss need channels on both sides when the part allows it. One channel pass for every 15-25 mm of cavity width is a workable starting density (typical). The drawing shows the channel count per 100 mm of cavity length so the density survives handoff.
Machining View
Straight channels are deep hole drilled, usually by gun drilling. A gun drilled hole holds diameter within ±0.05 mm and stays straight within 0.3 mm per 300 mm of length (typical). The drawing must state the channel-to-surface distance so the driller can check depth before breaking through.
Blind holes need a start hole from the parting line or an end plug. Every drilled channel gets an air blow and a flow check before the plate is assembled. The channel plan and the drilling plan are the same document.
| Parameter | Rule | Typical Value |
|---|---|---|
| Centerline to cavity surface | 2-2.5x channel diameter | 16-30 mm for a 8-12 mm channel |
| Channel pitch | 3-5x channel diameter | 30-50 mm for a 10 mm channel |
| Steel to parting line or mold edge | 3-5 mm minimum | 5 mm |
| Drilled hole diameter tolerance | ±0.05 mm | Gun drilled |
| Hole straightness | 0.3 mm per 300 mm | Deep hole drilled |
← swipe to scroll →
Typical industry figures. Verify against your own program and mold steel grade.
Tip 2: Match Channel Diameter to the Steel Section
Channel diameter decides flow, pressure drop, and scale risk together. The standard working range for mold plates is 8-12 mm (typical). A 10 mm channel is the workhorse: it clears chips easily, holds turbulent flow at moderate pump pressure, and drills fast.
The 8-12 mm Standard
Flow follows velocity and area. At 2 m/s, a 10 mm channel carries about 9.4 L/min. An 8 mm channel carries 6.0 L/min, and a 12 mm channel carries 13.6 L/min. Standard mold temperature controllers hold these flows without strain.
Pressure drop climbs fast as the bore shrinks. At constant flow, the drop scales with roughly the fifth power of the diameter. An 8 mm channel carries about 3x the pressure drop of a 10 mm channel, and a 6 mm channel carries about 13x (calculated). Circuit pressure drop should stay under 0.3-0.5 MPa (3-5 bar) typical.
Water quality sets the life of the bore. Hard water deposits 0.5-1.0 mm of scale inside a 10 mm channel within a few months. Scale at that thickness cuts the heat transfer rate sharply (industry figures). Mold temperature controllers should run treated water with a filter. The flow check at T1 gives the baseline for later scale detection.
When to Drop to 4-6 mm
Deep cavities and slim cores leave little steel for cooling. A 6 mm channel fits cores 10-14 mm wide, and a 4 mm channel fits cores down to about 8 mm (typical). Below 4 mm, scale and debris clog the bore and pressure drop becomes unmanageable.
Small bores have one advantage. A 6 mm channel at 1.5 m/s carries about 2.5 L/min and still runs turbulent, because velocity is what drives the Reynolds number. The trade is flow volume against reach.
Machining View
Long small bores are gun drilled or stepped. A 6 mm by 300 mm hole is routine. A 4 mm by 300 mm hole needs a slower feed and a rigid setup (typical). The driller supports the hole exit to stop breakout burr inside the cavity steel.
Every drill exit gets a plug, sealed with thread sealant and pressure tested. Plug leaks are the most common cooling failure found at T1 (typical observation), so the layout keeps plug count as low as the design allows.
| Channel Diameter | Typical Use | Flow at 2 m/s | Pressure Drop vs 10 mm |
|---|---|---|---|
| 10-12 mm | Plates, mold bases, large cavities | 9.4-13.6 L/min | 1x |
| 8 mm | Standard cavities | 6.0 L/min | About 3x |
| 6 mm | Deep cavities, slim cores | 3.4 L/min | About 13x |
| 4 mm | Very slim cores and inserts | 1.5 L/min | About 98x |
← swipe to scroll →
Flow values calculated at 2 m/s water velocity. Pressure ratios calculated at constant flow rate.
Tip 3: Choose Series or Parallel Circuits on Purpose
Circuit layout decides flow balance, and flow balance decides temperature uniformity. A series circuit runs coolant through every leg one after another. Flow is identical in every leg, which is its strength. Pressure drop adds along the path, which is its cost.
Series Circuits
Series suits long channels in one plate and any circuit where flow balance matters more than pressure. Keep each series circuit under 0.3-0.5 MPa (3-5 bar) of pressure drop typical, so a standard pump holds the flow.
Coolant temperature rises along the path. Inlet to outlet rise of 2-3°C is the target for tolerance-critical molds (typical). A rise above 5°C means the flow is too slow or the circuit too long.
Flow per circuit is read with a flow meter at the press. A drawing that states 9 L/min at 2 m/s gives the operator a number to verify. A drop below 80% of that flow flags scale, a kinked hose, or a blocked plug.
Parallel Circuits
A parallel circuit feeds several branches from a manifold. Each branch takes flow according to its own resistance, so a short wide branch steals flow from a long narrow one. Flow variation of ±20% between branches is common in unbalanced parallel layouts (typical).
Fix it with flow meters and balancing valves on each branch, or switch to series. Parallel earns its keep where a mold has several identical cores that must run at the same temperature and the branch lengths match.
Counter-Flow Direction
Run coolant counter to the melt flow direction. Melt enters at the gate and cools as it fills, so counter-flow coolant meets the hottest melt with the coldest water. That flattens the temperature profile across the cavity (typical practice).
Mark the flow direction on the mold drawing. A reversed hookup at the press turns a balanced circuit into a hot-corner mold on day one. The defect looks like a material problem until someone checks the hoses.
| Property | Series Circuit | Parallel Circuit |
|---|---|---|
| Flow per leg | Identical in every leg | Varies with branch resistance |
| Pressure drop | Adds along the path, target under 0.3-0.5 MPa | Splits across branches |
| Temperature control | Inlet to outlet rise 2-3°C target | Needs balancing valves per branch |
| Imbalance risk | Low | High without flow meters |
| Best use | Long plate circuits, tight tolerance parts | Identical cores, large plates |
← swipe to scroll →
Typical design guidance. Flow balance is verified with a flow meter at T1 sampling.
Tip 4: Baffles and Spray Cooling for Deep Cavities
Deep cores and pockets hide from straight drilled channels. A core 40-80 mm deep with no channel access runs 10-20°C hotter than the cavity face and extends cooling time for the whole part (typical). Two methods reach into that steel: baffles and spray cooling.
Baffle Cooling
A baffle is a slotted blade inside a blind bore. Water enters on one side of the blade and exits on the other, so one drilled hole cools two sides of a core. Slot width runs 2-3 mm typical.
The baffle blade reaches within 5-10 mm of the core tip (typical). Baffle bores start at 8-10 mm diameter and suit cores of 12 mm and up. The blade must seat at the bore bottom, or flow short-circuits over the top and the core tip stays hot.
Spray Cooling
Spray cooling pushes water down a center nozzle to the core tip, then back up around the nozzle. It works in cores too slim for a baffle, down to 3-4 mm diameter (typical).
The spray nozzle sits 3-5 mm below the tip (typical). Water hits the tip wall, carries heat down the return annulus, and exits at the core base. Spray circuits need clean water, because a clogged nozzle kills the core cooling in minutes.
Machining and Materials
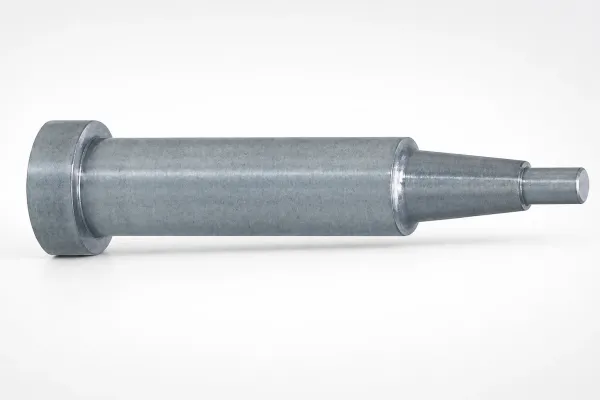
Baffle bores are drilled from the parting line or the core bottom and plugged after assembly. The slot is cut by EDM or wire EDM, which holds the 2-3 mm slot within ±0.02 mm (typical).
Where drilling cannot reach, copper alloy inserts carry the heat. Beryllium copper conducts 130-200 W/mK against 25-30 W/mK for P20 and H13 (typical published values). A copper insert moves heat from a hot tip to a drilled channel nearby. DieStrike builds these as part of our custom mold inserts program.
Tip 5: Helical and Conformal Cooling for Cycle Wins
Straight channels cannot follow a curved cavity or wrap a round core. Helical and conformal layouts put coolant where the heat is, and that is where the cycle time comes from.
Helical Cooling
A helical groove is cut on the outside of a core pin or sleeve, and water spirals along it inside a housing. The spiral adds surface area and keeps flow velocity high over the whole core. Groove pitch runs 2-4 mm and groove depth 1.5-3 mm (typical).
Helical cooling suits round cores and sleeves from 10-60 mm diameter. Compared with a straight channel beside the core, a helical circuit lowers core surface temperature by 8-15°C typical at the same water temperature.
Conformal Cooling With Printed Inserts
Conformal channels follow the cavity contour at 2-2.5x diameter, exactly like Tip 1, but the channel itself is curved. Laser powder bed fusion prints the insert around a designed channel network, so cooling follows every rib, boss, and thick section.
The payoff is cycle time. Printed conformal inserts cut cooling time 30-50% against straight drilled layouts on the same part (industry figures), and total cycle by 10-30% typical. On a 30-second cycle that is 3-9 seconds per shot.
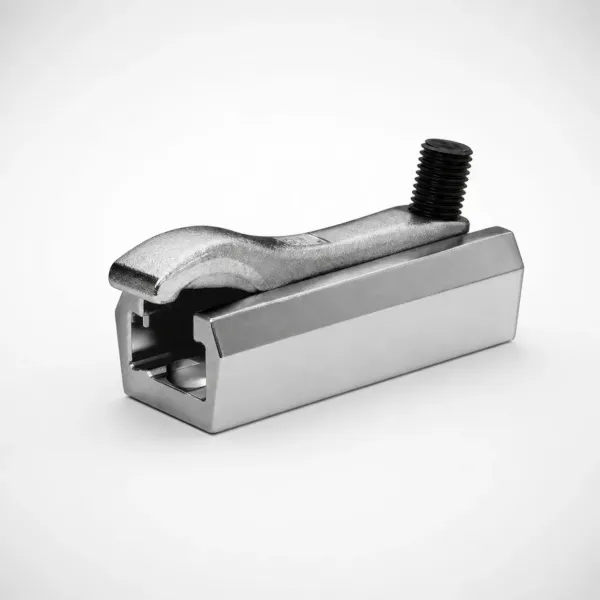
The cost is real. Printed insert premiums run 20-50% over machined inserts (industry figures). Payback lands on high-volume programs, because an insert premium of $4,000-15,000 typical clears itself inside 50,000-150,000 parts when the cycle saving passes 10% (industry figures).
When Conformal Pays
Use conformal where a drilled layout cannot follow the part: thin-wall housings, deep ribs, thick bosses, and optical or connector parts with flatness limits. Programs above 200,000-500,000 parts justify the premium (typical).
Verify the printed channel wall before production. Printed inserts get the same 1.0-1.5 MPa pressure test, and internal channels are confirmed with CT or flow testing. A collapsed channel wall fails only under production pressure, so the test happens before the insert goes in.
Prove it first. Mold flow analysis shows the predicted cooling time and cavity temperature spread before steel is printed. DieStrike's mold design and DFM service includes the conformal feasibility check, and the feedback returns within 24 hours.
Verify the Cooling Circuit Before Steel Is Cut
Every number in this article is measurable. The verification plan starts at the drawing and ends at T1 sampling, and it catches bad layouts before they become bad molds.
At the Drawing
The cooling layout is checked for the 2-2.5x distance rule, the 3-5x pitch, the edge margins, and the circuit pressure drop. Mold flow analysis predicts cavity temperature spread, and the target is 5°C or less (typical).
At the Machining Floor
Drilled holes are verified for diameter within ±0.05 mm, for position, and for depth. Each circuit gets an air blow to confirm the path, then a water flow check. Flow per circuit should match the drawing within ±10% (typical).
Pressure and Leak Test
Every circuit is pressure tested before assembly. Water at 1.0-1.5 MPa for 30 minutes with no pressure drop is a common acceptance rule (typical). The test catches plug leaks, drill breakouts, and bad thread seals before the mold ships.
At T1 Sampling
Run the mold at production settings, then measure cavity surface temperature with an IR camera or thermocouples. Cavity spread within 5°C and inlet to outlet water rise within 2-3°C confirm the design (typical). Keep the same measurement points across trials. A 5°C spread target means nothing if the probe moves between runs, so thermocouple positions are marked on the mold drawing.
The mold book records flow rate, pressure drop, and inlet to outlet temperature rise for every circuit. That gives maintenance a baseline for scale and wear checks later. DieStrike's cooling circuits are drilled, flow checked, and pressure tested under IATF 16949 procedures. The floor runs 120+ machines, and mold accuracy holds to ±0.005 mm.
The 5-Point Cooling Design Checklist
Run this list before the steel order is placed. Each point maps to a tip in this article, and each has a pass condition.
- Channel centerline to cavity surface holds at 2-2.5x diameter, checked on every cavity cross section.
- Channel diameter matches the section, 8-12 mm standard and 4-6 mm only where the steel is thin.
- Circuit layout is series or parallel by intent, with pressure drop under 0.3-0.5 MPa and counter-flow direction marked.
- Deep cores above 12 mm get baffles, and cores below 6 mm get spray cooling or copper inserts.
- Every circuit passes flow check within ±10%, pressure test at 1.0-1.5 MPa for 30 minutes, and a 5°C cavity spread target at T1.
FAQ: Mold Cooling Channel Design
Q1. What is the ideal distance from a cooling channel to the cavity surface?
2-2.5x the channel diameter from centerline to cavity surface (typical). For a 10 mm channel that is 20-25 mm of steel. Closer than 1.5x risks weak steel and surface distortion, and farther than 3x cools too slowly.
Q2. Why does coolant need turbulent flow?
Laminar flow moves heat across the water film by conduction only, which is slow. Turbulent flow mixes the water and lifts the heat transfer coefficient several times. Reynolds numbers above 4,000 start turbulence, and 10,000 is the working target (typical). For water in a 10 mm channel that means 1.5-3 m/s, about 9-10 L/min.
Q3. When should we use conformal cooling instead of straight drilled channels?
When straight channels cannot follow the part geometry, or when cycle time is the constraint. Printed inserts cut cooling time 30-50% (industry figures) but cost 20-50% more. Use them on thin-wall, deep-rib, and high-volume parts above roughly 200,000-500,000 parts.
Q4. How do we verify a cooling circuit before production?
Run an air blow and a water flow check after drilling. Flow must match the drawing within ±10%. Pressure test at 1.0-1.5 MPa for 30 minutes, then check cavity surface spread within 5°C at T1 (typical). Record the results in the mold book.
The Bottom Line
A cooling circuit that ignores distance, diameter, flow balance, and deep-core methods adds 20-40% to the cycle, warps parts, and costs thousands in rework (typical). Every number in this article is checkable at the drawing, the drill floor, and T1. DieStrike builds precision molds under IATF 16949 with 120+ machines, holds mold accuracy to ±0.005 mm, and returns DFM feedback in 24 hours. Send your part file through our contact page for a cooling layout review.
KEEP READING
Related Reading
5 Shrinkage Compensation Rules for Mold Design
Shrinkage compensation decides mold accuracy. Five rules: material rates from 0.3% to 2.
Read articleArticle5 Ways to Reduce Mold Cost Without Cutting Quality
Five proven ways to reduce injection mold cost without cutting quality: DFM before quoting, right-sized cavity count,…
Read articleArticle7 Gate Design Best Practices for Balanced Filling
Mold maker's 7 gate design rules for balanced multi-cavity filling: gate depth 50-80% of wall thickness, land 0.5-1.
Read articleArticle7 Signs Your Mold Base Needs Replacement
A guide pillar with 0.04 mm play can scrap a 32-cavity run in one shift.
Read articleNEXT STEP
Ready to Start Your Mold?
Send us your element dimensions or part numbers — our team responds within 24 hours with pricing and lead time.

Written by
Ray ChanMold Buyer's Guide Author · Precision Mold Manufacturing Specialist. Ray helps global importers, distributors and OEMs source factory-direct molds and mold parts.