
How to Design Molds for Automotive Connectors
Table of Contents
A 32-cavity connector mold that short-shots on cavity 27 does not fail quietly. It stops the press, then it stops terminal insertion downstream, and every housing already molded goes to sorting. A modern vehicle carries about 274 electrical connectors, and each housing must hold terminal pitch at ±0.01 mm with true position near 0.05 mm typical. When cavity-to-cavity drift pushes one terminal hole past that budget, the retention test fails at the Tier 1 plant. The incident bill runs to five figures.
Short shots, flash, and dimensional drift across cavities are the three failure modes this article designs against. Connector housings concentrate every difficult feature in one small part. Walls run 0.2 to 0.6 mm typical. Terminal holes form around core pins. Glass-filled LCP, PBT, and PA66 shrink 0.3 to 0.8% typical.
Cavity counts of 16, 32, or 64 push unit cost down but multiply the balance problem. Design each feature in isolation and the tool fails at first trial. Design them as one system and a connector mold runs millions of cycles for automotive injection molding customers.
The Snapshot
- ±0.01 mm typical terminal pitch tolerance. Cavity-to-cavity shrinkage differences break this budget before wear does.
- 0.05 mm typical true position on terminal cavities. Beyond it, terminal insertion and retention tests fail at assembly.
- 0.2–0.6 mm typical wall thickness. Gates, vents, and cooling must balance flow so every cavity fills without hesitation.
- ±3–5 °C typical coolant temperature differential across cavities. Uneven cooling shows up as dimensional drift shot to shot.
- 20,000–50,000 shots typical cleaning interval on PBT tools. Carbon build-up from outgassing blocks vents before flash appears.
Why Connector Molds Fail
Connector mold failures cluster in three signatures. Short shots appear when the last cavity in the runner network fills late or starves. Flash appears at the parting line or around core pins when vent depth or fit clearance exceeds the resin's tolerance. Dimensional drift appears when cavities cool at different rates and shrink differently. Each signature has a measurable cause and a design rule that prevents it.
Short shots trace to flow imbalance. On a 32-cavity tool, runner lengths and gate sizes must be identical cavity to cavity. A 0.05 mm difference in gate depth between two cavities changes fill time and pack pressure. LCP, with melt viscosity that stays low and thin, flows into the nearest cavities first. The far cavities hesitate and the thin walls freeze before the resin arrives.
Flash traces to clearance and vent geometry. Low-viscosity LCP and PBT will push into any gap larger than 0.02 mm at the parting line typical. Vent depths above 0.05 mm typical, worn parting steel, and core pin holes over 0.03 mm clearance all flash on connector resins. Once flash forms, it grows because it blocks venting and traps gas.
Dimensional drift traces to cooling. Connector housings are thin-walled, so they freeze in seconds and their shrinkage locks in early. If cavities 1 through 16 sit 4 °C warmer than cavities 17 through 32, the pitch and true position shift between banks. At 2.54 mm pitch, a 4 °C imbalance across a 0.4 mm wall moves the molded pitch by roughly 0.01 mm typical. That is the entire tolerance budget spent on cooling alone.
The economics make these failures expensive. A 32-cavity tool cycles in 20 to 40 seconds typical, or 90 to 180 housings per minute at full rate. A scrap rate of 1% on a million-piece program is 10,000 housings. Every hour of unplanned downtime idles the press and the assembly line downstream. Design effort spent before steel is cut returns in avoided sorting.
Terminal Geometry and Tolerances
Connector design starts from the terminal grid. Standard pitches run 2.54 mm, 2.0 mm, 1.27 mm, and 1.0 mm. The housing walls between terminal holes fall to 0.2 to 0.6 mm typical. The terminal holes themselves run 0.4 to 1.5 mm diameter typical depending on the terminal system. These numbers decide cavity steel thickness, core pin size, and where the mold can and cannot put steel.
The tolerance budget is set by the customer's assembly line, not by the mold shop. Terminal insertion machines index on the housing datum and push stamped terminals into the cavities. If the housing pitch drifts, terminals misalign and the retention test fails. The typical drawing calls pitch at ±0.01 mm and true position of terminal holes at 0.05 mm. That budget has to survive shrinkage, cooling, and 500,000 cycles of wear.
Wall thickness drives the filling strategy. A 0.3 mm wall in PA66 GF30 freezes in about 1 to 2 seconds at a 80 °C mold temperature typical. The gate must fill that wall before the skin sets. Thin walls also create core pins that must stand up to injection pressure without bending. A 0.5 mm diameter core pin at 8 mm length deflects measurably under typical pack pressure, so the pin steel and support decide the tolerance.
The Tolerance Budget Starts at the Terminal
Read the terminal drawing before the housing drawing. Terminal width, insertion depth, and retention geometry fix the hole size and the draft policy. A terminal retention latch needs a 0.2 to 0.5 mm typical undercut inside the hole. That undercut becomes a core feature the mold must release or an insert must form.
Verify the tolerance chain against machining capability. DieStrike machines cavity details to ±0.005 mm standard and ±0.002 mm on precision features with wire EDM and CMM verification. If the drawing asks for terminal hole position at 0.05 mm true position, the machining budget must hold about half of that before shrinkage. Ask the mold maker how they hold hole position before you sign the quote, not after first article.

Thin walls set the machining strategy too. Cavity steel between terminal holes can drop below 1.0 mm on a 1.27 mm pitch part. Machining that wall with a conventional end mill deflects the steel and leaves a taper. High-speed CNC and wire EDM cut those walls with less tool pressure and hold the pitch from cavity to cavity.
Material Selection and Shrinkage
The resin decides shrinkage, flow, and corrosion inside the tool. Three families cover most automotive connector housings, and each changes the mold design.
LCP is the choice for small-pitch, high-heat connectors. Its shrinkage runs 0.2 to 0.4% typical, but it is anisotropic: flow-direction and cross-flow shrinkage differ, sometimes by 0.2% or more. LCP melts at 280 to 340 °C typical and its low viscosity flashes easily. Mold LCP with tight vent control and a polished cavity finish so the part releases.
PBT dominates cost-sensitive interior connectors. Shrinkage runs 0.6 to 0.8% typical. PBT outgasses acetic acid at processing temperature, which corrodes standard mold steels and builds carbon on vents and gates. That outgassing is why connector mold cavities are commonly S136 or 420 stainless, and why cleaning intervals sit at 20,000 to 50,000 shots typical.
PA66 and PA6T with 30 to 45% glass carry the mechanical loads: latches, polarizing ribs, and body connectors. Glass-filled shrinkage runs 0.3 to 0.5% typical for PA66 GF30, with less anisotropy than LCP. The glass fiber is abrasive, so cores, pins, and gates wear faster and need harder steel or coatings.
The mold compensates for shrinkage by cutting the cavity oversized. A part with 0.4% shrinkage typical needs a cavity dimension 0.4% larger than the print nominal. That allowance is grade-specific and direction-specific. Pull it from the resin datasheet and the mold flow analysis, not from a single shrinkage number in the brochure.
Shrinkage also varies with wall thickness. A 0.3 mm wall cools and crystallizes faster than a 1.0 mm wall, so thin and thick sections shrink differently in the same part.
Shrinkage variation across cavities is the drift killer. If every cavity is cut identically but cooling differs, each cavity lands at a different size. The mold design task is not just compensating shrinkage once, but keeping the compensation identical across 32 or 64 cavities. That is a balance problem, not a material problem.
Cavity Count and Balance
Cavity count is an economics decision with a balance penalty. Connector tools typically run 16, 32, or 64 cavities. Sixteen suits large housings and moderate volume. Thirty-two is the default for high-volume single-part programs. Sixty-four appears on small-pitch parts where the press can take the projected area.
Each doubling of cavities roughly halves the per-part tooling cost share, then doubles the balance problem. Balance means every cavity fills at the same rate, packs at the same pressure, and cools at the same rate. Natural runner balance is the starting point: equal flow lengths from the sprue or manifold drop to every gate. A geometrically balanced runner delivers the same pressure drop to every cavity. The alternative, an artificially balanced runner with different diameters, invites guesswork.
Gate size must be identical cavity to cavity. On 32-cavity tools, gate dimensions are cut to 0.01 mm tolerance typical and verified with pin gauges or air gauges at tool buyoff. Cooling circuits must mirror across the tool so cavity banks see the same mold temperature. Venting must be present at every last-filled point, not only on the cavities that failed in the analysis.
The design rules below consolidate the numbers that keep a high-cavity connector tool balanced. Each value is a working starting point, and each must be confirmed against the resin datasheet and the mold flow analysis.
| Design Rule | Typical Value | Why It Matters |
|---|---|---|
| Terminal pitch tolerance | ±0.01 mm | Keeps terminal insertion and retention tests passing at assembly |
| Terminal hole true position | 0.05 mm | Prevents misalignment between mating halves and feeder nests |
| Housing wall thickness | 0.2–0.6 mm | Sets gate, vent, and cooling requirements; thin walls freeze fast |
| Shrinkage allowance, glass-filled LCP/PBT/PA66 | 0.3–0.8% | Cavity steel is cut oversized so the part lands at nominal |
| Coolant temperature differential across cavities | ±3–5 °C | Holds cavity-to-cavity dimensions inside the pitch budget |
| Draft on terminal holes and walls | 0.5–1.0° | Releases the housing without lifting retention geometry |
| Vent depth at the parting line | 0.02–0.05 mm | Deep vents flash on LCP; shallow vents trap gas and cause short shots |
| Core pin sliding clearance | 0.01–0.03 mm | Tight enough to block flash, loose enough to avoid seizure |
| Cleaning interval on PBT tools | 20,000–50,000 shots | Carbon from outgassing blocks vents before flash appears |
| Cavity steel hardness | HRC 48–54 | Resists glass-fiber abrasion; S136/420 resists PBT corrosion |
| Core pin hardness | HRC 58–62 | Thin terminal pins survive bending, wear, and repeated cycles |
← swipe to scroll →
Balance verification belongs in the mold trial protocol. Weigh parts cavity by cavity on a 0.01 g scale at the start of each trial. A spread of more than 3% typical in cavity weight means the filling or packing is unbalanced. The cavity that weighs light is the one that will short-shot at volume. Fix the imbalance with gate and runner changes before you approve the tool, not after.
Gate Design for Balanced Filling
Gate choice on a connector mold balances three demands. The gate must fill the thin wall before it freezes. It must leave a vestige the assembly line accepts. It must keep the cavity-to-cavity fill identical. Sub-gates and edge gates cover most connector housings.
Sub-gates (tunnel gates) are the workhorse for multi-cavity connector tools. They shear off automatically at ejection, so no secondary degating operation is needed. A sub-gate on a 0.4 mm wall typically runs 0.3 to 0.5 mm diameter, sized at about 60 to 80% of the wall thickness. The gate land stays short, about 0.5 to 1.0 mm, to keep pressure drop low.
Edge gates suit wider housings where a single sub-gate would fill one end before the other. An edge gate across part of the housing width spreads the flow front. Very wide or long housings may need two gates. Validate each gate position with a mold flow analysis before steel is cut.
Gate balance is the design rule that matters most on high-cavity tools. The same gate geometry in every cavity is the baseline. Gate depth tolerance of ±0.01 mm typical is achievable with EDM or precision milling, and it is the difference between balanced and drifting fill. Air-gauge the gates at buyoff and record the numbers, because a worn gate reads differently at 200,000 cycles than it did at trial.
Gate vestige size depends on the assembly process. Terminal insertion machines and vibratory feeders tolerate a 0.2 to 0.5 mm typical vestige, but a raised gate stub jams the feeder bowl. If the print forbids a visible vestige, plan a hot runner with valve gates from the start. Retrofitting a vestige fix into a cold runner tool is a full cavity rework.
The gate is also the first place carbon and corrosion show up on PBT tools. Outgassing deposits build on the gate land and shrink the effective opening shot by shot. Gate cleaning belongs on the maintenance interval, and the gate dimension must be part of the periodic inspection.
Cooling Design for Temperature Balance
Cooling time dominates the connector mold cycle. On a 20 to 40 second typical cycle, cooling is 40 to 60% of the total. Faster cooling shortens the cycle, but the real design goal on a multi-cavity tool is uniformity, not raw speed. A cavity that runs 4 °C hotter than its neighbor molds a different part.
Keep the coolant temperature differential across cavities at ±3 to 5 °C typical. That means balanced waterline layouts, equal circuit lengths, and no series circuits that heat the last cavity. Standard waterlines run 8 to 12 mm diameter typical. Space them about 2 to 2.5 times the hole diameter apart, and 2 to 3 times the hole diameter from the cavity wall. Follow those ratios and the steel between cavities stays at a usable temperature.
Core pins need cooling attention because they carry the most steel per part. A terminal hole core pin of 1.0 mm diameter cannot take a bubbler. Pins below 2.0 mm cool by conduction into the core plate, so the plate must be waterline-backed. Pins at 2.0 mm and above can take a bubbler or heat pipe. Leave the core pin cooling plan to the mold flow and cooling analysis, not to habit.
Mold temperature targets follow the resin. LCP typically runs at 80 to 120 °C mold temperature; PBT at 60 to 80 °C; PA66 at 60 to 90 °C. A temperature controller with ±1 °C stability typical on each circuit holds the cavity bank uniform. Log the circuit temperatures at buyoff. When dimensional drift appears later, the first check is whether a circuit drifted out of its window.
Cooling analysis pays for itself on the first 32-cavity tool. A mold flow and cooling analysis shows hot spots before steel is cut, so waterlines move while the model is still virtual. On thin-wall connector parts, the analysis also shows whether the cavity steel between terminal holes can shed heat fast enough to hold cycle time. If it cannot, the answer is a different waterline layout or a higher-conductivity cavity steel, both cheaper on a CAD model than in hardened steel.
Core Pins and Terminal Holes
Every terminal hole is a core pin, and a connector housing carries dozens of them. A 16-position housing at 2.54 mm pitch has 16 terminal holes, each formed by a core pin or an insert. Multiply by 32 cavities and the tool holds 512 core pins. Pin density this high makes the core plan the mechanical heart of the tool.
Terminal Holes and Core Pin Density
Core pin diameter follows the terminal hole. Pins run 0.4 to 1.5 mm typical, with the smallest pins reserved for fine-pitch terminals. The unsupported length matters more than the diameter. A 0.5 mm pin with 8 mm of unsupported length bends under pack pressure. A bent pin shows up as a wall thickness error on the housing.
Support pins close to the cavity face and keep the unsupported span short.
Core pin steel must carry hardness and wear resistance in a small cross section. H13 hardened to HRC 58 to 62 typical is the baseline for terminal pins on glass-filled resins. Nitriding or a PVD coating adds wear life on PA66 GF30. The pin tip and fit length are ground to a 0.01 to 0.03 mm typical sliding clearance. That gap is tight enough to block flash and loose enough to avoid seizure at running temperature.
Hole position is cut with wire EDM in precision work. DieStrike holds terminal hole positions to ±0.005 mm standard and ±0.002 mm on precision features. Wire EDM cuts the hole without tool pressure, so the thin cavity wall between holes does not deflect during machining. That is the difference between a drawing tolerance and a delivered tolerance.

Venting is part of the pin plan. Each core pin is a potential gas trap, and gas trapped at a thin terminal hole causes a short shot at the hole tip. Grind a vent flat on the pin or vent the insert around it. The vent depth stays at 0.02 to 0.05 mm typical so LCP does not flash into the gap.
Replaceable Inserts for Terminal Cavities
Terminal cavities wear faster than any other surface in the mold. Each insert cycle shears against abrasive glass fiber, and a worn terminal cavity fails the retention test before the housing itself wears. Hardened inserts solve that by concentrating the wear in a part you can replace.
Insert the terminal cavity block in hardened tool steel, HRC 54 to 58 typical, keyed into the cavity plate. When the insert wears past tolerance, pull it, install a spare, and return the tool to service in hours instead of days. Keep 10% of the insert population as spares per tool. Track insert life in shots so replacement happens on schedule, not at a line stop.
Insert interchangeability is a tolerance problem of its own. The insert pocket position must hold the same true position budget as a solid cavity. Otherwise the replacement insert lands the terminal hole in the wrong place. Cut pockets to ±0.005 mm typical and verify the assembled insert position with CMM after every insert change. An interchangeable insert that does not repeat position is just a spare that cannot be used.

Venting and Flash Control
Venting on a connector mold is a narrow window. Too deep, and low-viscosity LCP or PBT flashes into the vent. Too shallow, and trapped gas compresses, burns, and short-shots the thin walls. The working range is 0.02 to 0.05 mm typical at the parting line. Run 0.02 mm for LCP and 0.03 to 0.05 mm for PBT and PA66.
Vent placement follows the last-filled points. Run a mold flow analysis to find where the flow fronts meet, then vent those locations. On a 32-cavity tool, every cavity needs its own vents at the same positions. Vents that exist on cavity 1 but not cavity 17 create a cavity-to-cavity difference in fill and a gas-trap defect on 17.
Vent design is a geometry exercise, not a slot. The vent land runs 0.5 to 1.5 mm typical, then opens into a 0.2 to 0.4 mm deep relief channel to atmosphere. The land keeps the flash control, the relief keeps the gas moving. Grind vent flats on core pins and ejector pins at the same time, because terminal holes trap gas at their tips.
Flash also comes from fit clearances. Core pin clearance above 0.03 mm typical, ejector hole clearance above 0.03 mm, and parting line wear all flash on connector resins. LCP flashes earliest, so LCP tools run the tightest fits and the shallowest vents. If flash appears on a proven tool, measure the vent depth and pin clearances before changing the process. The process is rarely the cause.
Steel condition gates flash. A soft or worn parting edge deforms under clamp tonnage and opens a gap. Connector cavities at HRC 48 to 54 typical hold their parting edges; soft mild-steel inserts do not. When a tool flashes at the same spot repeatedly, check the steel hardness at that spot and the clamp tonnage the tool actually sees.
Mold Steel Selection
Connector mold steel is chosen for corrosion resistance, polishability, and wear, in that order for most programs. The resin chemistry decides the first two, and the glass content decides the third.
Cavity Steel: S136 and 420
S136 and 420 stainless are the default cavity steels for connector molds. The reason is PBT. PBT outgasses acetic acid at processing temperature, and that acid pits standard tool steel over time. Stainless cavities shrug off the chemistry, hold a mirror finish, and keep the cavity wall between terminal holes intact for the life of the tool.
Hardness on cavity steel runs HRC 48 to 54 typical. That range resists glass-fiber abrasion and keeps the steel polishable to an SPI A-2 finish. LCP and PBT housings need that finish to release cleanly. A polished cavity also reduces drag on the housing at ejection, which protects the fragile thin walls.
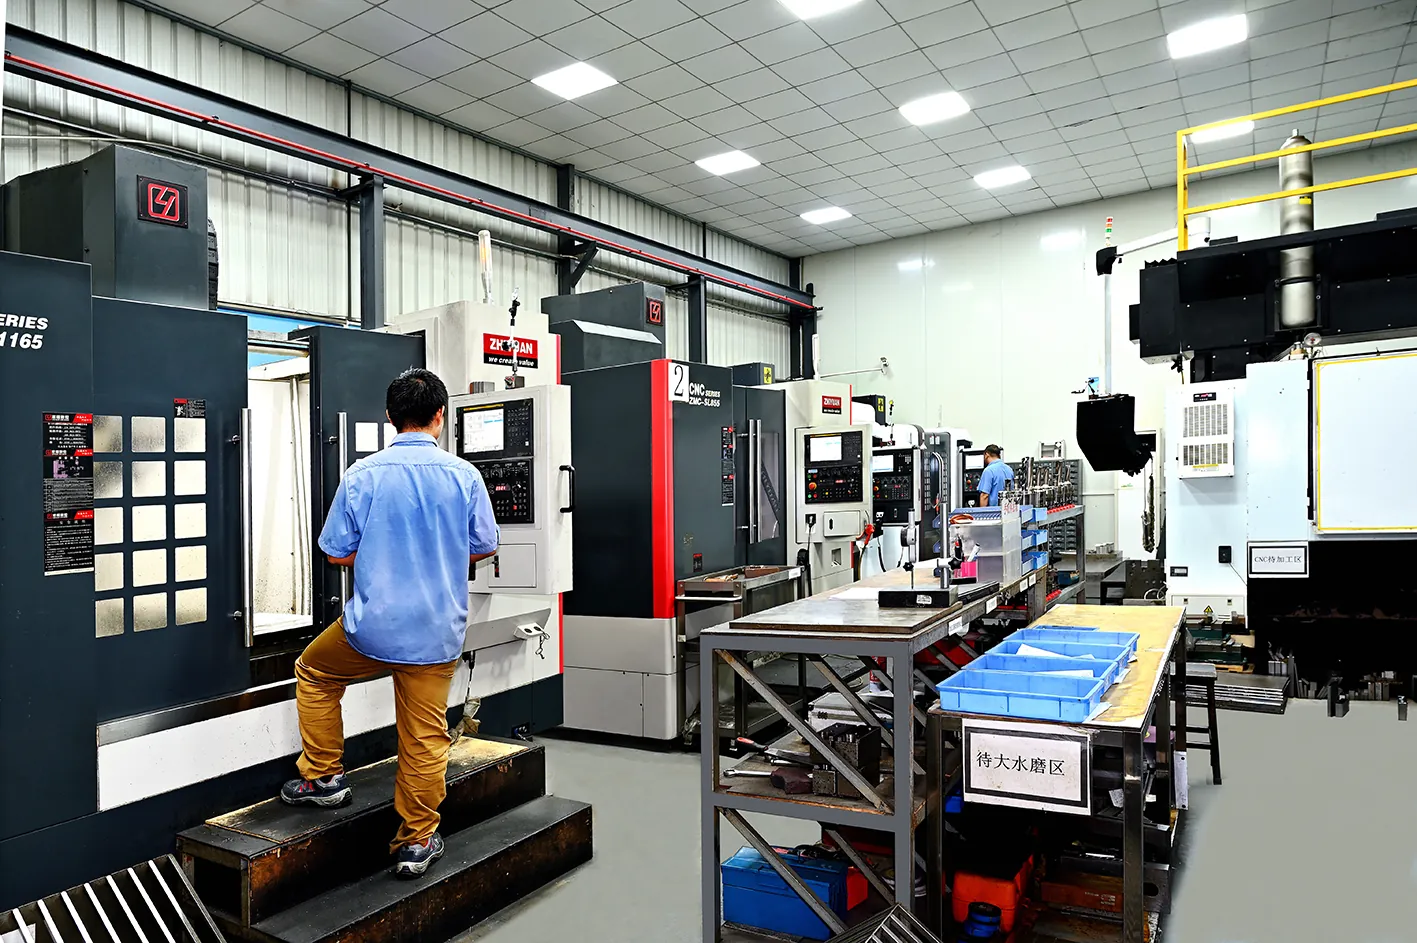
DieStrike machines S136 cavity details to ±0.005 mm standard. Precision features hold ±0.002 mm. Hardness capability reaches HRC 62 when the program demands it. The same machining standard applies across the 120+ machines on the DieStrike floor, so a 32-cavity tool is one build, not 32 separate guesses.
Core Pin Steel: H13 and Harder
Core pins carry the hardest duty in the tool. H13 at HRC 58 to 62 typical is the baseline. Where wear dominates, SKD11 or a coated pin extends life at the cost of toughness, so thin pins stay on H13. Nitriding and PVD coatings push pin life on glass-filled PA66 and PA6T, where bare steel starts galling between 200,000 and 400,000 cycles typical.
Match the steel to the resin, not to the habit of the shop. PBT tools need stainless cavities for corrosion and standard pins for economy. LCP tools need polished stainless cavities and tight-clearance pins because flash is the failure mode. PA66 GF tools need the hardest pins and coated gates because wear is the failure mode. The steel list follows the failure list.
Draft Angles and Ejection
Draft on a connector housing is a negotiation with the terminal geometry. The retention features inside the terminal holes resist draft, but the housing still has to release from the core. The working range is 0.5 to 1.0° typical on terminal holes and walls, with 0.5° on retention-critical surfaces and 1.0° where the geometry allows. Less than 0.5° and the housing grips the steel; more than 1.0° and the terminal retention geometry drifts.
Ejection of a thin-walled connector housing is a force problem with fragile witnesses. The housing shrinks onto the core pins, so stripping force concentrates where the steel contact is greatest. Ejector pins push on ribs and terminal cavity floors, never in the middle of a thin wall. A 0.05 mm typical pin height offset between two ejectors tilts the housing and jams the cavity.
Ejector sleeves protect thin cores. A terminal core pin surrounded by thin plastic cannot take a conventional ejector pin without marking or cracking the wall. An ejector sleeve pushes a full ring of material around the core and spreads the load. Sleeves are standard on deep terminal cavities where the housing would otherwise tear on release.
Ejector pin geometry follows the connector mold playbook. Diameters run 1.0 to 2.0 mm typical for housings with 0.4 to 1.0 mm walls. Use shoulder pins below 2.5 mm. Hold sliding clearance at 0.01 to 0.03 mm.
Pin tip height is set flush to 0.02 mm below the cavity face so no ring mark stamps the housing. For the full pin selection process, see how to select ejector pins for automotive connector molds.
Ejection stroke stays short, typically 3 to 5 mm for a connector housing. Longer strokes add wear and cycle time without adding function. The ejector system returns to the same stop every cycle, and the plate parallelism holds 0.02 mm per 300 mm so the pins land square.
Hot Runner vs Cold Runner
The runner decision is made once and lives with the tool for its entire life. On high-cavity connector molds, hot runners are the default for volume programs, and cold runners survive on low-volume or prototype work.
A hot runner removes the sprue and runner from the cycle. No runner to cool, no runner to degate, and no regrind loop. On a 32-cavity tool running 20 to 40 second cycles typical, the cycle saving is real. The scrap saving is absolute.
A cold runner on a small housing can carry 10 to 20% of the shot weight as runner, typical. That runner is regrind on PA66, but on LCP and flame-retardant PBT, regrind is restricted or forbidden.
Temperature control is the hot runner's discipline. The manifold must hold the melt within its processing window at every drop. Degraded resin shows up as black specks or carbon on the part. LCP and PBT both degrade at temperature, so manifold balance and heater control are design requirements, not options.
Valve gates solve the vestige problem. A valve-gated hot runner leaves a clean gate mark with no stub, which matters for housings feeding into terminal insertion machines. Thermal-tip hot runners leave a small vestige and cost less. On 64-cavity tools, valve gates add actuation complexity, so weigh the vestige requirement against the gate count.
Cold runners still make sense below about 16 cavities or on prototype tools. The tool costs less, the runner system is simpler to maintain, and sub-gates shear automatically at ejection. The trade is cycle time and runner scrap. If the annual volume is under a few hundred thousand parts, the cold runner economics often win. For a volume program, start with the decision framework in how to choose a hot runner for multi-cavity automotive molds.
Maintenance and DFM Checks
A connector mold's failure rate is set by its maintenance rhythm as much as by its design. PBT outgassing builds carbon on gates and vents. LCP and PA66 GF wear pins and cavity edges. Both failure modes are scheduled, not discovered, if the interval is right.
The typical cleaning interval on PBT tools is 20,000 to 50,000 shots. At that interval, clean the vents, degate the tool, and re-polish the cavity faces. LCP tools run cleaner but check gate and vent condition on the same rhythm. The interval shortens when the program runs halogen-free flame-retardant grades, which outgas more aggressively.
Maintenance is a measurement event. Air-gauge the core pin holes and measure pin OD at every scheduled pull. Log the gate dimensions, because a gate that opened 0.01 mm from wear changes the fill. Flush the waterlines and verify the circuit temperatures still hold ±3 to 5 °C across cavities. The parts that run out of tolerance are the ones nobody measured.
The DFM Check Before Quoting
The cheapest tolerance is the one caught on the drawing. A DFM review before quoting checks three connector-specific numbers: pin pitch, terminal thickness, and wall uniformity. Pitch drives the cavity layout and the true position budget. Terminal thickness drives the core pin diameter and its bending check. Wall uniformity drives the filling plan, because a 0.2 mm wall next to a 0.8 mm wall hesitates at the transition.
The DFM review also validates the gate and vent plan against the resin. Mold flow analysis on the actual part geometry shows the fill pattern, the last-filled points, and the pressure at each cavity. If the analysis predicts a short shot at a terminal hole tip, the fix is a vent or a gate change. A wall thickness change works too. All are cheaper before steel.

DieStrike runs the DFM review under IATF 16949 and ISO 9001 quality systems, the same documentation chain the customer's PPAP needs. The customer list includes TE Connectivity, Amphenol, Luxshare, and Dongshan, all automotive connector programs that hold the tolerances in this article. Production molds ship in 2 to 5 weeks. Standard mold parts ship in 3 to 7 days. The DFM answer comes back before the tooling budget is committed.
Send the terminal drawing and the housing drawing together. The mold design reads the terminal system, not just the housing print. With both, the DFM review returns the cavity count recommendation, the gate plan, the core pin layout, and the maintenance schedule. Everything is documented for the PPAP file.
FAQ
What cavity count should I use for an automotive connector mold? The common families are 16, 32, and 64 cavities. Thirty-two is the default for high-volume single-part programs. Sixteen suits larger housings and lower volume, while sixty-four appears on small-pitch parts where the press takes the projected area. Cavity count is a volume-and-press trade, not a preference.
What tolerance can a connector mold hold on terminal pitch? The design budget is ±0.01 mm typical on pitch and 0.05 mm typical on true position. DieStrike machines cavity details to ±0.005 mm standard and ±0.002 mm on precision features, with wire EDM and CMM verification. The delivered tolerance depends on shrinkage compensation and cooling balance as much as machining.
Should I use LCP, PBT, or PA66 for a connector housing? LCP for small-pitch, high-heat parts: shrinkage 0.2 to 0.4% typical, low viscosity, and high flash risk. PBT for cost-sensitive interior parts: shrinkage 0.6 to 0.8% typical, with corrosion and carbon build-up from outgassing. PA66 with 30 to 45% glass for mechanical loads: shrinkage 0.3 to 0.5% typical, with abrasive wear on the tool. The mold design follows the resin.
Why does my connector mold flash at the parting line? Check vent depth first: above 0.05 mm typical on a low-viscosity resin like LCP, the vent itself flashes. Then check clamp tonnage and parting steel hardness, HRC 48 to 54 typical. Worn or soft parting edges open a gap under clamp. Measure before changing the process.
How often should a connector mold be cleaned? Every 20,000 to 50,000 shots typical on PBT tools, when carbon from outgassing starts blocking vents and gates. LCP tools run cleaner but get the same inspection rhythm. Flame-retardant and halogen-free grades outgas more aggressively and may shorten the interval.
What steel should an automotive connector mold use? S136 or 420 stainless for the cavity when running PBT, for corrosion resistance from outgassing. H13 at HRC 58 to 62 typical for core pins and terminal pins. Hardened and coated pins extend life on glass-filled grades, where bare steel starts galling between 200,000 and 400,000 cycles typical.
The Bottom Line
Connector molds fail in three predictable places: unbalanced filling, uneven cooling, and dirty vents. Each has a measurable spec: balanced flow lengths, ±3 to 5 °C across cavities, and vent depth at 0.02 to 0.05 mm. Each is decided on the drawing, before steel is cut, and each is verified at trial with cavity weights and CMM data.
The tolerance budget decides the tool. Terminal pitch at ±0.01 mm, true position at 0.05 mm, and walls at 0.2 to 0.6 mm survive only as one system. Shrinkage, cooling, and core pin rigidity have to be designed together. A 32-cavity tool that holds the balance runs its volume without the sorting line. One that does not fails at the retention test, and the retention test does not care about the quote.
Start the design with the terminal drawing, the resin datasheet, and the mold flow analysis. Lock the gate, cooling, and core pin plan before the mold base order. If the runner decision is still open, work through the trade-offs in our guide to choosing a hot runner for multi-cavity automotive molds. The runner choice sets the balance, the cycle, and the scrap rate for the life of the tool.
NEXT STEP
Ready to Start Your Mold?
Send us your element dimensions or part numbers — our team responds within 24 hours with pricing and lead time.

Written by
Ray ChanMold Buyer's Guide Author · Precision Mold Manufacturing Specialist. Ray helps global importers, distributors and OEMs source factory-direct molds and mold parts.