
How to Prevent Stamping Die Galling: 8 Root Causes and Fixes
Table of Contents
A progressive die running 304 stainless at 180 SPM starts leaving dull, smeared patches on the blank edge. Four hours later the strip stops feeding. The punch face is covered in torn steel welded to it, the die block is scored, and you have 40,000 parts due Friday. That failure mode is galling, and it is the single most common cause of unplanned downtime on stainless, aluminum and copper stamping dies. An untreated galling loop can destroy a $12,000 die section in one shift.
Galling is predictable physics, not bad luck. It happens when contact pressure exceeds the yield strength of the sheet, protective oxide films break, and fresh metal cold-welds to the tool steel. Every one of the eight root causes below has a measurable threshold you can check today: clearance as a percent of stock thickness, hardness in HRC, coating microhardness in HV, surface finish in Ra micrometers, lubricant film type, strokes per minute, coil condition and die temperature in °C.
The Snapshot
- Blanking clearance for mild steel runs 5-10% of stock thickness per side; gummy materials like 300-series stainless and soft aluminum need 10-15% to avoid metal pickup.
- D2 tool steel at HRC 58-60 is the baseline for stainless; powder metallurgy grades like CPM 10V (HRC 60-62) survive 3-5x longer in severe galling service.
- TD (Toyota Diffusion) vanadium carbide layers reach 2,800-3,200 HV and extend punch life 5-10x on stainless and aluminum; DLC keeps friction coefficients near 0.1.
- Working surfaces need Ra 0.2-0.4 µm or better. Each doubling of Ra roughly doubles the adhesion sites where cold welding starts.
- Chlorinated EP lubricants carry the highest anti-galling load capacity; die surface temperature above roughly 80-120 °C collapses the lubricant film and accelerates pickup.
Why Stamping Dies Gall
Galling is adhesive wear in its most violent form. Under high contact pressure, the asperities on the sheet and the die surface push through their own oxide films. Fresh metal touches fresh metal across a few microns. Those junctions cold-weld. As the strip keeps moving, the weaker material tears, and fragments transfer onto the harder tool face.
That transfer is what kills dies. A transferred patch is harder and rougher than the parent steel, so it grabs the next sheet even more aggressively. The patch grows stroke after stroke in a self-reinforcing loop. Within a few thousand strokes a smooth punch can carry a built-up edge several hundred microns thick, dragging the strip, distorting blanks and finally jamming.
Some materials gall far more readily. Austenitic stainless steels (304, 316) work-harden during forming and expose fresh, oxide-free metal constantly. Soft aluminum series (1xxx, 3xxx, 5xxx) are ductile and smear easily. Copper and brass behave similarly. Plain carbon steel with a healthy mill oxide is the easiest to stamp. If your mix includes stainless or aluminum, treat galling prevention as a design requirement, not a maintenance afterthought.
Contact pressure is the driver. Blank and pierce operations concentrate the entire cutting force on a narrow band roughly equal to material thickness. Pressure in that band routinely exceeds 1,000 MPa on high-strength strip, far past the yield point of the sheet surface. Forming and drawing operations spread the load but slide the sheet across long working radii, which is why draw dies gall on radii and blanking dies gall on the cutting edges first.

The eight root causes below cover every lever a tooling engineer controls: geometry, steel, coating, finish, lubricant, speed, incoming material and heat. Fix the ones you find and galling moves from a weekly fire drill to a managed risk.
Root Cause 1: Cutting Clearance Too Tight
Clearance is the gap between punch and die per side, expressed as a percent of stock thickness. It controls how the crack fronts from the punch edge and the die edge meet. With correct clearance, the two fracture planes converge cleanly and the blank separates. With tight clearance, the material is squeezed instead of sheared. That squeeze creates extreme friction and fresh-metal contact on the punch land, exactly the conditions that start galling.
Typical blanking clearance values per side (industry figures):
| Material | Clearance per side (% of t) | Example: t = 1.5 mm | Galling tendency |
|---|---|---|---|
| Low-carbon steel (SPCC, 1008) | 5-8% | 0.075-0.12 mm | Low |
| 304/316 stainless | 10-15% | 0.15-0.23 mm | High |
| Soft aluminum (1xxx, 3xxx, 5xxx) | 10-15% | 0.15-0.23 mm | High |
| Copper, brass | 8-12% | 0.12-0.18 mm | Medium-high |
| HSLA / high-strength steel | 8-12% | 0.12-0.18 mm | Medium |
← swipe to scroll →
Table note: clearance ranges are typical industry figures for blanking and piercing; verify against your strip supplier's data and die design handbook.
Two failure patterns to check. First, clearance specified for mild steel but applied to stainless. A die that runs fine on SPCC will pick up metal within thousands of strokes on 304 at the same gap. Second, clearance lost to wear and regrinds. Every regrind shortens the punch and changes the effective working length, and misaligned sections open or close the gap locally. Check clearance after every sharpening cycle, not just at die build.
Burr height is your on-line diagnostic. A healthy blanked edge carries a burr under 0.05 mm on 1.5 mm stock. When burr climbs toward 0.10 mm with tight clearance, or you see a double burnished band, the section is shearing wrong and galling risk is rising. Our guide on maintaining punch clearance in progressive dies covers the measurement and regrind schedule in detail.
Root Cause 2: Wrong Steel and Hardness Pairing
Tool steel selection decides how long a die survives in galling service. The key property is not just bulk hardness but wear resistance under adhesive contact, which depends on carbide type, size and volume. Ordinary through-hardening steels carry iron-chromium carbides that the sheet can plow through. High-vanadium steels carry vanadium carbides harder than most abrasive contaminants, and they resist material pickup far better.
D2 is the working baseline. D2 (1.5% C, 12% Cr) at HRC 58-60 is the standard for stainless and aluminum stamping sections. It is economical, wire-EDM friendly and regrinds well. Above HRC 60 it gets brittle on thin punch lands; below HRC 56 it wears and galls quickly. If your D2 punches come back from the heat treater at HRC 52, that is a supplier problem worth escalating.
Powder metallurgy steels win in severe duty. CPM 10V (roughly 10% vanadium) at HRC 60-62 delivers vanadium carbide volumes near 20% by weight, and typical service reports put its life at 3-5x D2 when stamping stainless at high volumes. CPM 15V pushes further for the worst aluminum cases. The tradeoffs are cost (roughly 2-4x D2 per kg), harder grinding and lower toughness, so reserve PM steels for punches and inserts that have proven themselves as galling hot spots.
Consider the pairing, not one part. Galling is an interaction. Running identical steels against each other (D2 punch, D2 die button) with poor lubrication is more adhesive than mismatching. Where design allows, pair a hard carbide-rich punch with a tougher matrix die block, and keep hardness above HRC 58 on every surface that touches the sheet. For forming dies under 1,000 MPa contact stress, D2 is usually enough; above that or beyond 500,000 strokes, step up to PM or carbide inserts.
Our guide on selecting stamping die steel walks through the full trade matrix: D2 vs A2 vs M2 vs PM grades, toughness limits and cost per thousand strokes.
Root Cause 3: No Surface Coating
Coatings are the highest-leverage anti-galling fix because they change the surface chemistry without touching the substrate. A coated punch presents a ceramic-like face that sheet metal does not readily cold-weld to, and it keeps that face through millions of strokes.
TD (Toyota Diffusion) vanadium carbide. TD grows a vanadium carbide layer bonded metallurgically to the steel, typically 5-15 µm thick at 2,800-3,200 HV, harder than most PVD coatings and much better adhered. Because the layer grows from the substrate rather than sitting on it, it resists the chipping that kills thin coatings on interrupted cuts. Field reports on stainless and aluminum stamping commonly show 5-10x punch life versus uncoated D2, and regalled TD tools can be stripped and recoated several times.
DLC and low-friction PVD. Diamond-like carbon holds friction coefficients near 0.05-0.15 against steel, the lowest of common tool coatings, which directly starves the adhesion mechanism. Its thermal limit (roughly 250-350 °C deposition-dependent) suits aluminum and copper stamping well. For the coating selection detail, see our article on DLC coating for mold components.
TiN and TiCN as the economy tier. TiN (roughly 2,300 HV, golden color) and TiCN (roughly 3,000 HV) at 2-5 µm thickness typically deliver 2-4x life gains on mild steel and moderate stainless work. They cost a fraction of TD and recoat easily, but the thin layer can wear through on sharp radii, so watch edges on high-pressure forming sections.

Coating after finishing, never before. All coatings are applied after heat treatment and final polish, and the coating temperature must stay under the tempering temperature of the steel. D2 tempered at 510-540 °C handles TD at roughly 900-1,050 °C only with distortion control and a post-process straightening allowance; PVD at 200-450 °C is dimensionally safer. Budget for the extra regrind-and-recoat cycle: coatings add cost per cycle but cut cost per thousand parts.
Root Cause 4: Poor Surface Finish
Roughness decides how many contact points the sheet actually touches. A ground punch at Ra 0.8 µm has sharp asperity peaks that pierce the oxide film of the sheet and start cold welding immediately. A polished or coated face at Ra 0.1-0.2 µm spreads the load over many more, gentler contacts. The practical working range for galling-prone materials is Ra 0.2-0.4 µm on every surface that slides against the strip: punch lands, die button walls, draw radii, stripper faces and pilot surfaces.
Polish direction matters as much as polish level. Grinding and polishing strokes should run in the direction of material flow, not across it. Transverse scratches act like tiny barbs: the sheet catches on them, tears, and leaves debris that seeds the next galling patch. On a draw radius, polish circumferentially so the sheet slides along the grooves rather than riding over them.
EDM surface is a trap. Wire EDM leaves a recast layer 5-25 µm deep with micro-cracks and Ra values of 1.6-3.2 µm straight off the machine. That layer is porous, rough and heat-affected, a perfect galling starter. Any EDM'd working surface on a stamping section should be polished away, typically 0.03-0.05 mm stock removal, before the die runs. A cheap EDM finish on a stainless blanking die routinely costs more in downtime than the polishing it skipped.
Verify with numbers, not eyeballs. A $300-800 pocket roughness tester confirms Ra in seconds. Log readings at die build and after each regrind. When a punch that ran 200,000 strokes clean comes back from sharpening at Ra 0.9 µm instead of 0.2 µm, you have found why pickup started in week three.
Root Cause 5: Lubrication Failure
Lubricant keeps a boundary film between sheet and steel so asperities never touch bare metal. When that film fails, galling starts within strokes, not hours. The film fails for three reasons: wrong chemistry for the pressure, wrong application quantity, or breakdown at temperature.
Extreme-pressure additives carry the load. Under the 1,000+ MPa contact pressures of blanking, ordinary mineral oil films squeeze out. EP additives (chlorine, sulfur, phosphorus compounds) react with fresh metal surfaces to form solid lubricious films (iron chloride, iron sulfide) that survive boundary contact. Chlorinated EP lubricants historically give the best anti-galling performance on stainless, which is why many stampers still fight to keep them.
Chlorinated vs non-chlorinated tradeoff. Chlorinated paraffin lubricants handle the most severe draws on 304 and 316, but they face regulatory pressure (REACH restrictions in the EU) and can leave corrosion residues. Modern chlorine-free EP lubricants based on sulfur-phosphorus chemistry plus polymeric film formers now cover most stamping duties at 80-90% of chlorinated performance. Test candidates on your worst galling station before switching a whole line.
Quantity and placement beat chemistry alone. Typical roll-coater or drip application rates run 1-4 g/m² per side depending on severity. Too little starves the contact; too much causes slug retention and feeding problems. The lubricant must land on the strip before it enters the die, and on both sides for drawing operations. A die that galls only on the bottom surface of the blank usually has a single-sided applicator problem, not a chemistry problem.
Watch cleanliness. Lubricant mixed with abrasive pick-up debris becomes a grinding paste that accelerates wear and scratches the polished surfaces you paid for. Filter recirculating systems to 25-50 µm and change sumps on schedule. Fresh lubricant on a dirty die still galls.
Root Cause 6: Excessive Stamping Speed
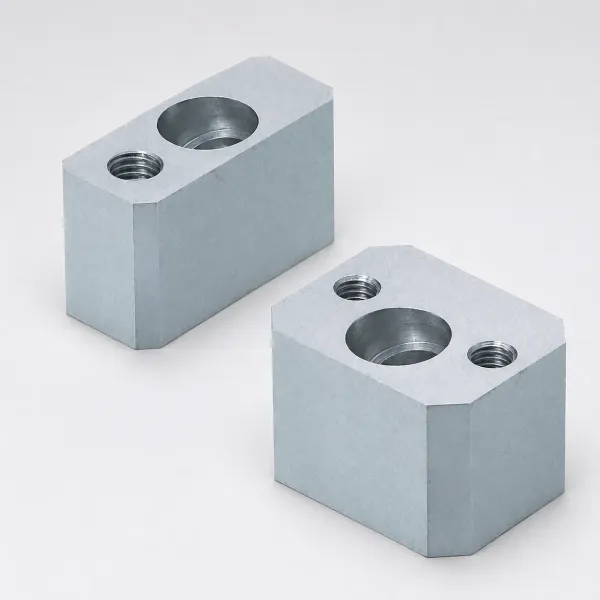
Speed feeds heat into the contact zone faster than the lubricant film and the die mass can remove it. Contact time per stroke shrinks, but frictional energy per unit area rises because the sheet slides more aggressively and the lubricant has less time to re-form. In practice, dies that run clean at 120 SPM can start picking up aluminum within minutes at 350 SPM.
Typical SPM bands by material (industry figures): mild steel blanking runs comfortably at 200-600 SPM depending on part size; 304 stainless usually stays in the 60-250 SPM range before galling risk climbs sharply; soft aluminum often needs 100-300 SPM with high-quality lubricant. These are starting points. The right ceiling for your die is the speed at which part quality and tool temperature stay stable for a full shift.
Find your die's speed ceiling empirically. Run a speed ladder: 30 minutes at target minus 30%, 30 minutes at target, 30 minutes at target plus 20%. Log part appearance (edge quality, scratches), burr height and punch temperature with an infrared gun at each step. The ceiling is where any of those three start drifting. Set production SPM at roughly 80% of that value so normal variation does not cross the line.
Speed and feed synchronization matter. A mis-timed feed that drags the strip against a stationary pilot adds sliding friction no lubricant can fully cover. At high SPM, check pilot entry alignment and feed length accuracy within ±0.05 mm. Many "galling" reports at high speed are actually feed-scratching that seeds pickup.
Root Cause 7: Material Surface Condition
The incoming coil is half the tribological system, and it is the half most stampers never inspect. Two properties dominate galling behavior: the sheet's surface film and its work-hardening rate.
Stainless work-hardening. 304 deforms from roughly 200 HV in the annealed state to 400+ HV locally during forming. Hardened asperities plow into the die surface and the freshly generated oxide-free metal welds readily. Use the softest temper that meets part strength (2B or bright annealed finishes deform more predictably than rough 2D finishes), and expect to pay for it in coating and clearance rather than fighting the material.
Galvanized zinc transfer. Zinc coatings on GI and GA strip are soft (roughly 60-100 HV) and melt-smear onto tool steel at comparatively low temperatures. Zinc buildup on punches grows into rough nodules that scratch and grab. Regular wiping of zinc-rich deposits and slightly increased clearance (1-2 points over bare steel values) keep galvanized runs stable. Coating choice matters here too: zinc adheres strongly to bare steel but poorly to smooth DLC or TD surfaces.
Aluminum surface films. Aluminum's natural oxide is hard but thin (roughly 2-10 nm) and constantly re-forms, so aluminum galling is really oxide-film failure plus smearing of the soft substrate. Coils with rough mill finishes (Ra above 0.5 µm) grab harder. Where possible, specify smoother tempers for severe draws.
Contamination multiplies everything. Dirt, rust-preventive residue differences between mills, and edge debris from slitting all change friction stroke to stroke. A die that ran fine on last month's coil may gall on this month's even with the same certificate. When galling appears suddenly, audit the coil lot before touching the die. Check surface finish spec (mill designation), hardness (HRB/HV), and oil film weight. Incoming material inspection costs minutes; misdiagnosing it costs a die section.
Root Cause 8: Heat Buildup in the Die
Most stamping heat comes from plastic deformation of the sheet, and 90%+ of that energy converts to heat. A portion flows into the tooling every stroke. In high-speed progressive work, punch tip temperatures can sit 30-80 °C above ambient after an hour, and local flash temperatures at asperity contacts spike far higher for microseconds.
Heat attacks galling resistance three ways. First, lubricant films thin and EP additive chemistry degrades above roughly 80-120 °C for many products, so the boundary film collapses exactly when pressure peaks. Second, tool steel softens: D2 tempered for HRC 60 loses measurable hardness above roughly 200-250 °C sustained. Third, differential thermal expansion changes clearances, usually closing tight gaps and raising contact pressure.
Measure instead of guessing. An infrared thermometer ($50-150) on punch shanks and stripper plates at every die check tells you which stations run hot. Log it. A station running 40 °C hotter than its neighbors is your galling candidate before it ever shows pickup.
Remove heat at the source. Practical levers: increase lubricant flow to hot stations, add vented or copper-alloyed punch inserts where design allows, reduce unnecessary work (a redundant coining station is pure heat), and schedule die checks so sections cool. On severe jobs, chilled stripper plates or forced-air cooling on the die shoe pay back in tool life. Keeping bulk die temperature under roughly 60-80 °C preserves both lubricant film and clearance stability.
Diagnosis: Galling vs Scoring vs Abrasive Wear
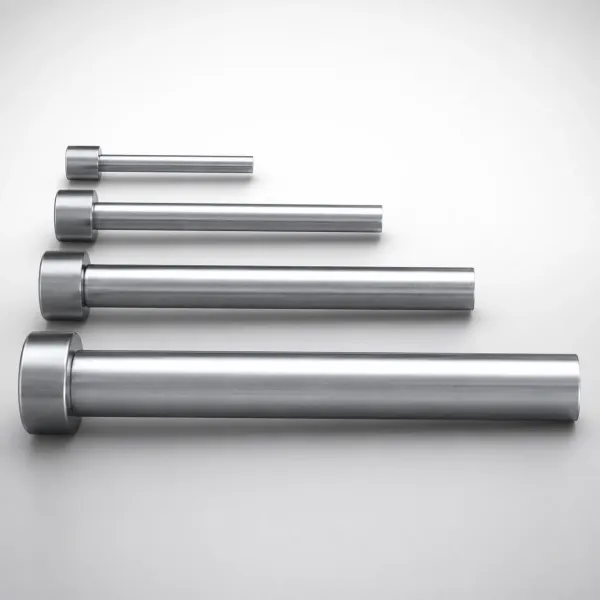
Fixing the wrong wear mode wastes tool room hours. Galling, scoring (scratching) and abrasive wear look similar on a dull part edge, but they leave different evidence on the steel and demand different fixes. Galling shows as lumpy, welded-on deposits that grow. Scoring shows as long, straight grooves with no buildup. Abrasive wear shows as uniform polishing or rounding of edges with fine scratches. Use this table at the die check bench:
| Feature | Galling (adhesive) | Scoring (scratching) | Abrasive wear |
|---|---|---|---|
| Tool surface | Rough, lumpy transferred metal patches | Long straight grooves, clean metal | Uniformly polished, rounded edges |
| Progression | Fast, self-accelerating | Sudden onset, steady | Slow, linear with stroke count |
| Part symptom | Smeared, torn edges, burr spikes | Single deep scratch line | Burr slowly grows over weeks |
| Common trigger | Stainless/aluminum, tight clearance, film failure | Hard debris, chipped edge, misaligned feed | Scale, high-strength steel, HSLA oxides |
| Primary fix | Coating + clearance + EP lubricant | Remove debris source, repair groove | Harder steel (PM grade), regrind cycle |
← swipe to scroll →
Table note: field-typical wear signatures; combine with stroke-count logs for confirmation.
Quick bench tests. A transferred patch can often be felt with a fingernail and will not wipe off with solvent, while lubricant residue will. Score grooves follow the strip direction exactly. Abrasive-worn punch lands lose dimension measurably with a micrometer: if the land has shrunk 0.01-0.02 mm over 500,000 strokes with a smooth surface, that is wear, not galling, and coating hardness is your lever.
How to Fix a Galled Die
Once pickup has started, running the die harder or faster makes it worse. Stop, then work through this sequence. Total bench time for one section is typically 2-6 hours depending on deposit severity.
Step 1: Isolate and document. Pull the section and photograph each galled surface before touching it. Note which stations and which faces (punch land, die wall, radius) carry deposits. That map tells you the root cause: edge pickup points to clearance and hardness, radius pickup points to lubrication and finish, one-sided pickup points to application or feed.
Step 2: Remove transferred metal. Use a brass or copper scraper, plastic abrasives, or a fine oilstone. Never use a hardened steel file on the working surface; you will gouge the parent steel and create new galling seeds. For stubborn deposits on coated tools, a fine aluminum-oxide slurry on a soft lap removes buildup without cutting into a TD or PVD layer if you work gently and check often with a 10x loupe.
Step 3: Re-finish the surface. Polish back to Ra 0.2-0.4 µm or better, in the direction of material flow. Verify with a roughness tester. If the deposit tore out substrate or the edge is rounded, regrind the punch and die to restore geometry, then check clearance per side against the material table above.
Step 4: Re-harden or re-coat if it recurred. A section that galls twice in 100,000 strokes has a systemic problem, not a surface problem. Escalate in order: polish plus better lubricant first; then TD or DLC coating; then PM steel (CPM 10V) or carbide inserts on the worst station. Each step roughly multiplies interval life: coating 5-10x, PM steel 3-5x over D2.
Step 5: Prove it with a monitored run. Run 5,000-10,000 strokes with checks every 1,000: burr height, part edge quality, punch temperature, visual inspection of the repaired faces. Only sign the die off for full production when two consecutive checks are clean. Record the fix and the interval so the next die check has a baseline.
Prevention and Maintenance Schedule
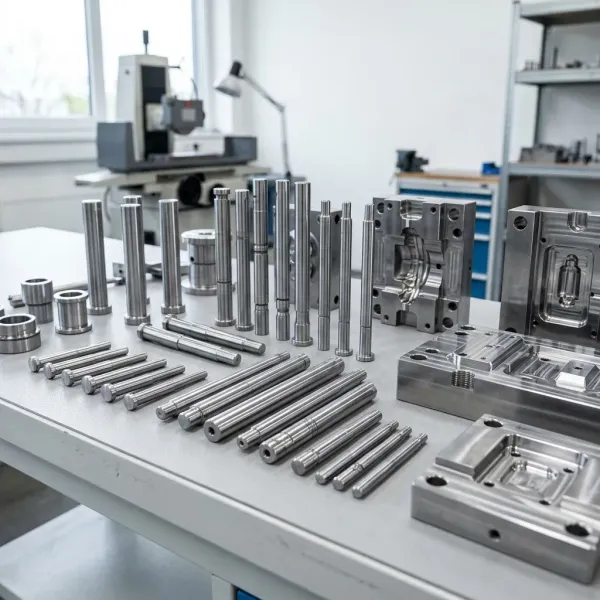
Galling prevention is mostly discipline: the same checks, on a schedule, with numbers logged. This cadence works for medium- to high-volume progressive dies running stainless, aluminum or galvanized strip.
Every shift (operator level). Visual check of part edges for smearing and burr spikes at the worst-known station. Wipe visible deposits off stripper and punch faces. Confirm lubricant level and application pattern, roughly 1-4 g/m² per side. Log SPM and any feed faults.
Every 50,000 strokes (die check). Pull the top section. Inspect punch lands and die walls with a 10x loupe for early pickup: dull spots, faint discoloration, texture change. Measure burr height (alarm above 0.10 mm on 1.5 mm stock). Infrared-scan punch shanks and compare station to station; investigate any station running 40 °C above its neighbors.
Every 200,000-300,000 strokes (maintenance level). Full strip and clean. Measure clearance per side with feeler gauges or pin gauges at three points around each form. Roughness-test at least one punch and one die wall per galling-prone station against the Ra 0.2-0.4 µm spec. Regrind on schedule before edges round, typically 0.02-0.05 mm per sharpening, and record remaining punch length so sections retire before they break.
Annually or per campaign (engineering level). Review the galling log: which stations, which materials, which intervals. Feed the data back into design. Stations that consume maintenance hours every campaign are candidates for TD or DLC coating at the next rebuild, PM steel inserts, or clearance rework. Our stamping die manufacturing service builds these decisions in at design stage: material-specific clearances, coated working surfaces and IATF 16949 process control hold critical die dimensions to ±0.005 mm and component geometry to ±0.002 mm.
Log everything against stroke counts. The single most valuable anti-galling tool is a spreadsheet: date, strokes, station, finding, action, part quality. After three campaigns it tells you the true life of every material-coating-clearance combination you run, and it turns die steel and coating decisions from opinions into numbers.
FAQ
Q1. What clearance should I use to stop galling on 304 stainless?
Start at 10-15% of stock thickness per side, versus 5-8% for mild steel. On 1.5 mm 304 that means 0.15-0.23 mm per side. Tighter gaps squeeze rather than shear the stainless, and squeezing is what starts adhesive pickup.
Q2. Which coating is best against galling, TD or DLC?
For blanking and piercing on stainless and aluminum, TD's vanadium carbide layer (2,800-3,200 HV) usually wins because it is thicker and bonded, with field reports of 5-10x life on D2. DLC gives the lowest friction (roughly 0.05-0.15) and suits drawing and forming where sliding dominates, but it is thinner and less tolerant of edge chipping.
Q3. Can I run aluminum faster than stainless without galling?
Not automatically. Aluminum is softer and smears more easily, so it galls readily despite lower cutting forces. Mild steel tolerates the highest speeds (200-600 SPM on typical blanking); aluminum usually runs 100-300 SPM with good EP lubricant; stainless is often limited to 60-250 SPM. Find your ceiling with a speed ladder test, not a handbook.
Q4. How do I know if my lubricant is failing?
Three signs: part edges turn from bright-sheared to smeared, punch temperature climbs more than 10-20 °C at the same SPM, and pickup appears first on the hottest station. Check film weight (target 1-4 g/m² per side), sump contamination, and whether the additive package is rated for your contact pressure. Above roughly 80-120 °C many lubricants lose their boundary film.
Q5. Is galling on a brand-new die a manufacturing defect?
Sometimes. Check three things before blaming production: was the EDM recast layer polished off (Ra 0.2-0.4 µm spec), is clearance per side correct for the actual material, and was the punch hardness verified at HRC 58-60 (D2)? All three are measurable at incoming die inspection, and a die that fails any of them will gall from day one.
The Bottom Line
Galling is a chain: wrong clearance, soft steel, bare surfaces, rough finish, weak lubricant, excess speed, hostile material and trapped heat each feed the next. Break the chain with numbers, 10-15% clearance on gummy metals, HRC 58-60 D2 or PM steel, TD or DLC coatings, Ra 0.2-0.4 µm finishes, EP lubricant, controlled SPM and logged die checks, and it stops being a surprise. DieStrike builds stamping dies with these thresholds designed in from day one, holding ±0.005 mm on critical die dimensions. If your dies are picking up metal, send us the section photos and stroke logs through our contact page for a DFM-style review.
KEEP READING
Related Reading
How to Select Stamping Die Steel
Match D2, A2, M2 and powder metallurgy steels to your strip material, tonnage and expected die life.
Read articleArticleHow to Maintain Punch Clearance in Progressive Dies
Clearance charts, wear checks and regrind rules that keep progressive dies cutting clean from station 1 to the last.
Read articleArticleDLC Coating for Mold Components
How DLC and related hard coatings cut friction and extend the life of punches, inserts and forming tools.
Read articleServiceStamping Die Manufacturing
IATF 16949 progressive and stage dies built to ±0.005 mm with 2-5 week lead times.
Read articleNEXT STEP
Ready to Start Your Mold?
Send us your element dimensions or part numbers — our team responds within 24 hours with pricing and lead time.

Written by
Ray ChanMold Buyer's Guide Author · Precision Mold Manufacturing Specialist. Ray helps global importers, distributors and OEMs source factory-direct molds and mold parts.