
Mold Venting: Depth, Location and Design Rules
Table of Contents
Trapped air is the quiet killer in injection molds. It compresses as melt fills, and its temperature spikes past 300 °C (typical published model). The hot air scorches the resin at the last corner to fill. The result is a carbon burn mark, a short shot, or a bin of scrap. Vents cut to the right depth, in the right place, prevent all of it.
The physics is not complicated. A closed cavity holds air at atmospheric pressure, about 0.1 MPa. Melt pushes that air ahead of the flow front. If the air has no exit, the front stalls, or the air compresses until it ignites the resin. Molders call that dieseling.
A dieseling burn usually appears at the end of fill, opposite the gate. That is where venting is treated as an afterthought.
This guide gives the numbers a design review needs: vent depth per material, land and relief dimensions, vent count, ejector pin venting, and last-fill detection. The values are typical published ranges from venting charts, resin suppliers, and mold steel handbooks. Confirm them against your resin datasheet and your own trial shots.
The Snapshot
- Vent depth must match the resin: PP/PE 0.02-0.04 mm, ABS 0.03 mm, nylon PA 0.02 mm, POM and LCP 0.01-0.02 mm (typical). Deeper vents flash; shallower vents do nothing.
- Cut a vent every 25-50 mm of cavity perimeter, plus one at every last-fill point (typical industry rule).
- Keep the vent land 1-3 mm long, then cut a relief channel 0.5-1.0 mm deep from the land out to atmosphere.
- Air compressed during fill can pass 300 °C and burn the resin in milliseconds. Vents that bleed air in the final 5-10% of fill stop the burn.
- Deep ribs and bosses rarely fill clean from parting-line vents alone. Grind ejector pin flats or add core vents at 0.02-0.05 mm depth (typical).
What Venting Does (and What Trapped Air Costs)
A vent is a controlled gap in the parting line, at an insert edge, or around an ejector pin. It lets air leave the cavity while the melt front approaches. The gap is small enough that resin cannot squeeze in. It is large enough that air escapes before the front arrives.
Skip the vent and the trapped air does three things, in order. First, it builds backpressure. Air trapped between two melt fronts or at a blind corner resists compression, so the fill front stalls short of full.
Second, the compression heats the air. A typical cavity pressure of 30-80 MPa compresses the remaining pocket hard. Published models put the peak gas temperature in the 300-400 °C range. That is above the decomposition point of most resins.
Third, the hot air chars the polymer. It leaves carbon on the cavity and a burn mark at the same spot every cycle.
The cost shows up as scrap and lost time. A burn mark on an automotive connector housing is a reject. A short shot at one corner means the press sits idle while someone changes settings or vents the tool mid-trial. Design the vents during DFM and you avoid that loop entirely.
DieStrike reviews venting, gating, cooling, and ejection in a 24-hour DFM pass before cutting steel. The review answers one question first: where does the air go? If the answer is "nowhere," the tool will burn or short before it runs clean.
Vent Locations: Where Air Gets Trapped
Air collects where the melt goes last. Every feature that stops or splits the flow is a candidate vent location. Work through the part in order of likelihood:
- Last-fill points: the region farthest from the gate, usually the corner or edge opposite it. A rectangular housing with a center gate fills last at its four far corners.
- Ends of long, thin flow paths: ribs and walls that outrun the main front. The air pocket sits at the tip of the thin section.
- Weld lines: where two flow fronts meet, air is trapped between them. Vent the knit line directly so the fronts merge without a pocket.
- Blind bosses and deep ribs: air at the closed end has no escape unless the boss core or rib tip is vented.
- Insert shut-offs and slide tips: every boundary between moving or separate steel parts is a potential air trap.
Ejector pins are the sleeper location. A pin floats in its hole with roughly 0.01-0.02 mm clearance per side (typical). That gap is already a vent.
Grind a flat 0.02-0.05 mm deep on the pin's bearing surface. You turn an existing pin into a controlled vent at the deepest part of the cavity. This is standard practice on deep ribs, which parting-line vents cannot reach.
Vents near the gate are wasted effort. Air near the gate escapes easily or is harmless, because the melt arrives first and the pressure is lowest. Spend the vent budget on the last 10% of the flow path, not the first.
Vent Depth by Material: The Numbers
Vent depth is a compromise between two failures. Cut too shallow and the air cannot escape fast enough, so burns and short shots return. Cut too deep and the melt flashes into the vent slot, producing a fin on the part. The correct depth sits just below the resin's flash point. That is the gap at which the melt, at its viscosity and pressure, stays out.
Resin viscosity drives the number. Low-viscosity melts like PP and PE squeeze into gaps that a high-viscosity melt like PC ignores. That is why low-viscosity grades need the shallow end of the chart. A vent that works for PC can flash badly in PP.
Typical Published Vent Depths by Resin
The table below is a working reference, not a guarantee. Published venting charts differ between suppliers. A resin grade's flow rating, filler content, and cavity pressure can shift the number by 0.005-0.01 mm either way.
| Material | Vent Depth (mm) | Land (mm) | Notes |
|---|---|---|---|
| PP / PE | 0.02-0.04 | 1-2 | Low viscosity; flash risk climbs above 0.04 mm at high cavity pressure |
| ABS | 0.03 | 1-2 | Mid-viscosity standard for housings; start at 0.03 mm and verify |
| PC | 0.02-0.04 | 1-3 | Higher melt viscosity tolerates the deeper end of the range |
| Nylon PA6 / PA66 | 0.02 | 1-2 | Flash-prone even at moderate pressure; keep depth at 0.02 mm |
| POM (acetal) | 0.01-0.02 | 1-2 | Degrades above roughly 230 °C; trapped air burns it fast, vents must stay clean |
| LCP | 0.01-0.02 | 1-2 | Very low viscosity; thin-wall connector molds run at the shallow end |
| PC/ABS blends, thin-wall PC | 0.01-0.02 | 1-2 | High fill rates in thin sections demand shallow, frequent vents |
← swipe to scroll →
Values are typical published ranges from venting charts and resin suppliers. Treat every number as a starting point, not a spec. When in doubt, start shallow at 0.01-0.02 mm and deepen in 0.005-0.01 mm steps only if short shots or burns persist.
Glass-filled grades change the math on the wear side, not the depth side. A 30% glass-filled PA6 still needs a 0.02 mm vent, but the melt abrades the vent land faster. Expect land erosion over 100,000-200,000 shots (typical). Budget a re-cut into the maintenance plan.
Machining the Depth Accurately
Cutting a 0.02 mm step is a machining job, not a hand job. Vents are cut on hardened steel, so they are ground, milled, or EDM'd after heat treatment. Depth is verified with a micrometer or an optical comparator. A 0.02 mm step is about one-fifth of a human hair. An error of 0.01 mm either way changes the part.
DieStrike machines vents after hardening, when the cavity is at HRC 62. It verifies the land dimensions before polish. Cutting a vent into soft steel and hoping the heat treater holds 0.02 mm through distortion is how flash gets baked into a tool.
Vent Width, Land, and Relief Channels
Depth gets the attention, but a vent is three features. There is the depth step at the cavity, the land behind it, and the relief channel to atmosphere. Miss any of the three and the vent fails.
Vent Width: 3-8 mm Per Slot
Each individual vent slot is typically 3-8 mm wide along the parting line. Narrower slots move too little air. Wider slots weaken the parting-line seal and invite flash between slots. On long straight edges, cut several 5-8 mm slots with 3-5 mm of solid land between them. Do not machine one continuous trench.
Some large parts use continuous venting: a full-length slot with the land interrupted every 5-10 mm by small bearing pads (typical practice). It moves more air but costs more to machine and maintain. Reserve it for fast-filling parts that need maximum escape area.
Land Length: 1-3 mm
The land is the flat, full-depth section between the cavity and the relief. Its length controls how much the vent resists both air flow and melt entry. A 1-3 mm land is the working range (typical). A land longer than 3 mm chokes the air path. The vent then performs as if it were too shallow.
A land shorter than 1 mm wears through quickly. The relief channel edges into the cavity and becomes a flash channel. On abrasive, glass-filled resins, run the long end of the range, 2-3 mm. The land still seals after 100,000 shots of erosion.
Relief Channels: 0.5-1.0 mm Deep to Atmosphere
Behind the land, the vent opens into a relief channel cut 0.5-1.0 mm deep. The relief carries air from every vent slot to the edge of the mold, where it meets atmosphere. A relief that dead-ends inside the plate is not a vent. It is a pressurized pocket.
The relief is cut generously because resin rarely reaches it. If flash climbs past the land into the relief, the depth is wrong, not the relief. Fix the depth before the tool leaves the press.
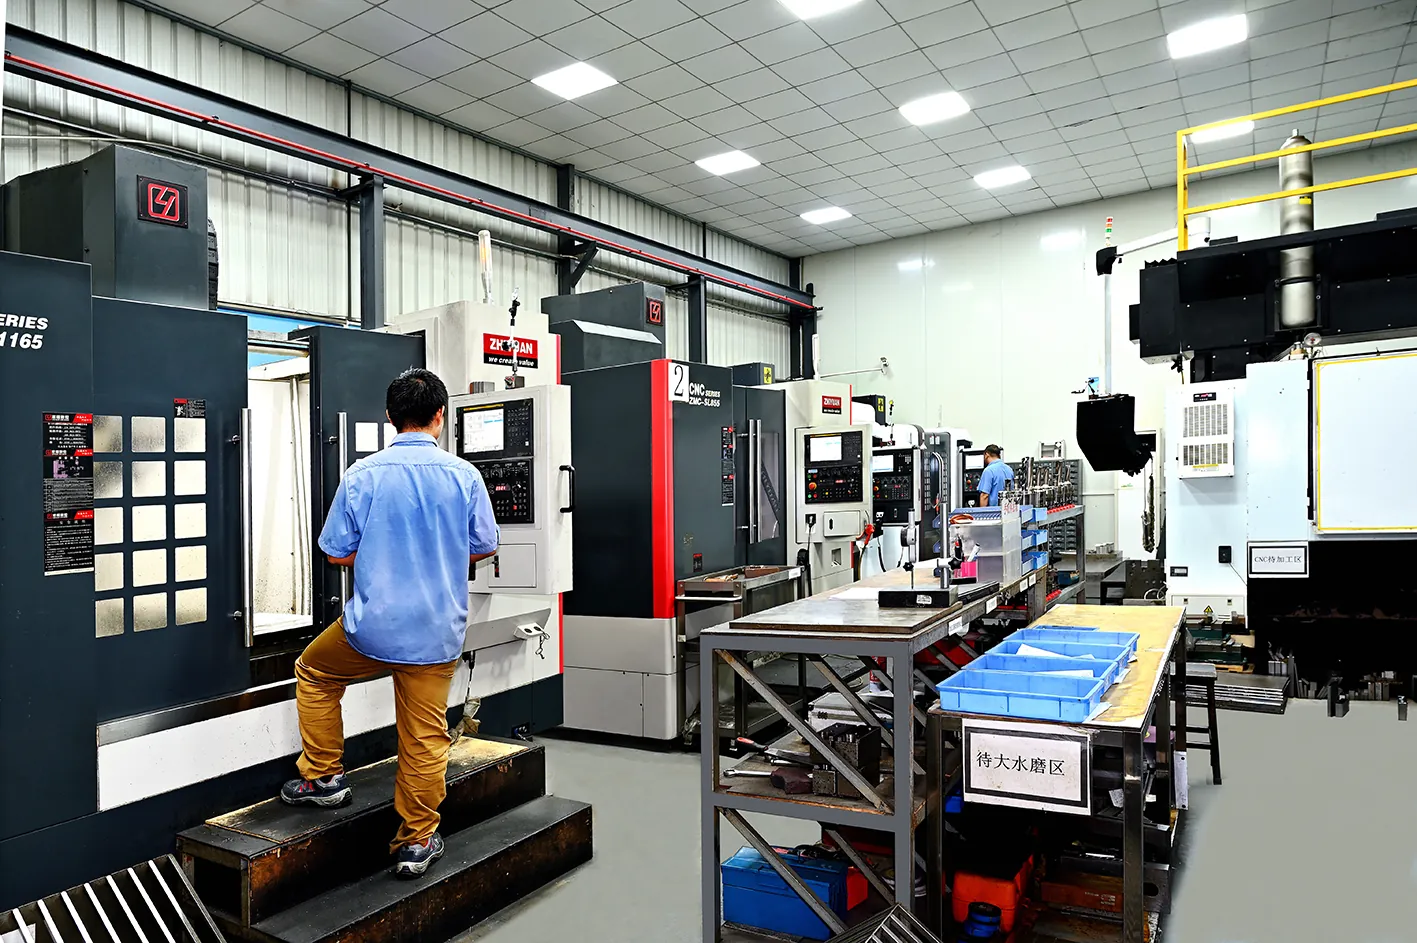
Air leaves through the gap between the mold halves. The relief must break out at the mold edge or into a groove that leads there. Check the breakout point during assembly. A 0.5-1.0 mm relief that stops 10 mm short of the edge vents nothing.
How Many Vents: The 25-50 mm Rule
Vent count follows cavity perimeter, with last-fill points on top. The typical industry rule is one vent every 25-50 mm of cavity outline. Add a dedicated vent at every region that fills last. A 150 mm × 100 mm housing has a 500 mm perimeter. At 25-50 mm spacing that is 10-20 vent slots, before counting the far-corner last-fill vents.
The spacing logic is about air volume and time. A cavity of that size holds a few cubic centimeters of air. During a 1-2 second fill, that air must escape without letting pressure spike. More slots mean less air per slot and lower backpressure at the end of fill.
Four corners of a rectangular part are not four vents. They are four minimums. Between corners, long straight edges still trap air along their full length as the front sweeps toward the far wall. Space the slots, then add the last-fill corner vents.
Parts with high length-to-thickness flow ratios need the tight end of the spacing. Thin-wall housings and connector bodies are the usual cases. Parts filled slowly with viscous resins can run at the loose end. Use mold flow analysis to set spacing. Do not guess from part size alone.
The design rules below summarize the vent package in one card. Use it at the DFM review and at every maintenance check.
| Feature | Typical Value | Why It Matters |
|---|---|---|
| Vent depth | 0.01-0.04 mm, by material | Deep enough to bleed air, shallow enough to stop flash |
| Vent width, per slot | 3-8 mm | Slots this wide vent enough air without weakening the parting-line seal |
| Land length | 1-3 mm | Short land vents fast; long land chokes the air path |
| Relief channel | 0.5-1.0 mm deep | Drops air to atmosphere after the land |
| Vent spacing | Every 25-50 mm of perimeter | Plus one dedicated vent at every last-fill point |
| Ejector pin flats | 0.02-0.05 mm deep | Vents deep ribs and bosses the parting line cannot reach |
← swipe to scroll →
Values are typical published ranges. Treat them as a starting point and confirm against your resin supplier and trial results.
Venting Deep Ribs, Bosses, and Cores
Parting-line vents sit at the cavity edge. Deep ribs and blind bosses sit in the middle of the part, often 10-40 mm below the parting line. No edge vent can reach them. Air at the closed end of a deep rib is trapped by the melt front on three sides and the steel on the fourth. It has one legal exit: through the steel, via a vented ejector or a core vent.
Ribs deeper than roughly four times their width are the failure zone. Bosses whose depth exceeds the core diameter fail the same way. Parting-line-only venting cannot fix them. The symptom is a burn or short at the rib tip on every shot. It stays at the same location regardless of process changes.
Ejector Pin Vents
The standard fix is a vented ejector pin. Grind a flat 0.02-0.05 mm deep along the pin's bearing length, on the side that faces the rib tip. Air trapped at the rib end travels down the flat. It passes the pin's 0.01-0.02 mm per-side clearance. It exits under the ejector plate to atmosphere.
Pin diameter sets the flat count. A pin under 3 mm typically carries one flat. Pins of 3-8 mm can take two or three. Space them so the pin keeps enough bearing area to stay straight.
The flat must start at the pin tip and reach the atmosphere side of the plate. A flat that stops inside the bushing is a dead end.
Pin-to-hole clearance matters as much as the flat. If the pin fits at less than 0.01 mm per side, the air chokes even with a perfect flat. If the fit is loose enough to vent on its own, it is loose enough to flash. The flat makes the clearance deliberate instead of accidental. Our guide to selecting ejector pins for automotive connector molds covers the fit and tolerance side of this trade-off.
Core Vents and Insert Splits
Where no ejector can reach, split the steel. A core insert can carry its own vent at the insert-to-cavity boundary. Machine a 0.02-0.05 mm step on the insert face with a 1-2 mm land. The air escapes through the insert seam into a relief channel below the parting line.
Insert venting has a hidden benefit: it is maintainable. When the vent wears, the insert is pulled and re-cut. There is no need to rework the whole cavity. Toolrooms that run 100,000+ shot programs standardize on vented inserts for exactly this reason.

Wire EDM is the reliable way to cut these features after hardening. A 0.02 mm deep slot in a 52-62 HRC insert is not a milling job. EDM holds the depth without deflecting tooling or burning the edge. DieStrike cuts core vent features by EDM after heat treatment. Each insert is checked on the CMM before assembly.
Vacuum Venting for Thin-Wall, High-Fill-Rate Parts
Some parts outrun conventional vents. Thin-wall housings at 0.3-0.8 mm wall fill too fast for conventional vents. So do connector bodies and parts with flow-length-to-wall ratios above 150. Air cannot escape through parting-line slots in the time available. The front moves faster than the air can leave, so the air compresses and burns.
Vacuum venting removes the air before the melt arrives. A soft seal closes the cavity perimeter. A vacuum unit pulls the cavity down to roughly 25-29 in Hg (0.03-0.13 bar absolute, typical) before injection starts. With no air in the cavity, there is nothing to compress and nothing to burn.
When Vacuum Venting Pays
Run the cost math before specifying it. Vacuum venting adds a sealed parting line, a vacuum unit, and controls to the tool. It earns that cost when conventional vents cannot keep up. That means sub-1.0 mm walls, fill times under 1 second, or many blind features that would need a forest of ejector pin vents.
On those parts the payoff is measurable. There are no dieseling burns and no vent-flash on thin edges. Fill times stay short instead of being slowed to let air escape. Molds for high-speed connector programs are the most common vacuum-vented tools in DieStrike's shop.

Vacuum venting does not replace depth rules. The seal and the vacuum system are additional systems on top of correct vent design. A tool with blocked vents still traps the air that leaks past the seal. Vacuum pulls most of it out. The remaining few percent still needs an exit at the last-fill corner.
Finding Last-Fill Points: Analysis and Short-Shot Trials
Every venting decision starts with one question: where does the melt arrive last? Two methods answer it. The smart DFM uses both.
Mold Flow Analysis First
Mold flow software predicts fill sequence before steel is cut. It shows the flow front at 10% fill steps. It flags weld lines and highlights last-fill regions where air traps will form. Run it on the part geometry. Then place vents on the analysis, not on intuition.
The analysis is only as good as its inputs. Feed it the actual resin grade's viscosity curve, real wall thicknesses, and the gate location you intend to machine. An analysis run with generic data places vents 5-10 mm off the true last-fill point. That is close, but a burn mark does not care about close.
Short-Shot Trials Confirm It in Steel
Once the tool exists, short-shot trials find the true flow pattern in the actual steel. Fill the cavity at partial volume, typically 70%, 80%, and 90% shots. Reduce shot size or injection time in steps. Each partial part shows how far the front traveled and where it stalled.
Read the parts in sequence. The last region to fill on the 90% shot is the last-fill point. If a short shot leaves a void at the far corner with a scorched edge, that corner was venting-starved. Air traps show up as glossy unfilled pockets at the front's leading edge. Dieseling burns appear exactly at the front's final position.

Run short shots on a fixed process: same melt temperature, same injection speed, only the fill volume changes. Then the differences between parts are flow differences, not process noise. Document each shot's settings next to its part. The venting fix can then be traced back to the evidence.
A short shot at the same corner across all cavities points to runner balance first, vents second. A balanced tool fills all cavities at the same rate. Our mold defect troubleshooting guide walks through that triage in order.
Vent Marks on Parts: What Is Acceptable
A vent leaves a mark. The witness line shows where melt pressed against the vent land. Expect a faint raised edge or a slight gloss change at the vent location. On a correctly set vent it is small, typically under 0.05 mm of raise. It is invisible on matte or textured surfaces.
Acceptable limits are set by the part, not by the mold. Cosmetic A-surfaces often reject any visible vent mark. Consumer housings and automotive interiors move vents to edges, ribs, and parting-line areas hidden in assembly. Functional surfaces accept a vent mark within the drawing's flash or witness-line tolerance, commonly 0.05-0.1 mm (typical).
If the vent mark is the problem, first check the depth. A raise above 0.05 mm usually means the vent is cut too deep and the land is flexing or filling. Reduce depth in 0.005-0.01 mm steps until the mark drops below spec. Then confirm the part still fills without burns.
Vent marks that grow over the run are wear, not setup. The land erodes and the effective depth increases. Flash grows at the vent. Track vent-mark height at the same inspection points as flash. Both rise together when the land is going.
Vent Maintenance: Carbon, Cleaning, and Wear
Vents are the most neglected feature in mold maintenance. Carbon builds up, the vent chokes, burns return, and the tool goes back to trial mode. Clean vents on a schedule, not when the part fails.
Cleaning Intervals
A typical cleaning interval for commodity resins is every 50,000-100,000 shots. Resins that degrade or gas heavily, like POM, PVC, and flame-retardant grades, can foul vents in 10,000-20,000 shots. They need a shorter cycle. Glass-filled grades erode rather than foul, so they need depth checks more than carbon removal.
Clean vents with a brass scraper or soft brush and solvent. Steel tools scratch the land and open the depth. Never sand the vent face. Sanding rounds the land edge and turns a 0.02 mm step into a 0.04 mm flash channel.
Dieseling Carbon: The Tell-Tale
Black carbon in the vent groove is evidence, not just dirt. It means the vent filled with air that compressed and burned. The vent was too shallow, too far from the air pocket, or choked by the previous carbon layer. Clean it, then check whether the depth and location are right before blaming maintenance.
Carbon in the relief channel, behind the land, is more serious. Resin reached the relief, which means flash crossed the land. Measure the vent depth before the tool goes back in the press.
Depth Verification and Re-Cutting
Vent depth drifts with wear and with every careless cleaning. Verify it at scheduled maintenance with the same measurement you trust for the cavity. Use a CMM, an optical comparator, or calibrated depth pins. Compare against the drawing's 0.005 mm tolerance band, not against memory.

When the land has eroded past spec, re-cut it rather than polishing it back. The correct repair removes the worn land face by 0.2-0.5 mm. It machines a fresh land at drawing depth and re-verifies. Re-cutting a land on hardened steel is EDM or grinding work. DieStrike's maintenance program re-cuts and documents the new depth so the tool record stays accurate.
Frequently Asked Questions
Q1. What vent depth should I cut for PP and PE?
0.02-0.04 mm is the typical published range. Both resins are low viscosity, so they flash easily. Start at 0.02 mm and deepen only if short shots or burns persist. Keep the land at 1-2 mm.
Q2. How do I vent a deep blind rib that keeps burning at the tip?
Vent through the steel. Grind a 0.02-0.05 mm flat on an ejector pin that sits at the rib. Or split the core with an insert carrying a 0.02-0.05 mm step and a 1-2 mm land. Parting-line vents cannot reach a rib tip 10-40 mm below the parting line.
Q3. How do I find the last-fill point without mold flow software?
Run short-shot trials. Fill the cavity at roughly 70%, 80%, and 90% of full volume on a fixed process. Inspect where the flow front stopped. The region that fills last on the 90% shot is the last-fill point, and that is where the vent goes.
Q4. What causes burn marks at the end of fill?
Dieseling. Trapped air compresses as the melt front advances, its temperature passes 300 °C, and it chars the resin. The fix is a vent at the burn location, cut to the resin's depth. Keep the land at 1-3 mm with a 0.5-1.0 mm relief channel to atmosphere.
Q5. How often should vents be cleaned?
Every 50,000-100,000 shots is typical for commodity resins. Gassing grades like POM and flame-retardant compounds can foul vents in 10,000-20,000 shots. Clean with brass or soft tools only. Steel scrapers open the depth and cause flash.
Q6. My vent flashes even though I cut it at 0.03 mm. What is wrong?
Check the land. If the land is shorter than 1 mm, the relief acts as the depth step. The effective vent is then much deeper than 0.03 mm. Re-cut a proper 1-3 mm land, verify depth on the CMM, and confirm cavity pressure stays within the tool's clamp rating.
The Bottom Line
Venting is a depth problem, a location problem, and a maintenance problem. Match depth to the resin's published range. Put a vent every 25-50 mm, plus one at every last-fill point. Keep lands at 1-3 mm. Cut relief channels that reach atmosphere.
Air is the only thing in the cavity you cannot see during fill. Design for it before steel is cut, and the burn marks, short shots, and scrap bins never show up. That is the difference between a mold that takes two weeks of trials and one that runs clean in the first session.
DieStrike builds IATF 16949 and ISO 9001 certified molds with ±0.005 mm standard accuracy and ±0.002 mm on critical geometry. The 120+ machine shop runs production molds in 2-5 weeks and standard components in 3-7 days. Customers include TE Connectivity, Amphenol, Luxshare, and Dongshan. Every tool gets a 24-hour DFM review that checks vent placement and depth before steel is ordered.
Venting controls where air goes; gate design controls where melt goes, and the two decide fill quality together. Our gate design best practices guide covers the other half of that equation.
NEXT STEP
Ready to Start Your Mold?
Send us your element dimensions or part numbers — our team responds within 24 hours with pricing and lead time.

Written by
Ray ChanMold Buyer's Guide Author · Precision Mold Manufacturing Specialist. Ray helps global importers, distributors and OEMs source factory-direct molds and mold parts.