
How to Design Molds for High-Gloss Parts: Steel, Polish and Process
Table of Contents
A piano-black bezel came off the press at the first trial looking like frosted glass. The molder ran 300 parts and 62 failed the gloss check at 60° geometry, measuring 92 gloss units against an approved sample at 98. A weld line crossed the show face 8 mm from the gate, and over-polished low spots showed orange peel under raking light. No process setting could fix any of it, because the causes were locked in before steel was ordered.
High-gloss parts fail on the mold design desk, not at the molding machine. Polishing that P20 cavity to a mirror cost three extra bench days, and it still pitted at Ra 0.05 µm. Re-cutting the cavity in a stainless mold steel added 2 to 3 weeks and 25 to 40% to the tooling budget. Moving the gate meant a new insert, a weld repair, and a second trial. Every fix traced back to a decision made before the first CAD review.
This guide is the mold-side design chain for class A gloss surfaces: steel selection, hardness, the polish target, gate and weld placement, mold temperature, venting, and the care rules that keep a mirror cavity alive across 100,000 to 500,000 shots. The bench craft of polishing itself sits in our mold polishing guide. Read this when you are choosing steel, writing the finish spec, or laying out gates, because that is where a gloss part is won or lost.
The Snapshot
- Class A mirror finishes spec at SPI A1, Ra 0.012 to 0.02 µm typical. The polish target must be written on the steel, the heat treatment, and the RFQ before quoting.
- Mirror-capable steel starts around 46-52 HRC. S136 ESR holds SPI A1 reliably. P20 at 28-32 HRC tops out near SPI B2 at Ra 0.2 µm and risks pitting below that.
- Every weld line is visible on a gloss face. Film gates, submarine gates, or gates on the hidden face keep the A surface unbroken. A visible knit line usually costs an insert rework at 10 to 20% of mold price.
- PC gloss parts run at 80 to 120 °C mold temperature typical. Below roughly 70 °C the surface shows flow marks and gloss variation between thick and thin sections.
- Vents run 0.01 to 0.02 mm deep typical on PC and ABS gloss cavities. Trapped air heats past 300 °C, burns the surface, and ruins a mirror polish in one shot.
The High-Gloss Decision Chain: Order the Calls Before Steel
Gloss quality is decided in six steps, and each step can only be reversed cheaply at its own position in the chain. Step one fixes the resin and the gloss target, which sets the Ra goal. Step two picks the steel that can hold that Ra without pitting. Step three sets hardness and the heat treatment route. Step four places the gate so flow evidence never crosses the show face. Step five designs mold temperature and cooling for uniform replication. Step six plans venting and the handling rules that protect the finished surface.

Cost rises fast when a call is made late. A steel change after machining runs 15 to 30% of the mold price typical, plus 2 to 3 weeks. A gate relocation after trial costs 10 to 20% when it needs a new insert. A polish grade upgrade on a finished cavity adds 3 to 5 bench days and lands near 10 to 20% of mold price on small tools. At design time the same decisions cost an hour of review.
Resin choice arrives first because it sets the numbers downstream. PC and PMMA parts demand near-optical cavity finishes at Ra 0.012 to 0.02 µm. PC/ABS and ABS cosmetic housings pass at Ra 0.02 to 0.05 µm with a high mold temperature. A glass-filled grade on the same A surface is a contradiction, because exposed fibers texture the surface and wear the cavity. Resolve resin and gloss target in the DFM review, before any steel is quoted.
DieStrike returns DFM feedback within 24 hours on gate placement, steel grade, and polish spec, because that review window is where gloss risk is cheapest to kill. The decisions below follow the chain in order, with the numbers a tooling engineer needs at each step.
Steel Selection: Polishability Before Price
Polishability is the property that decides whether a mirror finish survives production. A polished cavity face is only as clean as the steel underneath it, and inclusions, porosity, and carbide bands show up as pits and haze in the Ra 0.012 to 0.05 µm range. Buying steel on price alone is how a gloss mold inherits its first defect.
P20 at 28-32 HRC is the cheapest cavity steel and the wrong default for gloss. Its inclusions polish out and leave pits, so the realistic ceiling sits near SPI B2 at Ra 0.2 µm. Below that band, P20 shows pinholes and haze on dark glossy resins. 718H, the nickel-modified P20 at 33-38 HRC, improves cleanliness and reaches SPI B1 to A2, but it still corrodes on hot humid molds.
NAK80 at 38-42 HRC is a precipitation-hardened grade with good polishability and dimensional stability after machining. It suits medium-life gloss tools. For class A piano-black surfaces, S136 ESR at 48-52 HRC is the workhorse: ESR refining removes the inclusions that pit, and the chromium gives corrosion resistance against the condensate that forms on a 80 to 120 °C mold face between cycles.
| Steel | Typical Hardness | Realistic Mirror Ceiling | Corrosion Risk on Hot Molds | Typical Gloss Use |
|---|---|---|---|---|
| P20 | 28-32 HRC | SPI B2, Ra 0.2 µm | High, pits below Ra 0.2 µm | Short runs, textured or matte surfaces |
| 718H | 33-38 HRC | SPI B1 to A2 | Medium | Medium-life cosmetic cavities |
| NAK80 | 38-42 HRC | SPI A2 to A1 | Medium to low | Polished inserts, medium life |
| S136 ESR | 48-52 HRC | SPI A1, Ra 0.012 µm | Low | Class A piano black, PC and PMMA optics |
← swipe to scroll →
Table note: Hardness bands and SPI ceilings are typical industry values. Confirm the polish ceiling against the specific steel certificate and the mold shop's process before the RFQ is signed.
Corrosion is the hidden killer on gloss tools. A hot mold at 80 to 120 °C pulls moisture from the shop air between cycles, and a non-stainless face can rust-spot within hours of an idle weekend. One rust pit at Ra 0.05 µm depth forces a full re-polish of that cavity face, so stainless or coated steel earns its premium on tools that run hot and stop often.
Steel cleanliness matters more than brand. ESR or VAR remelting removes the oxide inclusions that polish out as pits, and a fine, uniform carbide structure polishes evenly without orange peel. Ask the mold shop for the steel certificate and the heat number. On a gloss mold, that paper is worth more than the price difference between two nominally identical grades.
Hardness: The 46-52 HRC Holdout Line
Hardness decides how long a mirror face stays a mirror. A soft cavity deforms under polishing pressure, so the polisher cannot lean in without creating low spots, and the surface wears and scratches in service. The industry holdout line for reliable gloss work sits around 46 to 52 HRC, which is where S136 and similar stainless tool steels are through-hardened.

Heat treatment order is part of the gloss decision. The typical route machines the cavity with 0.2 to 0.3 mm of stock left, vacuum hardens and tempers to the target band, then finish-grinds or EDM-cuts the face, and polishes last. Vacuum hardening of a block typical moves dimensions by 0.05 to 0.1%, so the finish geometry is cut after hardening, never before. Polishing after hardening also stops the soft-edge wash-out that rounds dimensions by 0.01 to 0.05 mm.
EDM leaves a recast layer behind, and that layer is the enemy of a mirror. A finish EDM cut at Ra 0.4 µm deposits a white layer roughly 2 to 10 µm thick that must be removed before polishing, or it flakes off in production and takes the gloss with it. Spec the EDM strategy on gloss faces, then start polishing at 400 to 600 grit instead of 240.
Weld repair on a hardened gloss cavity is a last resort. A weld zone re-hardens differently, polishes differently, and shows as a ghost on a dark glossy part. If a gloss cavity needs repair, plan to replace the insert rather than weld the show face. That rule alone prevents most of the 10 to 20% rework lines on cosmetic tooling.
The Polish Target: SPI A1 and Ra 0.012 to 0.02 µm
The polish grade is a spec, not a wish. SPI A1 sits at the optical top end of the scale at Ra 0.012 µm, produced by a #3 diamond polish. Production piano-black faces typically spec SPI A1 to A2, Ra 0.012 to 0.05 µm, while PC and PMMA parts with true optical requirements hold at A1 with a comparator block for verification.
Write the grade on the drawing with a reference area. "Mirror finish" on a print means nothing to the polisher and nothing to the buyer at first article. The spec should name the SPI or SPE grade, the Ra band, and the area that must meet it, such as the full A surface within 5 mm of the part edge. Then the mold shop quotes a real polish scope instead of a guess.

The grit sequence is a staircase with no shortcuts. A typical cosmetic run goes 240, 400, 600, 800, 1200, 3000 grit, then 1 to 3 µm diamond compound. Skipping more than one stage leaves the previous scratches behind, visible at a 45° inspection angle, and skipping from 600 straight to 3000 guarantees a cloudy first trial. Each stage removes the peaks left by the stage before it, and the total removal on a mirror face is only 2 to 5 µm of material.
Verify with instruments, not impressions. The mold shop checks cosmetic faces against a comparator block and confirms critical areas with a profilometer before the mold ships. After the trial, the molded part gets a 60° gloss meter check against the approved sample, with acceptance typically within 3 to 5 gloss units. A gloss meter on the part catches what a flashlight on the cavity misses.
Polishing cannot fix geometry. If a cavity is 0.02 mm low after machining, polishing will not bring it back, it will only round the edge. Gloss tooling is won in milling and grinding accuracy, and polishing reveals that accuracy. Hold the cavity geometry first, then spend the polish budget on the peaks, not the shape.
Gate and Weld Placement: Keep Flow Evidence Off the A Surface
A gloss A surface is a no-touch zone. No gate vestige, no weld line, no ejector witness can cross it, because a dark glossy resin magnifies every flow artifact into a visible defect. The gate decision is therefore made against the part geometry before anything else, and the rule is simple: the gate feeds the part from a face that the customer never sees.
Film gates and fan gates spread melt across a hidden edge and are the standard choice for gloss panels and bezels. Submarine and tunnel gates open below the parting line and shear off clean, leaving a vestige that hides inside the tool. An edge gate on the show face leaves a vestige at 0.05 to 0.1 mm even when hand-trimmed, and on piano black that dot fails inspection every time.
Weld lines are the second flow artifact, and they never vanish on gloss. When melt fronts meet around a boss, rib, or insert, the knit line reads as a visible ridge or color shift on a mirror face at any practical depth. The design job is to place gates and flow so the fronts merge at the part edge or under a hidden feature, not across the show face. Our weld line guide covers the flow balancing rules in detail.
If a weld line cannot be moved off the show face, three mold-side tools remain. An overflow well 0.5 to 1 mm deep at the knit location pulls the weak front out of the visible zone. A hotter mold surface, 80 to 120 °C typical for PC, lets the fronts weld with more strength and less visible line. Or the A surface changes from gloss to texture, which is the honest fix when geometry cannot cooperate.
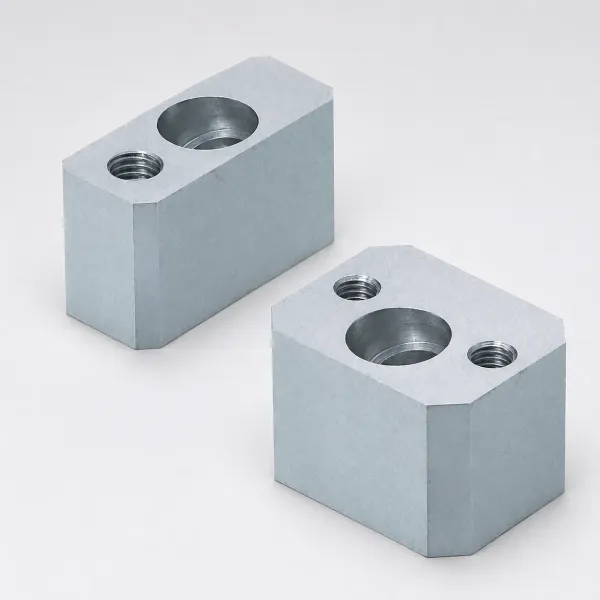
Gate size interacts with gloss in one more way. A gate smaller than 50% of wall thickness pushes shear rates past 40,000 s-1 typical for PC, and over-shear degrades the melt into visible haze and silver streaks. Gloss molds tend to run gates at 60 to 90% of wall thickness with a short land of 0.5 to 1.5 mm, trading a slightly larger vestige on a hidden face for a cleaner melt.
Mold Temperature: The 80 to 120 °C Band for Replication
A gloss face is a copy of the cavity face, and the copy quality depends on how hot the cavity surface is when the melt skin freezes. Low mold temperature freezes the fountain flow skin early, leaving flow marks, haze, and gloss differences between thick and thin sections. High mold temperature keeps the skin fluid long enough to replicate the mirror, which is why gloss tooling runs hot.
PC gloss parts run at 80 to 120 °C mold temperature typical, with optical parts at the top of the band. Below roughly 70 °C, PC shows visible flow marks and non-uniform gloss. PC/ABS cosmetic housings run 60 to 90 °C, PMMA optics run 60 to 90 °C, and ABS gloss parts run 40 to 80 °C. Every grade has its own band, and the band must be written into the mold temperature control spec before the cooling layout is cut.
| Resin | Typical Mold Temperature for Gloss A Surface | Failure Mode Below the Band |
|---|---|---|
| PC | 80 to 120 °C | Flow marks, haze, low gloss below 70 °C |
| PC/ABS | 60 to 90 °C | Orange peel, uneven gloss on large faces |
| PMMA | 60 to 90 °C | Cloudiness, poor optical replication |
| ABS | 40 to 80 °C | Flow lines, matte patches at low end |
← swipe to scroll →
Table note: Temperature bands are typical datasheet guidance for cosmetic parts. Confirm the band against the specific grade datasheet and the approved gloss sample before tooling.
Uniformity matters as much as the set point. A cavity face that varies by more than 5 °C across the gloss area will show gloss variation that no process setting can remove. Cooling channels run 8 to 12 mm diameter typical, spaced 2 to 3 times the channel diameter from the cavity face, and the circuits must be flow-balanced so hot spots never form behind ribs or thick walls.
Running hot costs cycle time, and that trade belongs on the quote. Raising mold temperature from 60 to 100 °C typical adds 10 to 30% to the cooling phase, which is why some shops quote gloss jobs with an oil or water temperature controller rated to 140 to 160 °C. Rapid heat cycle molding pushes the cavity to 150 to 180 °C during fill, then cools fast, and it buys the best replication on thick gloss parts at a premium in controller cost and cycle complexity.
Mold temperature is a mold decision before it is a process decision. The cooling layout, the channel-to-face distance, and the temperature controller range are all fixed at design time. A gloss mold quoted with standard 60 °C cooling is already a reject machine for PC, regardless of what the molder does at the press.
Venting and Burn Marks on Gloss Surfaces
Trapped air is the fastest way to destroy a mirror cavity. As melt fills the last corner of the cavity, air compresses and heats past 300 °C, burning the resin into carbon that deposits on the steel face. One burn mark on a gloss surface means stopping, cleaning, and often re-polishing that area, with 2 to 5 bench hours gone.
Vent depth on gloss cavities is tight because the melt must not flash, yet the air must escape. Typical vent depths run 0.01 to 0.02 mm for PC and PMMA, 0.02 to 0.03 mm for ABS, and 0.01 to 0.02 mm for PA and POM grades. Each vent opens into a relief channel 0.5 to 1 mm deep that carries the air to the atmosphere at the parting line.
Vent placement comes from fill analysis, not guesswork. Vents sit at last-filled points, at the ends of long flow paths, and at weld line locations where converging fronts trap air. A mold flow study on a gloss part typical pays for itself by showing where the last fill lands, before any steel is cut. On a 4-cavity gloss tool the vent layout repeats four times, and each cavity needs its own analysis result.
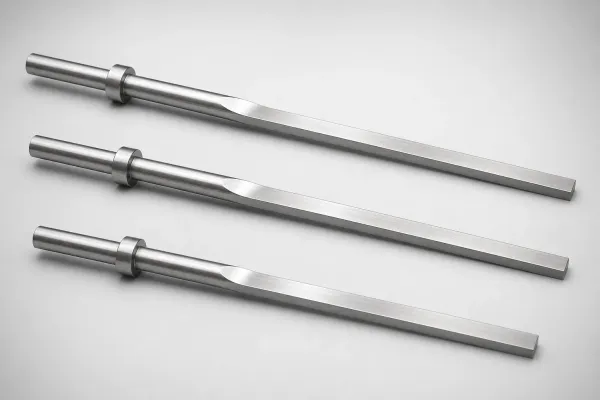
The vent land is part of the gloss system. The land face that seals against the cavity must be polished and flat so no flash forms and no melt wipes into the vent. The vent channel itself stays rough to pull air, and the two surfaces must never be confused during maintenance. Carbon in the vent is the first warning sign that cleaning intervals are too long.
Burn risk also lives at the gate. Over-shear at a tight gate heats the melt locally, and that heat shows as a dark halo or die-out on a gloss face near the gate. The fix is the same gate geometry that protects against splay: cross-section at 60 to 90% of wall, land at 0.5 to 1.5 mm, and a polished gate land at Ra 0.2 µm or better. Gate design and venting are the two mold-side systems that keep a gloss face clean for 100,000 shots or more.
Splay, Shear and Gloss: The Mold-Side Half
Silver streaks and haze on a gloss part are the highest-frequency cosmetic reject, and the mold owns half of the causes. Gas in the melt flashes at the flow front into bubbles that stretch into streaks, and on a mirror face every streak is a reject. The mold-side sources are gate land finish, cold slug control, and runner geometry, all fixed at design time.
Gate land roughness is a steel spec. A land rougher than Ra 0.2 µm tears the melt skin and leaves silver lines with no gas involved. Gloss molds polish the gate land to the SPI A2 range and hold the land length at 0.5 to 1.5 mm, because a long land re-heats the melt and a rough one shreds it. This is a 30-minute polishing detail that prevents a full shift of rejects.
Cold slugs are a runner geometry problem. The first melt into the mold cools against the sprue and runner walls, and that cold plug must be trapped, or it rides to the cavity front and shows as a blotch on the gloss face. Cold slug wells at the sprue and runner ends, sized at 0.5 to 1.0 times the channel diameter in depth, catch the plug every shot.
Moisture and shear fill the other half of the splay equation, and they arrive from the material and the machine. PC must dry below 0.02% moisture, typically at 120 °C for 3 to 4 hours. Screw speed and back pressure set the shear input. When the mold-side sources are clean and the reject persists, the moisture analyzer and the barrel settings are the next stops, and our splay guide runs that diagnosis in order.
One sentence frames the responsibility correctly: gloss rejects are the joint product of mold design and molding process, and the mold side must be proven clean before the process gets blamed. A gloss tool built with polished gate lands, cold slug wells, and balanced runners hands the molder a fair fight. A tool without them hands the molder a defect that no barrel setting can cure.
Texture vs Gloss: When the Safer Call Wins
Texture exists because gloss is a harsh judge. A textured A surface hides weld lines, sink marks, flow marks, and minor orange peel that a mirror face displays without mercy. When a design brief demands gloss but the geometry creates flow problems that cannot be moved, the honest engineering answer is often a controlled texture on part of the surface.
Texture also survives the real world better than gloss. A piano-black gloss face shows fingerprints within one touch, scratches within a week, and requires protective film through assembly and shipping. Medium textures in the SPI C1 to C2 or VDI 24 to 27 range hide wear and handling damage, which is why service-touched surfaces in automotive interiors and power tools rarely spec true gloss.
Texture changes the mold math in three ways. It allows a lower-cost steel like P20 because the surface hides inclusions and polish limits. It relaxes the vent and gate land demands, since the texture scatters what gloss would reveal. And it adds a draft angle requirement, because every micron of texture depth needs release: typical practice adds 1° of draft per side for medium textures and up to 2 to 3° for deep grains. Our texture specification guide gives the SPI to VDI mapping and the draft rules.
The designer's decision is a split surface more often than an all-or-nothing call. Consumer electronics housings routinely combine a gloss center panel with textured edges and hidden faces, and automotive trim mixes gloss bezels with textured surrounds. Every square centimeter of true gloss on the drawing carries a polish cost, a defect risk, and a handling burden, so gloss should be applied where it sells the product and withdrawn where it only adds risk.
Split surfaces cost the mold shop twice if the boundary is not defined. The polish-to-texture transition line must be a machined step or a parting edge, never a soft hand boundary between two hand finishes. Define the transition on the drawing within 0.1 mm, and the cavity comes back consistent, run after run.
Part Design Rules That Protect the A Surface
The part geometry decides how hard the mold has to work for a gloss face. Wall thickness uniformity is the first rule, because a thick section behind a gloss face sinks and shows a halo on the mirror. Ribs and bosses under the A surface should run at 50 to 60% of wall thickness to prevent sink, and if a sink cannot be avoided, the geometry should put it on the hidden face.
Draft is non-negotiable on a mirror. A perfect SPI A1 face with zero draft still sticks, because the vacuum between part and polished steel is strong and ejection force rises 30 to 50% on smooth faces. Deep gloss walls need 0.5 to 1° of draft per side, applied before polishing, because adding draft after a mirror finish means re-cutting the surface.
Ejector pins never touch the show face. Gloss parts eject on hidden ribs, edges, and internal faces, and when a witness is unavoidable it sits in a recess or a textured zone. A pin witness on a piano-black face is a reject at any depth, so the ejector layout is designed against the A surface map, not after it.
Corners and transitions replicate every flaw. Internal radii below 0.2 to 0.5 times wall thickness concentrate stress and can whiten on ejection. Milling scallops at Ra 1.6 to 3.2 µm show straight through a gloss coat, so gloss cavities go through finish grinding or EDM before polishing, never straight from a roughing pass.
Flow length sets the gate count, and the gate count sets the weld line risk. A long thin gloss part needs more gates, each one a potential flow front and a potential knit line on the show face. The part designer and the mold engineer resolve this together at the DFM stage: shorten the flow path, thicken the wall locally, or accept a texture in the merge zone. Resolving it on the drawing costs an hour. Resolving it in steel costs 10 to 20% of the mold.
Protection, Handling and Maintenance Between Runs
A mirror cavity is a precision surface with the fragility of a lens. One contact with an ejector pin, a screwdriver, or a stray insert scratches it, and a scratch on a gloss face means a full re-polish of that area at 2 to 5 bench days. The handling rules are written before the mold ships: gloved hands only, covers on open tools, and nothing ever placed on the cavity face.
Cleaning compounds need the same care. Ammonia-based and abrasive cleaners etch or scratch mirror steel, so gloss cavities clean with neutral solvents and soft lint-free cloths. Polishing paste residue left in corners hardens and shows as a stain on the first molded part, which is why cavity cleaning after any bench work ends with a solvent wipe and a flashlight check at a 45° angle.
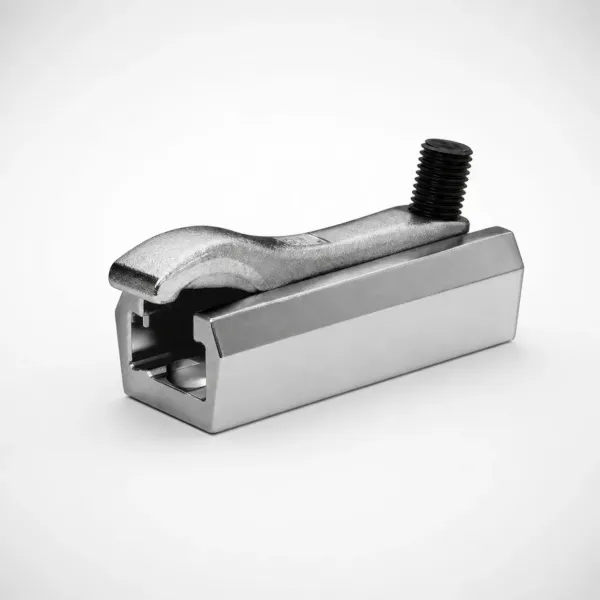
Storage is part of the gloss life. A hot mold at 80 to 120 °C that stops for the weekend pulls condensate from humid shop air, and on non-stainless steel that moisture starts rust spots within hours. Dry the mold, apply a rust inhibitor or VCI paper, and keep the faces separated with protective sheets so nothing touches the mirror in the rack.
Maintenance intervals follow the wear data. Vents on gloss tools clean every 50,000 to 100,000 shots typical, because carbon in a vent is the first sign a burn is one shot away. Cavity gloss is re-verified at every planned maintenance by molding a witness part and checking gloss units against the approved sample within 3 to 5 units. When ejector pins or leader pins near the end of their life on any tool, replace them from standard stock before wear debris scratches the cavity, and standard mold components ship from DieStrike in 3 to 7 days for exactly this reason.
The care system extends to repairs. When a gloss mold returns from any bench work, the first check is the A surface under raking light, because a wiped mirror that was never re-polished still carries the ghost of the old scratch. A gloss cavity is a component with a documented finish, and maintenance treats it like one: measure, protect, and record.
FAQ: High-Gloss Mold Design
Q1. Which steel should a piano-black part use?
For a class A piano-black surface, S136 ESR through-hardened to 48-52 HRC is the typical choice. Below that band, P20 at 28-32 HRC pits in the Ra 0.012 to 0.05 µm mirror range, and the first pit ends production for a re-polish.
Q2. What SPI grade do production gloss parts actually need?
SPI A1 at Ra 0.012 µm is the optical top end. Most consumer cosmetic parts spec A1 to A2, Ra 0.012 to 0.05 µm, and verify with a 60° gloss meter within 3 to 5 gloss units of the approved sample. Spec the grade and the measured Ra band on the drawing, not the word mirror.
Q3. Can a weld line ever be invisible on a gloss surface?
No. A knit line on a dark glossy face reads as a ridge or a color shift at any practical depth. The mold-side answer is to place gates and flow so the fronts merge off the show face, or to move the defect with an overflow well 0.5 to 1 mm deep at the knit location.
Q4. Is the 80 to 120 °C mold temperature worth the longer cycle?
Usually yes on PC gloss parts. The higher mold temperature adds 10 to 30% to the cooling phase typical, while a low-temperature tool rejects 10 to 30% of the shift to flow marks. One reject day on one machine outweighs the cycle penalty of a correctly specified temperature controller.
Q5. How often does a gloss cavity need re-polishing?
It depends on resin, mold temperature, and handling, but typical gloss cavities re-polish every 100,000 to 300,000 shots, or sooner when a witness part drifts more than 3 to 5 gloss units from the approved sample. Corrosion, burns, and scratches force the schedule earlier.
The Bottom Line
High-gloss rejects are designed in, not molded in. Choose mirror-capable steel above 46-52 HRC, spec the SPI grade with a Ra band, hide every gate and weld line off the show face, run the mold temperature the resin demands, and protect the mirror like the precision surface it is. Each call is cheap at design and expensive after steel.
DieStrike builds gloss-capable injection molds under IATF 16949 across 120+ machines. Molds ship in 2 to 5 weeks with geometry at ±0.005 mm standard and ±0.002 mm precision. Hardened cavity steel runs at HRC 62, and DFM feedback returns within 24 hours. Connector and electronics OEMs including TE Connectivity, Amphenol, and Luxshare run production on the same discipline.
Send your gloss part drawing for a DFM review with the steel, polish grade, and mold temperature written into the quote by contacting DieStrike.
KEEP READING
Related Reading
Mold Polishing Guide: From Ra 3.2 to SPI A1
The bench craft behind every mirror cavity: SPI and SPE grades, the diamond grit sequence from 240 to 3000, and how steel hardness sets the polish ceiling.
Read articleArticleHow to Specify Mold Texture: SPI, VDI and Grain
When a gloss face is the wrong call, texture covers flow defects and wear. SPI and VDI grades, grain depth, and the draft angle add-on per µm of texture.
Read articleArticleHow to Fix Splay and Silver Streaks: Moisture, Shear and Mold-Side Sources
Silver streaks and haze kill gloss parts at 10 to 30% reject rates. Moisture targets, shear limits at the gate, and the mold-side fixes that end the defect.
Read articleServiceMold Design & DFM
DieStrike reviews gate placement, steel, polish grade, and mold temperature on the drawing, with DFM feedback returned within 24 hours before steel is cut.
Read articleNEXT STEP
Ready to Start Your Mold?
Send us your element dimensions or part numbers — our team responds within 24 hours with pricing and lead time.

Written by
Ray ChanMold Buyer's Guide Author · Precision Mold Manufacturing Specialist. Ray helps global importers, distributors and OEMs source factory-direct molds and mold parts.