
Mold Polishing Guide: From Ra 3.2 to SPI A1
Table of Contents
An unspecified cavity finish is the most expensive free decision on a mold. The cavity ships with the as-machined surface — typically Ra 1.6-3.2 µm (63-125 µin) from finish milling — and at the first trial the cosmetic face comes out frosted, the part sticks and needs 30-50% higher ejection force, and the customer rejects the whole first run against a gloss standard nobody wrote down. Re-polishing that cavity to SPI A2 afterwards means 3-5 extra days on the bench and a change-order line that lands at 10-20% of the original mold price on small tools. The finish was going to be paid for either way — the question is whether it is paid for once, on the quote, or twice, after the rejection.
Polishing is the last operation before a mold runs, and it is the one most often left to assumption. Machining and heat treatment are specified down to the micron and the HRC; surface finish is frequently handed to the mold shop as "make it shiny." That hand-wave is where the money leaks. The difference between SPI B2 (Ra 0.2 µm) and SPI A2 (Ra 0.025 µm) is roughly two grit stages and a few bench hours on a small cavity — but on a large one, it can be the difference between a standard quote and a premium that doubles the finishing line.
This guide is for mold buyers, purchasing teams, and product engineers who need to write a finish spec that means something. It covers the Ra and SPI grade systems, the grit sequence that actually produces a mirror, how steel grade limits what finish is reachable, the defects that show up when polishing goes wrong, and the exact wording to put on an RFQ. The Ra values, grit sizes, and hardness figures below are typical industry values for production injection molds — starting points to validate against your part and your mold shop, not guarantees.
The Snapshot
- SPI A1 is the optical top end at Ra 0.012 µm (0.5 µin) — a #3 diamond polish. Most production cosmetic parts spec A2-B2, i.e. Ra 0.025-0.2 µm (1-8 µin), which is reachable on properly hardened steel.
- Grit is a staircase, not a shortcut: typical cosmetic sequences run 240-400-600-800-1200-3000 grit, then 1-3 µm diamond paste. Skipping more than one stage leaves the previous scratches — visible at a 45° inspection angle — and skipping from 600 straight to 3000 guarantees a cloudy part on the first trial.
- Steel hardness decides the ceiling: P20 at 28-32 HRC realistically tops out around SPI B2 (Ra 0.2 µm) with pitting risk in the mirror range; 718H at 33-38 HRC reaches B1-A2 (Ra 0.1-0.025 µm); S136 at 48-52 HRC is required for reliable A1-A2 (Ra 0.012-0.025 µm) on optics and lenses.
- EDM surfaces add a step: a finish EDM cut of Ra 0.4 µm (16 µin) leaves a recast layer roughly 2-10 µm thick that must be removed before polishing, or it flakes off in service. Polishing after EDM starts at 400-600 grit, not 240.
- Orange peel, pitting, and wash-out are the three defects that kill cosmetic parts — caused respectively by skipped grits and excess pressure, steel inclusions or porosity, and over-polishing edges that round off dimensions by 0.01-0.05 mm.
- Release is a system, not a polish: even an SPI A1 surface needs 0.5-1° draft per side on deep walls; a perfect mirror with zero draft still sticks. See the 9 draft angle mistakes guide for the geometry side.
- DieStrike writes the finish spec into every RFQ response, polishes to the stated SPI grade, and verifies cosmetic surfaces with a comparator block plus a profilometer check on critical areas before the mold ships.
What Mold Polishing Actually Is
Polishing is controlled, micron-scale material removal. Each stage uses a finer abrasive to cut down the peaks left by the previous stage until the surface is smooth enough to reflect light without scattering. On the Ra scale, that means driving the arithmetic mean roughness from the 1.6-3.2 µm machined range down to 0.05 µm or below — a removal depth of roughly 2-5 µm of material over the whole surface, though individual passes with a coarse stone can cut 10-20 µm off high spots.
It is important to distinguish polishing from the operations around it. Grinding removes metal at 10-100 µm per pass and leaves a directional lay. Lapping uses a loose abrasive between two surfaces and produces a flat, non-directional finish. Polishing is the final abrasive stage — typically diamond compounds or bonded stones from 240 grit down to 1 µm particle size — and it removes almost no material, only the peaks of the roughness profile. A polisher is not fixing geometry; if a cavity is 0.02 mm low, polishing will not bring it back. Geometry is fixed before the polish stages start, and polishing simply reveals the surface quality the steel and machining steps have set up.
Two variables control the result: abrasive size and pressure. Abrasive size sets the theoretical floor — a 600 grit stone leaves scratches around 15-20 µm wide that a 1200 grit stone then halves, and so on down the sequence. Pressure controls how aggressively the abrasive cuts and how much heat it generates. Too much pressure on a fine grit stalls the surface — the abrasive stops cutting, glazes over, and burnishes the steel into a locally overheated, smeared layer. Bench polishers read this by feel; on a 200 mm cavity, a competent polisher will work in 50-100 mm zones, cross-hatching the stroke direction 45-90° between stages so that each stage's scratches are visible and removable, and checking with a magnifier or an optical comparator between every stage change. That cross-hatch discipline is the practical difference between a mirror and a surface that looks fine head-on and streaks at an angle.
The finish you can actually hold depends on the whole chain upstream: steel grade and hardness, machining or EDM quality, and whether the surface was polished before or after heat treatment. A polished surface is only as good as the steel beneath it — which is why the steel selection and the finish spec belong in the same conversation. Our P20 vs H13 vs S136 comparison covers the material side of that decision, and the steel itself is worth specifying deliberately when cosmetics matter.
Ra Scale and SPI Finish Grades
Ra — roughness average — is the arithmetic mean deviation of the surface profile from its centerline, measured in micrometers or microinches. It is the number on most drawings: Ra 0.4 µm, Ra 0.2 µm, Ra 0.05 µm. It is a useful gate, but Ra alone does not describe a cosmetic surface — two surfaces with identical Ra can look completely different depending on the spacing of the roughness peaks, which is why the mold industry works mostly in the SPI/SPE finish grades, a 12-step system from A1 (mirror) to D3 (coarse blast).
The SPI grades map to specific Ra ranges and specific processes. The A grades are diamond-polished mirrors; the B grades are paper-polished semi-glosses; the C grades are stone finishes; the D grades are dry-blast textures. The table below lists all twelve grades with typical Ra values and the process that produces them — the numbers are the widely published SPI/SPE standard values.
| SPI grade | Typical Ra (µm) | Typical Ra (µin) | Producing process | Typical application |
|---|---|---|---|---|
| A1 | 0.012 | 0.5 | #3 diamond compound, 1-3 µm | Optical lenses, light pipes, precision optics |
| A2 | 0.025 | 1.0 | #6 diamond compound, 3-6 µm | High-gloss cosmetic, phone and medical covers |
| A3 | 0.05 | 2.0 | #15 diamond compound, 6-15 µm | Glossy consumer parts, appliance faces |
| B1 | 0.1 | 4.0 | #600 grit paper | Semi-gloss, subtle texture tolerance |
| B2 | 0.2 | 8.0 | #400 grit paper | Dull gloss, interior automotive trim |
| B3 | 0.4 | 16.0 | #320 grit paper | Satin, low-gloss surfaces |
| C1 | 0.8 | 32.0 | #600 stone | Non-visible functional surfaces |
| C2 | 1.6 | 63.0 | #400 stone | Draft surfaces, hidden ribs and bosses |
| C3 | 3.2 | 125.0 | #320 stone | Coarse stone, structural areas |
| D1 | 7.6 | 300.0 | Dry glass-bead blast | Light texture, non-cosmetic |
| D2 | 15.0 | 600.0 | Dry glass-bead blast, coarser media | Medium texture, grip surfaces |
| D3 | 18-30 | 700-1200 | Dry coarse bead / sand blast | Heavy texture, masking tool marks |
← swipe to scroll →
SPI/SPE standard finish grades and typical Ra values; actual measured Ra depends on steel hardness, pressure, and polisher technique.
Three practical notes on reading this table. First, the A grades are expensive for a reason: each grade step below B1 roughly doubles the bench time on the same area, and the A1-A2 range needs hardened steel, controlled pressure, and often a clean-room-grade bench because airborne dust scratches a mirror finish. Second, Ra and perceived gloss do not correlate one-to-one — a 60° gloss meter reading is the better check for how the part will actually look, and most automotive and consumer gloss specs are written in gloss units, not Ra. Third, the D grades are texture, not polish; if you want a soft-touch or leather-look surface, that is a separate texture process (chemical etch or bead blast) applied after polishing, and the two specs need to be stated separately on the drawing.
Where your part sits on this table is a function of what the customer sees and touches. Visible cosmetic surfaces on consumer and medical products typically land at A2-B2 (Ra 0.025-0.2 µm); mating and hidden surfaces at C1-C3 (Ra 0.8-3.2 µm); and blast textures at D1-D3. For medical devices specifically, the finish spec interacts with cleanliness and sterilization requirements — the mirror range sheds less and cleans more predictably — which is one of the reasons medical mold steel selection tends toward hardened stainless grades. If your part has cosmetic and functional faces on the same cavity, write both grades on the drawing; a single "polish all" note leaves the dark side of the part at whatever the machinist last touched.
SPI to VDI: The Conversion Table
European drawings — especially German and Austrian automotive specs — call finishes in VDI 3400 numbers instead of SPI grades. The two systems overlap but are not identical: SPI is a mold-polishing standard focused on glossy-to-matte finishes, while VDI 3400 is a texture standard that runs deeper into the rough range. Most shops treat them as roughly convertible in the range where they overlap. The table below maps all twelve SPI grades to their usual VDI equivalents and the Ra values both systems are anchored to. Use it to translate a German drawing into an SPI spec — or to check that a "VDI 24" your molder quoted actually matches the visual you approved.
| SPI grade | Typical Ra (µm) | VDI 3400 equivalent | Visual character |
|---|---|---|---|
| A1 | 0.012-0.025 | No direct VDI match (mirror) | Optical mirror — lenses, light pipes |
| A2 | 0.025-0.05 | No direct VDI match | High gloss, near-mirror |
| A3 | 0.05-0.10 | VDI 0-5 | High polish, glossy consumer |
| B1 | 0.05-0.10 | VDI 6 | Fine semi-gloss |
| B2 | 0.10-0.15 | VDI 7-8 | Medium semi-gloss |
| B3 | 0.28-0.32 | VDI 9-10 | Satin, low gloss |
| C1 | 0.35-0.40 | VDI 11-12 | Fine matte |
| C2 | 0.45-0.55 | VDI 13-15 | Medium matte |
| C3 | 0.63-0.70 | VDI 16-18 | Coarse matte, non-cosmetic |
| D1 | 0.80-1.00 | VDI 21-24 | Light texture |
| D2 | 1.00-2.80 | VDI 24-30 | Medium texture, grip surfaces |
| D3 | 3.20-18.0 | VDI 30-45 | Heavy texture, masking tool marks |
← swipe to scroll →
SPI-to-VDI conversion ranges after published SPI/VDI reference tables (Plastopia, Upmold, and VDI 3400 cross-reference charts). These are approximate equivalences, not exact identities — when a drawing is critical, order the physical texture plaque in both standards and compare under light.
Three conversion traps to avoid. First, the mirror grades (A1-A2) have no true VDI equivalent — VDI 3400 starts above the gloss range, so a German drawing asking for a mirror will specify it as "polished" rather than a VDI number. Second, Ra values between the two tables do not line up exactly because the two standards measure differently; use the Ra column as the tie-breaker when SPI and VDI numbers disagree. Third, when a molder quotes a texture that sounds close but is not on your drawing — "we can do VDI 24, same thing" — ask for the physical plaque before you approve steel cutting. Texture is judged by eye, not by number.
Diamond Grit and Stone Sequence
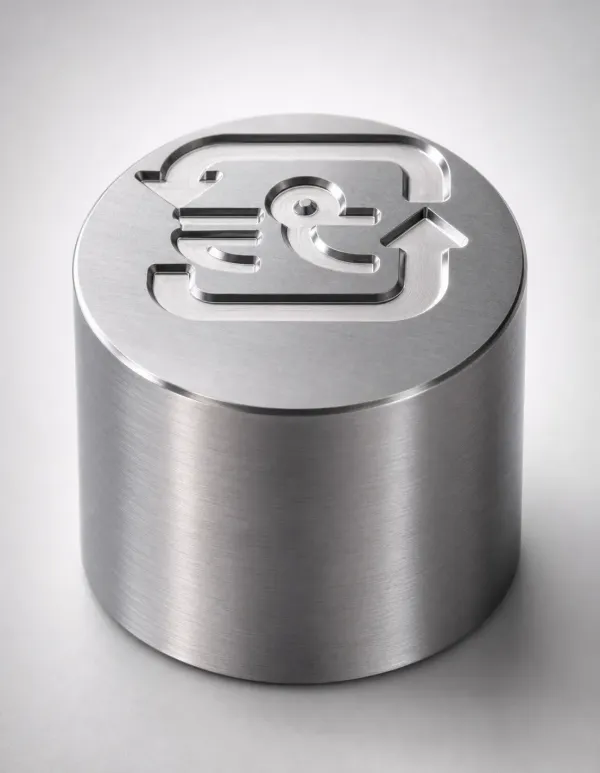
The grit sequence is the actual recipe for a mirror. A typical cosmetic sequence runs 240-400-600-800-1200-3000 grit in stones or paper, then a diamond-paste buff at 6 µm, 3 µm, and sometimes 1 µm for the A1-A2 range. Each stage exists for one job: remove the scratches of the previous stage and leave scratches small enough for the next stage to remove. The rule of thumb is never to jump more than one full grit step — a 600-to-3000 jump leaves 600 grit scratches buried under a semi-mirror, and they show up the moment light hits the part at an angle.
| Stage | Grit / particle | Typical particle size | Roughly achievable Ra after stage | Job at this stage |
|---|---|---|---|---|
| 1 | 240 grit SiC stone | ≈ 60 µm | 0.8-1.2 µm | Remove EDM recast layer and machining scallops |
| 2 | 400 grit | ≈ 35 µm | 0.4-0.6 µm | Level the 240 grit scratches |
| 3 | 600 grit | ≈ 20 µm | 0.2-0.4 µm | Take the surface to B2-B3 territory |
| 4 | 800-1200 grit | ≈ 10-15 µm | 0.1-0.2 µm | Approach B1-A3; first visible gloss |
| 5 | 3000 grit | ≈ 4-6 µm | 0.05-0.1 µm | Remove 1200 grit scratches; near-mirror |
| 6 | Diamond paste 6 µm | 6 µm | 0.025-0.05 µm | Mirror range A3-A2 |
| 7 | Diamond paste 3-1 µm | 1-3 µm | 0.012-0.025 µm | A2-A1 optical finish on hardened steel |
← swipe to scroll →
Typical production sequence and approximate outcomes; particle sizes and Ra values are typical for silicon carbide stones and diamond compounds.
Two techniques make or break the sequence. First, the cross-hatch check: between stages, the polisher changes the stroke direction by 45-90°, which makes the previous stage's scratches visible under a bench lamp so they can be confirmed fully removed before moving on. The moment a stage is declared "done" with scratches still present, every subsequent finer stage is polishing scratches instead of the surface — and the defect is baked in. Second, lubrication and pressure control: stones run with oil or water depending on the abrasive, and the final diamond-paste stages run on felt or wool bobs with very light pressure. A burnished, glazed surface from excess pressure reads as a mirror under the lamp but fails gloss and orange-peel checks on the molded part.
Time per stage is not linear — the coarse stages remove material quickly, and each finer stage takes longer per square centimeter because it must remove the previous stage's full scratch pattern. As a rough benchmark, a 100 × 100 mm flat area takes about 1-2 hours to reach B2 and 3-6 hours to reach A2 in the hands of a competent polisher, and ribbed or corner-heavy geometry multiplies that. This is why the finish spec, not the mold size, drives the polishing line item on the quote — and why the same drawing with a different finish callout can swing the mold price by several percent.
Hand Polishing vs CNC and EDM Finish
Every polished mold starts from machined steel, and the starting surface decides how much hand work follows. A finish-milled cavity with a good ball-end mill at a tight stepover lands around Ra 0.4-0.8 µm (16-32 µin) — essentially a B3-C1 starting point that needs only the fine half of the grit sequence. A rough milled surface at Ra 1.6-3.2 µm means starting at 240 grit and paying for the full staircase. The machining stepover, tool radius, and finishing strategy therefore directly control the polishing budget — a detail worth aligning during DFM review, before steel is cut, because it is nearly free to plan and expensive to undo.
CNC finishing has its own ceiling. High-speed machining with a polished ball-end mill can hold Ra 0.2-0.4 µm on open surfaces, but the cutter always leaves a scallop pattern that becomes visible on glossy parts, and narrow ribs, square corners, and fine features are out of reach of any round tool. That is where EDM takes over. A finish EDM cut with proper parameters holds Ra 0.02-0.4 µm (1-16 µin) — nominally in the mirror range already — but the EDM surface is not polishable as-is: the spark erosion leaves a recast (white) layer typically 2-10 µm thick that is harder, brittle, and full of micro-cracks. Polishing over it produces a finish that flakes or pits in service. The recast layer must be removed first — mechanically or with a light polishing pass starting at 400-600 grit — before the surface can be trusted.
The division of labor in a production mold shop is therefore: CNC removes geometry, EDM reaches what cutters cannot, and hand polishing does the last 0.1-0.4 µm of Ra on cosmetic surfaces. Hand polishing still dominates the mirror range because it is the only method that follows a free-form surface without a fixed toolpath, and a skilled polisher reads the surface by feel and light in a way no machine loop does. On the DieStrike floor, Sodick EDM machines hold finishes down to Ra 0.02 µm, and the bench team carries the surface from there to the specified SPI grade — for example, taking a B1 start to A2 with 1200-3000 grit and 3 µm paste.
There are automation aids: ultrasonic polishing heads cut the coarse stages on open areas, and spindle-mounted diamond tools reach flat floors, but ribs, cores, and corners stay hand work. When the mold needs repair work — a weld, a recut edge, a damaged cosmetic face — the repolish must match the original grade, and re-polishing after mold repair is part of the repair scope, not a surprise. If you are holding tight part tolerances alongside a mirror finish, the polishing allowance matters too: every polishing stage removes a little material, typically 0.005-0.02 mm per stage on high spots, which is why critical dimensions are finished before the polish stages and why a polish spec and a tight tolerance need to be reconciled — the interplay is covered in our 0.002 mm tolerance guide.
Polishing Steel Grades: S136 vs 718H vs P20
The steel decides the finish ceiling before the polisher touches the surface. Two properties matter: hardness and cleanliness. Hardness supports a scratch-free mirror — soft steel smears and digs under abrasive pressure, so the A1-A2 range effectively requires hardened steel in the 45-52 HRC band. Cleanliness — the number and size of non-metallic inclusions — decides whether pitting shows up in the mirror range: each inclusion exposed at the surface is a potential pit. That is why the same geometry can polish to A2 in one steel and pit at B2 in another.
| Property | S136 (hardenable stainless) | 718H (prehardened P20 mod) | P20 (prehardened) |
|---|---|---|---|
| Typical hardness in service | 48-52 HRC (hardened and tempered) | 33-38 HRC (prehardened) | 28-32 HRC (prehardened) |
| Realistic polish ceiling | A1-A2 (Ra 0.012-0.025 µm) | B1-A2 (Ra 0.1-0.025 µm) | B2-C1 (Ra 0.2-0.8 µm) in practice |
| Inclusion / pitting risk in mirror range | Very low (vacuum ESR refined) | Low to moderate | Moderate to high |
| Corrosion resistance | High — stainless, ~13-16% Cr | Moderate — Ni alloyed | Low |
| Typical applications | Optics, lenses, medical, food-contact | Cosmetic consumer, automotive trim | Prototypes, low-cavity, non-visible |
| Relative cost per kg | Highest of the three | Mid | Lowest of the three |
← swipe to scroll →
Typical properties and practical polish ceilings for common mold steels; the achievable grade depends on the specific heat, supplier quality, and shop technique.
S136 — a hardened stainless mold steel in the 48-52 HRC range — is the default for mirror work. Its hardness lets the polisher push fine abrasives without the surface digging, and its ESR-refined cleanliness keeps inclusions out of the visible range, which is why it shows up in optics, lenses, and medical cavities. 718H is the workhorse for mid-gloss cosmetics: prehardened to 33-38 HRC, it polishes reliably to B1 and reaches A2 on good material with careful technique, at a meaningfully lower cost than S136. P20 at 28-32 HRC polishes acceptably for functional surfaces but its softer matrix and higher inclusion content make the mirror range a lottery — pitting shows up exactly where it hurts most, in the middle of a glossy panel. A full technical comparison of the three is in the P20 vs H13 vs S136 article, and our mold steel product page lists the grades we stock for new tools.
One more rule that buyers regularly miss: polish after heat treatment, not before. A cavity polished in the soft state and then hardened will distort at the surface and lose the mirror; the correct sequence is harden, temper, then polish. This is a scheduling constraint — hardening adds days — and it is one of the reasons a mirror finish on a hardened steel tool carries a longer lead time than the same finish on a prehardened grade. If the part is medical or food-contact, the corrosion side of the equation matters as much as the mirror, which is where the stainless choice wins outright — see how to select mold steel for medical molds for the full criteria.
Common Defects: Orange Peel, Pitting, Wash-Out
Polishing defects are rarely random — each one points at a specific break in process discipline. The three that reject parts most often are orange peel, pitting, and wash-out, and all three are preventable at the spec or process stage.
Orange peel is the fine dimpled texture like an orange skin that appears on molded glossy parts. It comes from polishing with too much pressure or skipping grit stages, which smears the steel surface instead of cutting it; the smeared layer then releases differently than the bulk, and the molded surface comes out pebbled. On the bench it is detectable before molding: a glazed, wavy reflection under a raking light. The fix is to go back two or three grit stages and re-polish with lighter pressure — typically back to 600 grit on the affected zone, then forward again. Prevented by enforcing the grit staircase and by keeping pressure light from the 1200 grit stage onward. Ra alone will not catch it — a smeared surface can read Ra 0.05 µm and still mold orange peel — which is why a gloss check on the molded part, not just the cavity, is part of validation.
Pitting is the exposure of steel inclusions or porosity at the surface. Inclusions — non-metallic particles in the steel — polish at a different rate than the matrix, so in the mirror range they stand proud and then tear out, leaving pits. Pores in non-vacuum steels do the same. Pitting is a material problem that surfaces at the worst moment: mid-polish, on the expensive fine stages, on the part of the cavity the customer will photograph. The practical fixes are steel selection (ESR-refined grades for mirror work), and in extreme cases weld repair and re-polish of the pit. If pits keep appearing on the same steel heat, that heat is the problem, not the polisher. On a running mold, pits in a cosmetic face mean the part is scrapped until the cavity is re-polished — the repair scope is covered in how to troubleshoot mold defects.
Wash-out is the over-polishing that rounds off sharp edges, ribs, and fine details. Every polishing stage removes material — typically 0.005-0.02 mm per stage on high spots — so a rib edge polished through all seven stages can lose 0.01-0.05 mm of definition, and a gate land polished flat can change the fill behavior. Wash-out is how a mirror cavity produces parts that look glossy but have soft, undefined edges and dimensional drift on fine features. It is prevented by protecting edges with tape or a stop-off, by using firm-backed abrasives on flats and letting edges see less pressure, and by verifying critical features after the coarse stages, before the mirror stages make them unmeasurable. Where edge sharpness and a mirror must coexist, the drawing should say so — a note that reads "polish to SPI B1 on faces; keep rib edges sharp" gives the bench a rule to work against.
Two secondary defects complete the picture. Burnishing — the glazed, overheated layer from excess pressure — shows up later as sink marks and flow lines on glossy parts and can locally temper hardened steel if the surface temperature spikes toward 200 °C during polishing. Contamination scratching — a single airborne dust particle or a dirty compound loaded onto a wool bob — scribes a visible arc into an otherwise finished A2 surface; that is why mirror benches stay covered and why a "clean all, then polish last" rule applies. If your part shows a repeating scratch pattern on the molded surface, the first suspect is a contaminated bob or cloth, not the cavity geometry.
How to Spec Polishing on an RFQ
A finish spec is only as good as its wording, and "polish to mirror" is not a spec — it is a hope. What the mold shop needs is the SPI grade or an Ra value per surface, the areas it applies to, and the verification method. The difference between a quote written this way and a quote written with "polish all" can be thousands of dollars, because the shop prices the worst interpretation of an ambiguous note.
Write the spec in four parts. First, the grade: name the SPI grade (A2, B1, C1) or an Ra value (Ra 0.05 µm) per surface family — cosmetic faces, mating faces, hidden faces. Second, the area: a surface ID or zone label, because one cavity can carry three grades. Third, the verification: how the finish will be judged — a comparator block, a 60° gloss meter target, or a profilometer Ra reading on a designated check point. Fourth, the exclusions: where polishing stops, e.g. "no polish on vent areas," "keep seal-off edges sharp," "texture per drawing after polish." A complete callout looks like this: "Cavity face CV-01: polish to SPI A2 (Ra 0.025 µm), verify with comparator block and gloss check on first molded sample; keep rib edges sharp; no polish on vent channels."
Put the finish spec in the RFQ, not in a later email. A finish decided mid-project lands as a change order with bench time and schedule impact; a finish written into the mold RFQ is quoted, scheduled, and measured like any other requirement. This matters twice as much on multi-cavity tools, where every cavity must match — a common cause of first-article rejection is cavity-to-cavity gloss variation on a tool where the finish was never specified per cavity.
Finally, tie the finish to sampling and acceptance. Agree that finish acceptance happens on the molded part, not only on the cavity: the cavity can read Ra 0.025 µm and still mold orange peel if the process smears, and gloss is a molded-part property. The standard DieStrike flow is: polish to the stated grade, verify with a comparator block on the bench, then check gloss and surface on first-off molded samples against the agreed reference. If your part is cosmetic, the finish belongs on the drawing, in the RFQ, and in the sampling plan — all three places, or the first rejection will put it there for you.
FAQ: Mold Polishing Questions Buyers Ask
Q1. What Ra value is a mirror finish?
A true mirror — the kind you can read a reflection in — starts around SPI A3, Ra 0.05 µm (2 µin), and gets deeper at A2 (Ra 0.025 µm) and A1 (Ra 0.012 µm). Anything at or above Ra 0.1 µm (B1) reads as semi-gloss. Most "mirror" requests in the field actually land at A2-B1.
Q2. How much lead time does polishing add?
Roughly 1-2 days for a small cavity to B2, 3-6 bench-hours per 100 × 100 mm to A2 on a flat area, and more on ribbed geometry; a full cosmetic tool with hardened steel and multi-cavity matching typically adds 1-2 weeks over a non-polished build. Hardening before polishing adds its own heat-treatment cycle on top.
Q3. Can any steel be polished to SPI A1?
No. The A1-A2 range reliably requires hardened steel in the 45-52 HRC band with low inclusion content — S136-class grades. P20 at 28-32 HRC tops out around B2-C1 in practice before smearing and pitting take over. If the drawing demands A2, the steel must be chosen to support it; see the steel comparison table above.
Q4. Can a mold have both a polished area and a textured area?
Yes — it is common. Polish first, then apply texture (chemical etch or blast) only to the textured zones, with the textured area masked off during polishing. Both specs need separate callouts on the drawing; a "polish all" note will either destroy the intended texture or leave the glossy area unpolished.
Q5. How is the finish verified?
Three complementary checks: a profilometer measures Ra on a designated check point; a comparator block set (SPI finish standards) gives a visual match; and a 60° gloss meter on the first molded sample judges how the part actually looks. Ra alone does not predict gloss, so serious cosmetic programs use at least two of the three.
Q6. Does a finer polish hurt mold life?
It can help release and wear — a polished surface has less mechanical interlock for the part to grip, which lowers ejection force and drag on the cavity wall. The risk is in the process, not the finish: over-polishing edges causes wash-out, and polishing too aggressively can locally overheat and soften the steel. Polished correctly on hardened steel, a mirror surface is not a life liability.
Q7. Should cores and ejectors be polished too?
Yes, but to a different grade. Cores and side walls that the part shrinks onto need a good release finish — typically B2-B3 or better (Ra 0.2-0.4 µm) — plus adequate draft, because that is where sticking happens. Cosmetic A-grade polish belongs only on the surfaces the customer sees; polishing everything to A2 adds cost without benefit. Draft angles of 0.5-1° per side still apply on polished surfaces — geometry, not gloss, does the release work, as detailed in the draft angle guide.
The Bottom Line
The finish is specified, or the finish is a surprise. From Ra 3.2 µm machined stock to SPI A1 at Ra 0.012 µm is a staircase of grit stages, steel decisions, and bench hours — and every rung is quotable if it is written down and unquotable if it is not. The practical chain: pick a steel that supports the target grade, machine or EDM to a starting surface that minimizes the staircase, enforce the grit sequence without jumps, watch for orange peel, pitting, and wash-out, and put the grade, the area, and the verification method into the RFQ. Cosmetic parts and medical devices carry the highest finish stakes, and the choices upstream — steel, machining strategy, and spec discipline — decide whether the mirror holds or the first trial rejects.
DieStrike polishes to the stated SPI grade, writes the finish spec into every RFQ response, and verifies cosmetic surfaces on the bench and on first-off samples. If your part needs a finish you can hold a rejection against, send us the drawing — talk to our mold team and we will put the grade, the schedule, and the verification in writing before steel is cut. For the design side of getting cosmetic parts right — draft, geometry, and release — our how to design for moldability guide closes the loop.
KEEP READING
Related Reading
5 Mold Cooling Channel Design Tips for Faster Cycles
Mold maker's 5 cooling channel design rules: channel-to-cavity distance 2-2.
Read articleArticle5 Shrinkage Compensation Rules for Mold Design
Shrinkage compensation decides mold accuracy. Five rules: material rates from 0.3% to 2.
Read articleArticle5 Ways to Reduce Mold Cost Without Cutting Quality
Five proven ways to reduce injection mold cost without cutting quality: DFM before quoting, right-sized cavity count,…
Read articleArticle7 Gate Design Best Practices for Balanced Filling
Mold maker's 7 gate design rules for balanced multi-cavity filling: gate depth 50-80% of wall thickness, land 0.5-1.
Read articleNEXT STEP
Ready to Start Your Mold?
Send us your element dimensions or part numbers — our team responds within 24 hours with pricing and lead time.

Written by
Ray ChanMold Buyer's Guide Author · Precision Mold Manufacturing Specialist. Ray helps global importers, distributors and OEMs source factory-direct molds and mold parts.