
How to Design Molds for Gas-Assisted Injection Molding
Table of Contents
A 480 mm washing machine door handle was converted from solid ABS to gas-assisted molding to remove 35 percent of its weight. The first trial shot sent the gas channel drifting toward the outside wall. The channel thinned the visible face to 1.1 mm and blew a 4 mm hole through the grip during gas hold. The tool had been copied from a solid handle mold. The overflow cavity held only 8 percent of the channel volume it was supposed to feed. The weight saving was real. The part was scrap.
Gas-assisted injection molding (GIM) injects nitrogen into a partly filled cavity. The gas core pushes melt outward against the cavity walls, packs the section from the inside, and leaves a hollow channel behind. The mold carries most of that decision. Channel diameter, channel path, overflow cavity volume, gas pin location, transition radii and venting decide where the gas actually goes.
This guide covers the mold-side rules for nitrogen channels from 6 to 30 mm. It covers the overflow cavities that terminate them and the gas pin interface that ties into a hot runner or sprue bushing. It also covers the failure modes that send a GIM tool back to the drawing board. Process curves appear only as inputs to a mold decision. All values are typical industry figures, so confirm them against your resin datasheet and press capability before steel is cut.

The Snapshot
- Gas channels run 6 to 30 mm in diameter and are sized at 2 to 3 times the nominal wall. That caps a 3 mm wall at a 6 to 9 mm channel.
- Gas-assisted parts remove 10 to 40 percent of the weight of a solid design. They also cut clamp tonnage demand by 30 to 60 percent, because the gas core packs from the inside.
- Overflow cavities are sized at 1 to 3 times the gas channel volume. An overflow at 10 percent of channel volume cannot accept the gas front and leaves an unpredictable channel end.
- Gas pins run 1 to 3 mm in bore and sit at the sprue center or at the end of a runner branch. Protrusion of 0.5 to 2.0 mm into the cavity sets where the channel starts.
- Every transition between a channel zone and a thin wall needs a radius of 0.5 mm or larger. Every cavity also needs vents at 0.02 to 0.03 mm depth to release displaced air.
Why Gas-Assisted Molding Changes Mold Design
A conventional mold fills the cavity and then packs it with melt pressure. A gas-assisted mold deliberately stops filling at 60 to 85 percent of the shot, seals the melt, and drives nitrogen into the still-molten core. The gas follows the path of least resistance, which is the thickest, hottest section of the part. It pushes melt ahead of it into an overflow cavity or back into the running system. What remains is a part with a hollow channel where solid plastic used to be.
That single change rewrites four mold decisions. First, the cavity is no longer the whole story, because the gas front has to end somewhere and the overflow cavity becomes a functional part of the tool. Second, wall thickness stops being a defect and becomes a design variable, since a 10 mm boss that would sink in a solid mold can carry a 20 mm gas channel instead. Third, packing pressure stops coming from the nozzle and starts coming from the gas, so gate size and runner size no longer govern the pressure at the far end of the part. Fourth, the tool sees a new load case, because gas hold applies 100 to 300 bar from the inside of the part against the cavity walls.
Three process routes, three tool interfaces. Gas through the nozzle delivers nitrogen through a hollow injection unit, so the mold needs nothing more than a proper sprue bushing and a good seal at the nozzle seat. Gas through the sprue uses a gas pin in the sprue bush or the runner, which is the most common route for single-cavity structural parts. Gas into the part uses a pin mounted directly in the cavity or on the core, which gives the best channel control on long, branched parts. Tool cost rises in that order, from a few hundred dollars of sprue modification to a machined pin pocket with its own sealing surface.
Where the money actually sits. Weight reduction of 10 to 40 percent sounds like a material story, but on a 900 g appliance housing the savings land at 90 to 360 g per part, which is roughly $0.15 to $0.60 of resin per shot at typical engineering-resin prices. The larger financial effect is clamp tonnage. A part that needed a 650 tonne press in solid form often runs on a 350 to 450 tonne press in gas-assisted form, and that difference moves the program to a cheaper machine, a smaller mold base and a shorter cooling cycle. Neither benefit is free. The tool pays for it with an overflow cavity, an extra parting-line feature, a gas pin interface, and a part that must be trimmed.

The rest of this article works through the mold rules in the order they bite. Channel layout comes first because it fixes the part geometry. Overflow cavities come next because they fix where the gas stops. Gas pins, transition radii and venting follow, and the last sections cover clamp load, ejection, failure modes and the trial that proves the tool.
Gas Channel Layout and Diameter Rules
The gas channel is not a runner and not a rib. It is a hollow volume that the gas has to reach and then fill, and its diameter sets both the weight saving and the stiffness the part keeps. The industry rule is a channel diameter of 2 to 3 times the nominal wall. A 3 mm wall supports a 6 to 9 mm channel, a 5 mm wall supports 10 to 15 mm, and a 10 mm wall can carry a 20 to 30 mm channel. Below twice the wall the gas front is unstable and tends to break out of the channel into the thin section. Above three times the wall the channel creates a stiff rib-like spine that is heavier than the part needs.
Keep the channel round and constant. Gas follows the largest hydraulic diameter available, and it slows where the section narrows. A channel that tapers from 18 mm to 10 mm along the flow path will still conduct gas, but the front loses 40 to 60 percent of its velocity in the tapered zone, which makes the end position unpredictable. Design a constant diameter along each leg, and change diameter only at a junction where the gas has a clear alternative path.
Run the channel on the neutral axis of the section. Wall thickness around a gas channel is usually 2 to 3 mm, so a 20 mm channel in a 26 mm boss leaves a 3 mm skin on each side. If the channel sits 1 mm off center, one skin drops to 2 mm while the other rises to 4 mm. The thin side cools first, the gas breaks through the thin skin under 30 to 60 bar of local pressure, and a blow-out or a surface blister follows. Hold concentricity within 0.5 mm on machined channel ribs, and remember that a machined channel rib is often the simplest way to guarantee that.
Respect the length limit. A single gas entry can push a channel roughly 150 to 250 mm in a well-designed leg before the front stalls, depending on channel diameter, wall temperature and gas pressure. Beyond that distance the melt ahead of the front solidifies and the gas either stops early or fingers into the surrounding wall. Long structural parts such as automotive interior carriers or appliance handles are usually designed with multiple legs and two or more gas pins rather than one very long channel. Our guide to thick-wall mold design covers the same heat and shrinkage logic that governs a heavy section without gas.
Plan the route before the steel. A gas channel is a raised rib on the core side in most tools, so it is machined in the same setup as the ribs. Moving a channel after heat treatment means welding, re-machining and a fresh polish, which costs 3 to 5 times the original machining hour. Decide the channel path, diameter and neutral axis position at the DFM stage, when the geometry is still a line on a screen.
Gas Front and Melt Front Synchronization
Gas works only while there is molten plastic to push. The gas front and the melt front have to travel together, which means the gas must arrive at the channel before the melt in that channel cools below its no-flow temperature. On a 5 mm wall in ABS, the no-flow window opens roughly 15 to 25 seconds after the shot ends. On a 3 mm wall in PP that window is closer to 8 to 12 seconds. Those numbers set the maximum gas delay a tool can tolerate.
Shot size sets the starting point. Gas-assisted tools run short shots of 60 to 85 percent of the full cavity volume. The remaining 15 to 40 percent of the volume is filled by gas expansion plus the melt pushed into the overflow. If the shot is too large, the cavity fills solid and the gas has nowhere to go, which shows up as a short, stubby channel and a heavy part. If the shot is too small, the gas front runs ahead of the melt front and tears the surface, producing the silvery streak pattern known as fingering.
Delay and pressure profile belong in the tool trial. Typical gas delay runs 0.5 to 3.0 seconds after the injection screw stops, with 1 to 2 seconds the most common setting. Gas pressure ramps to 100 to 300 bar during the fill stage, then holds at 30 to 60 percent of that value while the part cools. That hold is what replaces packing. It is also what pushes the tool, because the cavity now sees internal pressure on a part that is already 70 to 85 percent full.
The tool must let the gas stop cleanly. A gas front that reaches the end of a cavity with nowhere to go expands into the wall and blows through. An overflow cavity gives the front a defined destination plus a small amount of melt to push into. In practice, the melt that arrives in the overflow is what stops the gas, because the cold melt plugs the gate between cavity and overflow and seals the front. That is why overflow gate size, not cavity pressure, is the variable a tool designer controls directly.

Flow simulation is worth the money on a gas-assisted part more than on almost any other tool. A fill-only analysis on a solid model will not show the gas channel, but a gas-assisted solver predicts front position, channel diameter after packing and the pressure the cavity will see. Running that analysis before cutting steel costs 5 to 15 percent of the tool price and routinely prevents one or two trial rounds, each of which costs 2 to 4 weeks of schedule.
Overflow Cavities and Gas Penetration
The overflow cavity is the single most under-designed feature on a first gas-assisted tool. It is the destination for the melt the gas pushes ahead of it, and it decides where the channel ends. Its volume should be 1 to 3 times the gas channel volume. A 20 mm channel running 400 mm holds about 126,000 mm³ of volume, so an overflow cavity for that leg needs 126,000 to 378,000 mm³, which is a pocket roughly 50 x 50 x 60 mm. Oversized overflow is cheap and safe. Undersized overflow is the most common cause of gas blow-out on new tools.
Connect the overflow with a controlled gate. A 1.0 to 2.0 mm deep gate between the cavity and the overflow pocket does two jobs. It lets melt through while the gas front advances, and it freezes within 1 to 3 seconds once the cold melt reaches it, which seals the gas in the part. Size that gate deliberately, because it is the tool's gas shut-off. A gate that is too large stays open, the gas keeps flowing into the overflow, and the channel collapses toward the pin. A gate that is too small plugs during fill, the gas has nowhere to go, and it blows out of the nearest thin wall instead.
Vent the overflow and plan its removal. The overflow pocket displaces a volume of air equal to the melt it accepts. Without a vent at 0.02 to 0.03 mm depth, that air compresses and flashes back through the gate, and the overflow fills short. Overflow removal is a real cost line: on a 900 g housing the overflow slug can weigh 40 to 120 g, and it must be sheared, ground or degated on every shot. Put the overflow on a face where a robot or a trimming fixture can reach it in one axis. Overflows placed on a curved Class A surface force manual trimming and add 8 to 15 seconds of labor per part.
One overflow per channel leg, or one shared pocket. Branched parts with three or four channel legs can share a single large overflow if the legs meet before it and the gate is sized for the total flow. Shared pockets save machining and reduce the number of trimmed faces, but they make the channel end less predictable, because gas takes the shortest route into the pocket. Single-cavity structural parts usually justify separate overflows per leg, and that is the safer choice when the part has a visible surface.
Gas Pin and Nozzle Placement
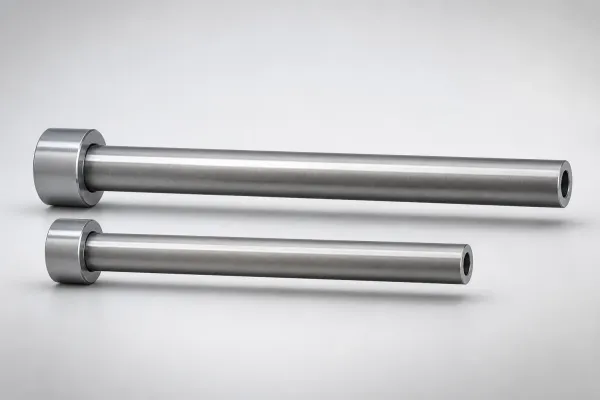
Gas enters the tool through a pin, and the pin is where the mold meets the process. Bores run 1 to 3 mm, with 1.0 to 1.5 mm covering most structural parts. The pin sits at the sprue center for gas-through-sprue tools, or in a machined pocket on the cavity or core for gas-into-part tools. Its protrusion into the cavity sets the point where the channel begins, and 0.5 to 2.0 mm of protrusion is the working range.
Locate the pin at a thick, hot, central node. The gas will travel from the pin toward the thickest, warmest section available. Placing the pin at the geometric center of the part and running channels outward gives the most symmetrical result. Placing it at one end of a long part forces the gas to travel the full length, which doubles the pressure needed and doubles the risk of an off-center channel. On appliances and automotive interiors, the pin typically sits on a hidden rib junction that later becomes a boss for a fastener.
Match the pin to the runner and gate system. A gas-through-sprue pin needs a sprue bushing with a straight bore and a machined seat, because the pin seals on the cavity side of the bushing. A gas-into-part pin needs a pocket with a hardened seat, a 0.02 to 0.05 mm fit clearance, and its own cooling line if the surrounding steel runs above 100 °C. Hot runner systems add a constraint: a valve gate gives independent shot-size control, which is exactly what gas-assisted molding needs, but the manifold must be sized for a larger channel and the pin cannot sit inside a nozzle tip. Where the pin must sit on the runner, put it in the branch, not at the manifold outlet. Our hot runner systems page covers the valve gate options that pair with a gas pin.
Seal and harden the pin seat. Nitrogen at 300 bar finds every leak path. A pin seat that leaks shows up as a pressure drop at the controller, a slow channel, and a gas smell around the press. Harden pin seats to HRC 50 or above, or use an insert in a pre-hardened base, and replace the pin as a consumable item every 50,000 to 150,000 shots. A worn pin changes the channel start point by 0.2 to 0.5 mm, which is enough to move a gas front 10 to 30 mm on a long leg.
Wall Transitions and Radii
The gas channel does not sit in a uniform wall. It sits in a local thick section, and that section has to blend into the thin walls around it. Where the blend is sharp, melt stalls in the corner, cools early, and can be pushed back into the channel mouth by gas pressure. That is melt backflow, and it plugs the pin or blocks the channel, depending on where it happens.
Use a radius of 0.5 mm or more at every transition. A sharp internal corner has an infinite stress concentration for the flowing melt and a stagnation zone for the gas. A 0.5 to 1.5 mm radius keeps the melt moving, lets the gas front pass cleanly, and removes a stress riser that would otherwise crack under the 100 to 300 bar of internal gas pressure. On glass-filled resins, radius the transition at 1.0 mm or more, because short glass fibers bridge a sharp corner and create a knit line where the gas is most likely to break out.
Step the thickness gradually. Going from a 20 mm channel rib to a 3 mm wall in one step is a 6 to 1 jump. Two intermediate steps at roughly 2 to 1 each, with 0.5 mm radii on every edge, keep the gas front centered and give the melt a clean flow path. This is the same logic that governs any thick-to-thin blend, and it interacts directly with the geometry rules in our ribs and bosses guide: the rib below a gas channel must still hold a 0.5 to 0.6 rib-to-wall ratio where it meets a thin panel.
Keep the pin mouth clear of the thin section. The gas pin should open into a section at least 1.5 times the channel diameter, so a 12 mm channel needs an 18 mm minimum local thickness at the pin. If the pin sits in a 6 mm wall, the gas is constrained at the entry, the front starts narrow, and the channel diameter grows as the gas moves out. This produces a tapered channel with the thinnest skin right at the pin, which is where most pin-area blow-outs start.
Venting and Gas Blow-Out
Gas-assisted molds displace more air faster than conventional tools. The cavity is filled to 60 to 85 percent with melt and then expanded by gas, and every cubic millimeter of that expansion has to push air out of the cavity, past the melt, and through the vents. A tool with conventional venting at 0.02 mm depth and 30 percent vent area will trap air at the last-fill zones, and trapped air plus 300 bar of gas is how blow-out starts.
Vent the last-fill zones, not the whole perimeter. Run vents along the final 20 to 30 percent of the flow path on both parting-line halves, and add vents at every channel end. Vent depth for unfilled PP, PE and ABS runs 0.02 to 0.03 mm. For PC, PA and glass-filled grades, use 0.015 to 0.02 mm and expect to clean them every 20,000 to 50,000 shots, because a flash-filled vent acts as a solid wall. Vent width of 6 to 12 mm with a 0.5 to 1.0 mm land is the standard profile.
Add overflow vents and ejector clearance as secondary paths. Ejector pins running at 0.02 to 0.04 mm clearance in their holes vent the core side of any tool, and on a gas-assisted mold that clearance is doing real work. Keep the ejector pattern generous on gas parts for this reason, even where the ejection force itself does not demand it. Likewise, a leader-pin bushing with a ground vent flat gives trapped air a path out of the closed mold.
Design against blow-out at the source. Blow-out happens when gas pressure exceeds the local melt strength and the wall there is thin. Three design moves prevent it: hold the skin thickness around every channel to 2 to 3 mm, keep the channel off the visible face by at least 1 mm more than the minimum skin, and make sure a defined overflow exists before the gas reaches the last 10 percent of the part. A blow-out through a Class A surface is a scrapped tool, because welding, blending and re-polishing a 4 mm hole costs 15 to 40 hours of tool work.
Clamp Tonnage and Mold Rigidity
Gas-assisted molding is sold as a clamp tonnage saver, and that part is true. Because the gas packs from the inside and the cavity is only 60 to 85 percent full of melt at the moment of pack, the projected-area force that the press must resist drops by 30 to 60 percent against the same part in solid form. That reduction is what lets a 650 tonne program run on a 350 to 450 tonne press, and it is usually the largest cost lever in the whole conversion.
The load case changes rather than disappears. Cavity pressure during gas hold still reaches 100 to 300 bar on the melt contact area, and that pressure is applied in the same direction as clamp force on the core side but against a part that has a hollow core. The net clamp force falls, but the plate bending and the support pillar loading change in a way a solid-mold calculation will not predict. Recheck clamp tonnage with the projected area of the actual gas-assisted part plus a 20 to 30 percent margin, and check the machine against the SPI interface requirements before committing, since the locating ring, ejector pattern and knockout positions still have to match the smaller press. Our mold to machine compatibility checklist covers those 12 interface checks.
Rigidity matters more than clamping force. Because the tool now sees internal gas pressure against a partly hollow part, the cavity inserts must resist deflection that would let the part grow or the parting line open. Support every gas channel boss with a pillar, or an ejector pin with a support disc, directly behind it. Target mold deflection under 0.05 mm across the cavity, and use a plate thickness at least 20 to 30 percent above the solid-mold standard for the same projected area. A deflection of 0.1 mm on a 480 mm handle is the difference between a clean parting line and 0.15 mm of flash.
Watch the heat balance. A hollow part has less mass and less thermal inertia than a solid one, so the mold surface temperature rises 5 to 15 °C faster during a run. That makes temperature control across a large gas-assisted cavity harder, not easier, because the gas channel area and the thin-wall area cool at different rates. Run separate circuits for channel ribs and thin walls, and hold the spread across the forming faces under 5 °C.
Ejection and Overflow Removal
A gas-assisted part is easier to eject than the solid version, because it is 10 to 40 percent lighter and its hollow core shrinks away from the core pin instead of gripping it. That advantage disappears if the ejection pattern was copied from the solid tool without thought, because the part also has an overflow slug hanging off one edge and a channel rib that is stiff in one direction and flexible in the other.
Eject on the stiff edges, not on the channel. The hollow channel rib is the weakest part of the section under a point load: a 3 mm skin over a 20 mm void dents at 40 to 60 percent of the force a solid 20 mm rib would take. Place ejector pins on solid bosses, on the outer walls and at the overflow gate end, with at least 80 to 120 mm spacing on large parts. Never eject directly on a channel rib, and never eject on a Class A face.
Automate the overflow cut where the volume justifies it. At 40 to 120 g per part, the overflow slug is 5 to 15 percent of the shot weight, and on a 60 second cycle that is 2 to 6 kg of regrind per hour per press. Three options exist. A shear gate machined into the tool leaves a clean edge and lets the slug fall free. A degating fixture outside the press adds 4 to 10 seconds per part. Manual trimming costs 15 to 40 seconds per part and introduces a quality variable, because the cut line is now operator-dependent. Design the overflow so that the slug can be sheared in the same direction the part is ejected, which makes a simple stripper or robot gripper viable.

Recover the slug as regrind, with limits. Overflow material is unfilled, unstressed and clean, so it regrinds well. Cap the regrind fraction at 15 to 25 percent on a structural part, and keep it out of any optical or load-critical part, because the material that reached the overflow has seen extra residence time at melt temperature. Purging the runner on every material change matters more here than on a solid tool, since the overflow pocket is a dead-end volume that holds 10 to 30 shots of material.
Failure Modes and Fixes
Gas-assisted tools fail in five recognizable ways, and four of them are decided by mold design rather than by the process. The table below sets out what each defect looks like, what the mold-side root cause is, and what the fix costs. Read it before the design freeze, not after the first trial.
| Failure | What it looks like | Mold-side root cause | Fix and cost |
|---|---|---|---|
| Fingering | Thin gas fingers branch off the channel into the wall, with silver streaks and a rough surface | Gas front runs ahead of the melt front; shot size under 60 percent or wall too thin around the channel | Increase shot size 5-10 percent, add 1-2 mm to the local wall. No steel change if caught at trial |
| Gas blow-out | A hole or blister through a wall, usually at a thin skin or a sharp corner | Undersized overflow, no sealing gate, or skin under 1.5 mm on one side of the channel | Enlarge overflow to 3x channel volume and re-cut the gate. 8-20 hours of tool work |
| Off-center channel | Channel drifts to one side, leaving a 1 mm skin and a 5 mm skin on a nominal 3 mm design | Channel rib not concentric with the wall, or uneven cooling on one side of the rib | Re-machine the rib to hold 0.5 mm concentricity, add balanced cooling. 12-30 hours |
| Gas back-flow | Gas escapes back through the pin, sprue or nozzle seat, with a pressure drop at the controller | Pin seat worn or soft, sprue bore mismatched, or gate frozen before gas is injected | Harden the seat to HRC 50+, replace pin. 2-6 hours, pin treated as consumable |
| Surface gas marks | Dull or rippled patches on the visible face above a channel | Skin too thin on the show face, or mold temperature below 40-60 °C on that face | Add 0.5-1.0 mm of local wall or re-polish and raise face temperature. 4-10 hours |
← swipe to scroll →
Table note: failure frequencies and repair hours are typical figures from structural-part tooling programs; actual values depend on part size, resin and tool condition.
Fingering is the one defect that is mostly process. It appears when the gas front outruns the melt, so the fix lives in shot size and delay time. Everything else on that list traces back to a steel decision: overflow volume, gate depth, rib concentricity, seat hardness and local wall thickness. That split is the practical reason to over-design the overflow and the sealing gate, because those two features absorb process variation that no setting can fix.
Weight Savings for Structural Parts
The commercial case for gas assistance is a weight-and-stiffness trade, and the trade pays on parts with long, thick, load-bearing features. Appliance handles, automotive interior carriers, seat frames, brackets and power-tool housings are the classic candidates, because each one has a thick spine running its length that a hollow channel can replace without losing bending stiffness. Our appliance mold design guide covers the Class A surface demands that sit on top of that trade.
Stiffness survives because the channel is a tube. A hollow 20 mm channel with 3 mm walls has roughly 55 to 65 percent of the bending stiffness of the same section solid, at 30 to 40 percent of the weight. Add a 2 to 3 mm rib on top of the channel and stiffness returns to 80 to 95 percent of the solid value, because the material is now at the outer fibers where it works. That is why a gas-assisted handle 35 percent lighter than its solid version can still pass the same load test.
| Part type | Channel | Weight cut | Clamp reduction | Overflow volume |
|---|---|---|---|---|
| Appliance handle, 480 mm | 16-20 mm | 30-40% | 40-60% | 1.5-2.5x channel volume |
| Automotive interior carrier | 20-30 mm | 20-35% | 35-55% | 2-3x channel volume |
| Power tool housing | 8-14 mm | 15-30% | 30-50% | 1-2x channel volume |
| Washing machine door handle | 12-18 mm | 25-40% | 40-60% | 1.5-2.5x channel volume |
| Structural bracket, glass-filled | 6-12 mm | 10-20% | 30-45% | 1-1.5x channel volume |
← swipe to scroll →
Table note: ranges are typical industry figures for unfilled PP, ABS and PC structural parts; glass-filled grades give up weight saving for stiffness and wear resistance.
Know when gas is the wrong answer. Gas assistance does not pay on thin-wall parts under 2 mm, on parts without a natural thick spine, or on very low volumes where the tooling premium for an overflow cavity and a gas pin cannot be amortized. It also loses to a well-designed ribbed part on many small components under 100 g, where ribs deliver the stiffness with no overflow slug and no trimming step. Gas wins when the part has a long thick section, a visible surface that a rib would mar, or a clamp tonnage problem that blocks the press the program was quoted on.
FAQ
Q1. What gas channel diameter should a mold be designed for?
Size the channel at 2 to 3 times the nominal wall. A 3 mm wall supports a 6 to 9 mm channel, a 5 mm wall supports 10 to 15 mm, and a 10 mm wall carries 20 to 30 mm. Below twice the wall the gas front breaks out into the thin section, and above three times the wall the rib becomes heavier than the part needs.
Q2. How large does the overflow cavity have to be?
Plan for 1 to 3 times the gas channel volume. A 20 mm channel running 400 mm holds about 126,000 mm³, so the overflow for that leg needs 126,000 to 378,000 mm³, roughly a 50 x 50 x 60 mm pocket. Add a 1.0 to 2.0 mm sealing gate that freezes in 1 to 3 seconds once cold melt arrives, and vent the pocket at 0.02 to 0.03 mm depth.
Q3. How much clamp tonnage does gas-assisted molding actually save?
Expect 30 to 60 percent against the same part in solid form, because the cavity is only 60 to 85 percent full of melt at the moment of pack. A 650 tonne program commonly moves to a 350 to 450 tonne press. Recheck the interface dimensions anyway, because the locating ring, ejector pattern and knockout positions must still match the smaller machine.
Q4. Why does the gas channel drift off center?
Because the rib is not concentric with the wall, or one side cools faster than the other. With 2 to 3 mm of skin on each side, a 1 mm offset drops one skin to 1 mm or less, and 30 to 60 bar of local gas pressure breaks through. Hold channel concentricity within 0.5 mm and balance the cooling on both sides of the rib.
Q5. Can a gas-assisted tool use a hot runner?
Yes, and a valve gate is the better choice because it gives the independent shot-size control that gas-assisted molding needs. The constraints are a manifold sized for a larger channel, no gas pin inside a nozzle tip, and gas pins placed in a runner branch rather than at the manifold outlet. A leaking valve gate pin seat at 300 bar of nitrogen shows up immediately as a pressure drop.
The Bottom Line
Gas-assisted molding is a mold design decision before it is a process setting. Channel diameter at 2 to 3 times wall, overflow volume at 1 to 3 times channel volume, gas pins of 1 to 3 mm seated hard, 0.5 mm transition radii and vents at 0.02 to 0.03 mm decide whether the gas goes where you planned. Design those five features first, then tune delay and pressure. DieStrike builds IATF 16949 injection molds with 120+ machines, mold accuracy of ±0.005 mm and 2-5 week lead times, for structural programs with the same weight and rigidity demands as connector OEMs including TE Connectivity, Amphenol and Luxshare. Contact us with the channel layout before steel is cut.
KEEP READING
Related Reading
How to Design Molds for Thick-Wall Parts: Sink, Cooling and Cycle
Where gas channels belong when walls pass 4 mm: volumetric shrinkage, void budgets and cooling sized from thickness squared.
Read articleArticleHow to Design Ribs and Bosses: Wall Ratios, Draft and Sink Control
Gas channels often replace thick ribs, so rib-to-wall ratios of 0.5 to 0.6 and sink control still set the stiffness budget.
Read articleArticleMold to Machine Compatibility Checklist: 12 Checks Before You Cut Steel
Gas-assisted tools cut clamp demand by 30 to 60 percent, but locating rings, ejector patterns and SPI interfaces still must match the press.
Read articleServiceInjection Mold Manufacturing
IATF 16949 certified mold building with 120+ machines, 2-5 week lead times and mold accuracy of ±0.005 mm.
Read articleNEXT STEP
Ready to Start Your Mold?
Send us your element dimensions or part numbers — our team responds within 24 hours with pricing and lead time.

Written by
Ray ChanMold Buyer's Guide Author · Precision Mold Manufacturing Specialist. Ray helps global importers, distributors and OEMs source factory-direct molds and mold parts.