
How to Design Molds for Thick-Wall Parts: Sink, Cooling and Cycle
Table of Contents
A 6 mm thick polycarbonate bracket was quoted at a 45 second cycle and shipped at 108 seconds. The tool had been copied from a 2.5 mm housing program, so the cooling channels ran at the same 9 mm diameter and the same 22 mm spacing. Every part passed dimensional inspection. Eighteen months later a customer dropped a batch at -20 °C and three housings split along the center of the wall, where a 1.2 mm void had been hiding since the first trial shot. The defect was designed in on the day the wall thickness was set at 6 mm.
Thick-wall parts behave differently from thin-wall parts at every level: shrinkage becomes volumetric instead of planar, cooling time grows with the square of thickness, gates freeze before the core of the wall solidifies, and ejection force climbs with the shrinking grip of a deep section. This article covers mold design for walls above 4 mm, the practical line where these effects stop being a rounding error. It is written for mold buyers, part designers and tooling engineers who sign off the drawing before steel is cut. Process settings appear only as inputs to a mold decision. Values are typical published or industry figures; verify them against your grade datasheet before cutting steel.
The Snapshot
- Thick-wall molding starts above roughly 4 mm. At that thickness, cooling time is about four times a 2 mm wall, and a 6 mm section runs about nine times as long.
- Volumetric shrinkage is close to three times linear shrinkage. PC at 0.6 percent linear shrinks about 1.8 percent by volume, which is the mass that must be fed or voided.
- Gates for thick sections are sized at 0.75 to 1.0 times wall thickness, not the 0.5 to 0.8 range used for thin walls, so packing stays open long enough.
- Cores over 12 mm across usually need bubblers, and cores from 8 to 15 mm take baffles. Beryllium copper inserts conduct 105 to 130 W/m·K against 25 to 30 W/m·K for P20.
- Mold temperature for PC, PMMA and PA thick sections runs 80 to 110 °C, and cycle times land between 45 and 180 seconds depending on wall.
Why Thick-Wall Molds Fail: The 4 mm Line
Below 4 mm, a wall solidifies fast enough that packing pressure reaches the core before the gate seals. Above 4 mm, the center of the wall stays molten for tens of seconds after the gate freezes. That single timing gap drives four failure patterns that show up in almost every thick-wall program.
The first is internal voids. A void is a vacuum pocket or gas pocket at the thermal center of the wall, formed when the shrinking core pulls material inward and nothing replaces it. It does not show on the surface, so it survives dimensional inspection and shows up later as a drop-test split, a leak, or an x-ray reject at the customer. A 6 mm PC or PA wall will void from the first shot if the tool is designed around a 2 mm cooling and gating model.
The second is sink. When the skin is thin or warm, the same shrinkage that would form a void drags the surface inward instead. On a 5 mm wall with a single-sided cooling circuit, sink depth of 0.1 to 0.3 mm is common on the hot side. Our sink mark root-cause guide covers that defect on its own; here it matters only as the alternative outcome of the same shrinkage event.
The third is cycle time. A 2 mm wall is fully solid in 8 to 12 seconds in an ABS tool. A 6 mm wall needs 55 to 85 seconds. Programs that budget press time from a thin-wall experience lose 60 to 70 percent of quoted output, and that miss lands on the mold builder even though it started on the drawing.
The fourth is ejection damage. A thick section grips the core harder because there is more shrinking material pressing against it, and thicker sections are also stiffer and heavier. Combination of a tall core, 1 degree of draft and an undersized ejector pattern produces drag marks, white stress marks and cracked corners at the first production run.

All four patterns trace back to one design decision: the mold is built to remove heat and deliver pressure on a timeline that thick sections cannot meet. The rest of this article works through the levers in the order they bite, starting with shrinkage because it sets the void and sink budget.
Volumetric Shrinkage and Internal Voids
Polymers shrink in three dimensions, but mold drawings only carry linear shrinkage. Approximate volumetric shrinkage as three times the linear value: PC at 0.5 to 0.7 percent linear shrinks 1.5 to 2.1 percent by volume, PA66 at 1.0 to 2.0 percent linear shrinks 3 to 6 percent by volume. On a 6 mm wall, 1.8 percent volumetric shrinkage means roughly 0.11 mm of missing material for every millimeter of wall thickness if no melt replaces it.
A thick wall cannot get that material from packing once the gate seals. Here is the sequence that forms a void. During fill and hold, melt pressure keeps the center of the wall under compression and pushes material into the shrinking mass. When the gate freezes, the cavity becomes a closed volume. The core of the wall keeps cooling, so it keeps shrinking, and the melt pressure at the center drops toward zero and then into tension. Above roughly 0.5 to 1.0 bar of negative pressure, dissolved gas and moisture come out of solution and nucleate a bubble, and the surrounding material pulls away from the solidified skin. That bubble is the void.
The judgment value is not void existence but void size and location. A centerline void of 0.2 mm in a 6 mm wall is usually acceptable in a non-sealing part. A void above 0.5 mm, or any void within 1 mm of a load-bearing surface, is a reject on structural parts. Sectioning two trial parts and measuring the pocket under a 10x loupe settles the question faster than any simulation.
Void risk rises with local thickness, with material moisture, and with gate size. Glass-filled grades void less because the fibers hold the matrix open against the pressure drop. Crystalline resins such as PA and POM void more than amorphous PC and ABS at the same wall, because their shrinkage is larger and their solidification front is uneven. A 5 mm PA66 wall without drying below 0.05 percent moisture will show both voids and silver streaks.
Three design answers control voids. First, size the gate so that it stays open while the wall center is still molten, which is covered in the gate section below. Second, cool the thick section from both sides, because a one-sided circuit doubles the distance heat must travel and holds the center molten longer. Third, cap the thickness. Where the geometry allows, a 4 mm wall with a rib pattern carries the same load as a 6 mm solid wall, and it does so with roughly 55 percent of the cooling time.
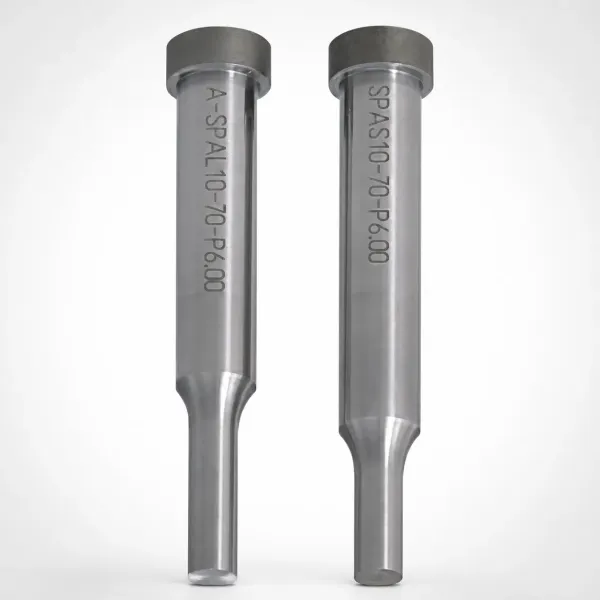
Cooling Time Scales With Thickness Squared
Cooling time follows the square of wall thickness. The relationship comes from the one-dimensional heat conduction equation, and the working form used in tool design is t = s² / (π² α) multiplied by a logarithmic term that carries the melt temperature, the mold temperature and the ejection temperature:
t = [s² / (π² α)] · ln[ (4/π) · (T_melt − T_mold) / (T_eject − T_mold) ]
Here s is wall thickness in mm, α is thermal diffusivity in mm²/s, T_melt is the melt temperature, T_mold is the cavity surface temperature and T_eject is the temperature at which the part is stiff enough to eject. For unfilled PC and ABS, α runs 0.08 to 0.10 mm²/s; unfilled PP and PE sit higher at 0.10 to 0.13 mm²/s, which is part of why polyolefin thick sections cool faster than polycarbonate ones at the same wall.
The log term moves cooling time by tens of percent. Raising melt temperature from 280 °C to 320 °C on a grade that ejects at 130 °C against a 90 °C mold adds roughly 20 percent to cooling time. Raising mold temperature from 60 °C to 100 °C at the same melt and ejection points adds roughly 30 percent. The squared term moves it by hundreds of percent. Doubling wall thickness doubles nothing, it quadruples cooling time.
| Wall thickness | Relative cooling time | PC at 100 °C mold | ABS at 60 °C mold | Design note |
|---|---|---|---|---|
| 1 mm | 0.25x | 3-5 s | 2-4 s | Fill limited, not cooling limited |
| 2 mm | 1.0x baseline | 10-16 s | 7-11 s | Straight-drilled channels reach the core |
| 3 mm | 2.2x | 22-35 s | 16-24 s | Gate must stay open past 15 s |
| 4 mm | 4.0x | 40-62 s | 28-44 s | Two-sided cooling becomes mandatory |
| 6 mm | 9.0x | 90-140 s | 63-99 s | Voids form without a large gate and long hold |
| 8 mm | 16.0x | 160-250 s | 112-176 s | Multi-cavity layouts stop paying |
← swipe to scroll →
Table note: cooling times are typical industry ranges from the conduction formula with α at 0.085 mm²/s, a 130 °C ejection temperature for PC and 95 °C for ABS. Your grade, wall geometry and mold temperature will move these numbers by 20 to 40 percent.
Two design consequences follow from the squared law. First, a thick section should never be cooled by a circuit sized for the nominal wall. A tool with 2.5 mm nominal walls and one 6 mm boss needs dedicated cooling at the boss, because the boss controls the cycle even though it is 5 percent of the part volume. Second, multi-cavity layouts lose their economics fast: eight cavities of a 6 mm part at 100 seconds is 288 shots per hour against 1,800 shots per hour for the same eight cavities at 16 seconds. For thick sections, four cavities with better cooling usually beat eight cavities with the same cycle.
Gate Sizing and Early Freeze
In a thin-wall tool the gate is the smallest element on purpose: it must shear-thin the melt, fill in under two seconds, and leave a small vestige. In a thick-wall tool the gate is the packing valve, and its job is to stay open. If the gate freezes at 12 seconds while the wall center stays molten until 70 seconds, the mold cannot feed the shrinkage and voids are guaranteed.
Gate freeze time also follows a squared relationship with depth. A gate 1.0 mm deep in an ABS tool freezes in roughly 2 to 4 seconds, one 2.0 mm deep freezes in 8 to 14 seconds, and one 3.0 mm deep holds for 20 to 30 seconds typical. Those numbers come from the same conduction math used for the wall, with the gate treated as a plate. Compare them against the cooling time of the thick wall: the gate must stay open for at least 60 to 70 percent of the wall solidification time in a void-critical part.
The practical sizing rule for walls above 4 mm is a gate depth of 0.75 to 1.0 times the local wall, with a minimum of 1.5 mm on any part over 200 g. That is well above the 0.5 to 0.8 range common in thin-wall tools. On a 6 mm PA66 wall, expect a gate depth of 4.5 to 6.0 mm and a land length of 1.0 to 1.5 mm. Land length matters in the other direction here: a long land of 3 to 4 mm adds friction and freezes the gate early even when the depth is correct.
Gate type follows the same logic. A side gate or a large-diameter direct gate on a thick section beats a tunnel gate or a pin gate, both of which are thermally thin by construction. Heated valve gates solve the freeze problem entirely, since the gate stays molten until the pin closes, but they leave a 3 to 5 mm gate vestige and need a manifold sized for the larger channel. On a 6 mm wall the vestige is often trimmed into a recess and accepted, because the alternative is a void at the center of the part.
Gate location follows mass. Place the gate so the flow path from the gate to the thickest section is short, ideally under 100 mm, because packing pressure decays along the flow path. A thick boss 250 mm from a cold gate receives almost no pack pressure and will void or sink regardless of machine settings. Two gates on a long thick part are common, and they must be balanced, with fill time spread under 3 percent between them, or one gate packs while the other starves.
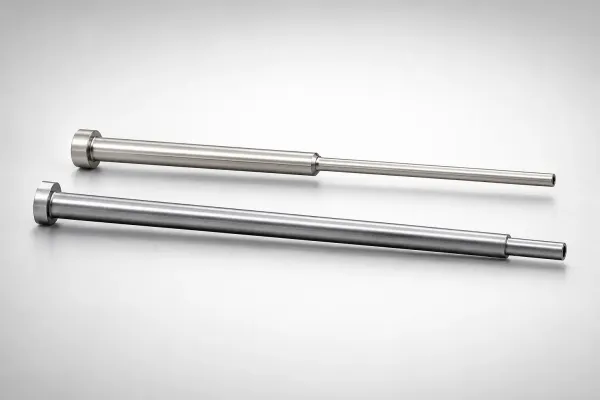
Packing Paths That Feed a Thick Section
Packing is a pressure path, and every element on that path either transmits pressure or blocks it. The path runs from the screw, through the sprue and runner, through the gate, and into the wall. In a thick-wall mold the gate is the first element to close, so the rest of the path must be oversized enough that it never becomes the bottleneck before the gate does.
Runner diameter for thick-wall parts runs 1.5 to 2.0 times the gate depth. A 6 mm gate takes a 9 to 12 mm runner on a full-round section. Undersized cold runners add 150 to 400 bar of pressure loss at thick-wall flow rates, and that loss comes straight off the pressure available at the wall center. Sprue bushings follow the same ratio, with a sprue bore of 6 to 9 mm for parts over 300 g.
Hold time is the second lever, and it is bounded by the gate, not by the machine. Once the gate seals, more hold pressure does nothing for the part. In practice, thick-wall programs run hold times of 20 to 60 seconds on a 6 mm wall, which is a large share of a 100 second cycle, so the mold must tolerate it mechanically. That means generous support plates, a properly sized ejector housing, and a mold base rated for the packing pressure instead of a thin-wall model reused because the plate pattern matched.
The third lever is where the packing pressure arrives. A thick section fed from one face packs from the gate outward and leaves the far face last. Feeding from the gate into the thick edge, rather than into a thin flange that freezes in 5 seconds, changes the effective pack path from 250 mm to under 80 mm and often removes both void and sink in one drawing revision. Shrinkage compensation then has to be set for the actual measured value rather than the datasheet value, since a well packed thick section shrinks less than an underpacked one. The rules in our shrinkage compensation guide apply, with tighter windows because thick sections are more sensitive to packing differences.
Degassing belongs in the same discussion. Thick walls hold more dissolved gas simply because there is more material, and moisture in PA, PC and PMMA grades adds volatile content. A gate that stays open 40 seconds lets that gas migrate back into the runner, while a gate that seals at 10 seconds traps it at the wall center as a bubble. Drying to the datasheet limit, typically below 0.02 percent for PC and below 0.05 percent for PA, is a mold specification issue in the sense that the mold must include vents and a runner volume able to absorb the gas.
Baffles, Bubblers and Series Circuits
Thick-wall parts are usually built around a core. A 6 mm wall on a 60 mm diameter cup leaves a core 48 mm across, and a straight drilled channel cannot reach the center of that core face without leaving 20 mm of dead steel between the cooling line and the forming surface. Published practice puts channel centerlines 2 to 2.5 times the channel diameter from the cavity surface. A 10 mm channel therefore sits 20 to 25 mm from steel, which is exactly the wrong number for a 6 mm wall that must shed heat from the full section.
The three standard answers scale by core size. Cores from 8 to 15 mm diameter take baffles: a machined slot that splits a drilled hole into two paths and doubles the coolant contact area in the tip zone. Cores above 12 mm diameter usually take a bubbler, a tube inserted into a drilled hole that jets coolant to the core tip and returns it along the annulus. Cores narrower than 8 mm take a high-conductivity insert, because there is no room for a coolant circuit at all.
Bubbler geometry is the part that gets designed wrong. The tube stands 3 to 6 mm from the core tip surface, and the annulus between tube and hole should be 1.5 to 2.5 mm, which keeps the return flow turbulent without adding pressure drop. A bubbler with a 1 mm annulus chokes the return and the core tip runs 15 to 25 °C hotter than the base, which is precisely the condition that holds the wall center molten and forms a void. Flow rate for a bubbler circuit runs 3 to 8 L/min per circuit, with Reynolds numbers above 10,000 to stay in the turbulent band that transfers heat 3 to 5 times better than laminar flow.
Series circuits are the third option and the most misunderstood. In a thin-wall tool, series circuits are avoided because they stack temperature rise from cavity to cavity. In a thick-wall tool the heat load per unit of steel is lower and the cooling time is long, so a series circuit of 4 to 6 parallel-drilled passes with 12 to 16 mm channels can be acceptable, provided the coolant temperature rise across the circuit stays under 3 °C. Above that, the downstream end of the circuit runs warm, the wall cools asymmetrically, and the part warps toward the hot side. Our baffle and bubbler selection guide covers the diameter, fit and flow tables that these circuits depend on.

Two more layout rules apply to thick walls specifically. First, channel diameter should grow with wall thickness: 9 to 10 mm suits a 2 mm wall, and 12 to 16 mm suits a 6 mm wall, because the heat load per unit of channel length is roughly triple. Second, pitch should tighten to 2.5 to 3 times the diameter on the faces that touch thick sections, instead of the 3 to 5 times used on thin parts, so surface temperature variation across the thick zone stays under 5 °C.
Core-Side Heat and Mold Temperature
Thick-wall parts conduct heat to the mold more slowly than thin-wall parts, and they shed that heat from both faces for a long time. The result is a mold that runs hotter than the cooling water suggests, with surface temperature in the cavity often 10 to 20 °C above coolant temperature. Design must account for that offset instead of assuming it away.
Mold temperature targets for thick sections sit higher than for thin walls. PC thick sections run 80 to 110 °C for good surface and low molded-in stress, PMMA runs 60 to 90 °C, PA66 runs 80 to 100 °C, and ABS runs 50 to 80 °C. Those temperatures are set by the part requirement, not by convenience, and they push the tool into oil or pressurized water circuits rather than the 20 to 40 °C water used on packaging tools.
High mold temperature has three consequences for the mold itself. First, thermal expansion: a 600 mm mold plate heated from 25 °C to 100 °C grows about 0.6 mm in steel with a coefficient of 11.5 × 10⁻⁶ per °C, so leader pins, side locks and hot-runner centering must be designed with that growth in mind. Second, gaskets and O-rings in the cooling circuit must be rated for 120 to 150 °C, not the standard 90 °C nitrile parts used on thin-wall tools. Third, insulation plates of 6 to 10 mm under the cavity and core plates reduce heat loss to the platens and cut the heater load by 15 to 25 percent.
The heat balance is settled by the cycle, not by the controller. A 6 mm PC part weighs roughly 120 g and releases about 30 to 40 kJ of heat per shot as it cools from melt to ejection temperature. At a 100 second cycle that is 300 to 400 W per cavity that the mold must remove while holding 100 °C, which is why thick-wall tools often run both a chiller circuit for plate cooling and a separate high-temperature circuit for the forming steel. Thick sections also hold heat in the core, so core-side temperature typically reads 5 to 15 °C above cavity-side. Part dimensions follow that difference, which is one reason thick-wall parts show mold-to-part shrinkage variation that thin-wall parts hide. The mechanisms behind that drift are covered in our dimensional instability guide.
Ejection and Distortion Control
A thick-wall part grips the core harder than a thin-wall part, because there is more shrinking material pressing on the steel and less flexibility in the wall to absorb the release. Ejection force follows contact pressure times area times friction: a 50 mm core 100 mm deep carries about 15,700 mm² of side area, and at 8 MPa of typical residual contact pressure that is roughly 125 kN of normal load, or 25 to 50 kN of ejection force at a friction coefficient of 0.2 to 0.4. The mold must be designed for that load, not for the 8 to 15 kN a thin-wall cup needs.
The first design lever is draft. Thick sections take 1.5 to 2 degrees of draft per side as a baseline, and deep cores above 100 mm take 2 to 3 degrees. Draft below 1 degree on a 6 mm wall raises release force by 30 to 50 percent and produces drag marks on the first production shift. Textured surfaces, which thick-wall structural parts often carry, need an extra 1 degree per 0.025 mm of texture depth.
The second lever is ejection area. Point ejection on a thick, stiff part concentrates force and cracks corners. Spreading the same force across ejector sleeves, stripper plates or large-diameter ejector pins of 8 to 12 mm drops stress by a factor of 5 to 10. Ejector pins must land on the stiffest geometry: ribs, bosses, corner radii and thick flanges, never on a free span of wall.
The third lever is release quality on the core. Polish direction follows ejection, never across it, and optical thick-wall parts commonly run SPI A1 to A2 on the core, Ra 0.025 to 0.05 µm. A polished core releases with noticeably lower force than an EDM-finished one, and it eliminates the 5 to 20 µm recast layer that spalls and drags. Where a small vacuum forms between the part and a deep core, air poppet valves at the core tip break the seal in 0.1 to 0.3 seconds and remove most of the release resistance.
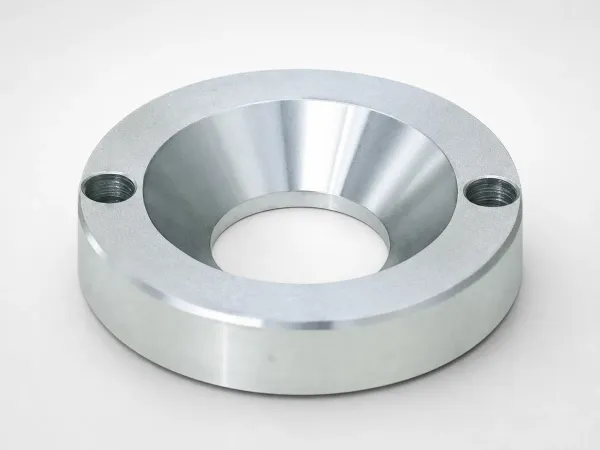
Distortion control is a cooling problem disguised as a mechanical one. If one face of a 6 mm wall runs 5 °C hotter than the other, differential shrinkage of roughly 0.03 percent over a 300 mm feature produces a 0.09 mm bow, and that bow grows with wall thickness because the temperature difference takes longer to even out. Symmetrical circuits, core-side cooling that matches cavity-side capacity, and equal flow to both sides are the mold-side answers. A thick-wall tool with a 300 mm long part should be balanced to within 5 °C surface-to-surface before the first trial, measured with a contact pyrometer across 8 to 12 points.
Steel and Polish for Thick Sections
Thick-wall molding raises cavity pressure. A 6 mm PC wall filled at typical rates sees 600 to 1,000 bar at the gate, and that pressure acts on cores with more area than thin-wall cores carry. Steel choice therefore starts with stiffness, then moves to corrosion and polish.
For PC and PMMA, hardened stainless such as S136 or 420 stainless at HRC 48 to 54 is the standard forming steel. Stainless resists the moisture and acidic residue that accumulate in long, hot cycles, and it takes an SPI A1 polish without pitting. For unfilled ABS and general structural parts in the 4 to 6 mm range, P20 at HRC 30 to 34 supports several hundred thousand shots at lower cost. For glass-filled PA and PBT at thick sections, 1.2343 or H13 at HRC 48 to 52 with nitriding at 1,000 to 1,100 HV and a 0.05 to 0.15 mm case is the usual answer, since glass fiber abrasion at a thick gate is the fastest wear point in the tool.
Insert practice matters more than the base steel. Thick sections concentrate heat, so deep cores are often built as separate inserts in a high-conductivity grade, and gate areas are built as replaceable inserts because that is where wear and erosion land. A gate insert in hardened steel costs a fraction of a new core and can be changed in hours. Cores and cavities that carry 4 mm and thicker sections should be through-hardened rather than case-hardened where the wall geometry requires heavy polishing, since polishing through a nitrided case removes the wear layer.
Polish specification drives both release and appearance. Thick optical parts, light guides and lenses need SPI A1, Ra 0.012 to 0.025 µm, and that finish must be produced by hand polishing after EDM, never by EDM alone. Structural thick-wall parts run SPI B1 to B3, Ra 0.05 to 0.1 µm, which still releases cleanly and saves polishing hours. Textured thick walls need grain depth matched to draft, and mismatched grain across a parting line is a common cosmetic reject. Mold components for these tools, including ejector sleeves, core pins and gate inserts, are standard parts that can ship in 3 to 7 days while the cavity blocks are still being machined.
PC, PMMA, PA and ABS at Thick Sections
Material choice sets the ceilings on wall thickness, cycle time and tooling cost before any mold detail is decided. The table below summarizes what the four common thick-section resins demand from the tool.
| Material | Wall range | Linear shrinkage | Mold temp | What the mold must do |
|---|---|---|---|---|
| PC | 4-10 mm | 0.5-0.7% | 80-110 °C | Gate at 0.75-1.0x wall, hot oil circuits, high-viscosity flow path, SPI A1 where clear |
| PMMA | 4-12 mm | 0.3-0.8% | 60-90 °C | Optical polish on both faces, low pack pressure, slow controlled cooling to avoid internal stress |
| PA66 unfilled | 4-8 mm | 1.0-2.0% | 80-100 °C | Oversized gate and runner for heavy packing, vents for moisture gas, highest void risk of the four |
| PA66 + 30% GF | 3-8 mm | 0.3-0.6% | 80-100 °C | Hardened gate and core inserts, nitrided steel, 1.5-2 degrees draft for fiber-stiff walls |
| ABS | 4-8 mm | 0.4-0.7% | 50-80 °C | Most forgiving of the group, standard two-sided cooling, polish or texture per appearance spec |
| POM | 3-8 mm | 1.8-2.5% | 90-110 °C | Long hold for high crystalline shrinkage, generous draft, hot mold with tight temperature control |
← swipe to scroll →
Table note: shrinkage and wall ranges are typical published figures for unfilled grades at standard conditions. Glass and mineral fillers cut shrinkage in the flow direction by 50 to 70 percent and increase it across flow, so compensation must be directional.
Two material behaviors deserve their own design line. PC is the most common thick-wall resin in structural parts and light guides, and its high melt viscosity means the flow path is short: 5 mm walls typically support flow lengths of 100 to 150 times thickness before short shots appear, so gates must be generous and mold temperature must stay above 80 °C. PA absorbs moisture and continues to shrink after molding, moving 0.1 to 0.3 percent over 24 to 48 hours, so thick PA parts need either a controlled annealing plan or a dimensional window wide enough to absorb the movement. Both behaviors trace back to the same root: a thick section holds heat and mass long enough for material effects that thin walls simply outrun.
Trial and Acceptance Criteria
A thick-wall mold must be bought off on voids, cycle and stability, not on first-off dimensions. Dimensions on a 6 mm part can read correct on shot 3 and drift 0.15 mm by shot 300, once the core reaches full temperature. The trial plan below is what to write into the purchase contract before steel is cut.
Thermal stabilization first. Run 8 to 12 shots before taking any measurement. A thick-wall tool needs 30 to 60 minutes to reach steady state, and mold surface temperature typically climbs 15 to 30 °C over that period. Record surface temperature at 8 to 12 points and require a spread under 5 °C across the forming faces.
Void acceptance. Section two parts through the thickest wall and inspect under 10x magnification, then x-ray five more. Acceptance: no void larger than 0.5 mm in any direction, and no void within 1 mm of a functional surface. If sectioning is not allowed, part weight within 0.5 percent of the theoretical shot weight is the surrogate check, since a void shows up as missing mass.
Cycle and stability. The mold must hold the quoted cycle within 3 percent for 4 continuous hours, with no rising scrap. Cooling time dominates that number: a 6 mm PC wall at a 100 second cycle spends 90 to 140 seconds of theoretical cooling time in the wall, which is why the quoted cycle must be built from the table above rather than from the machine's maximum rate.
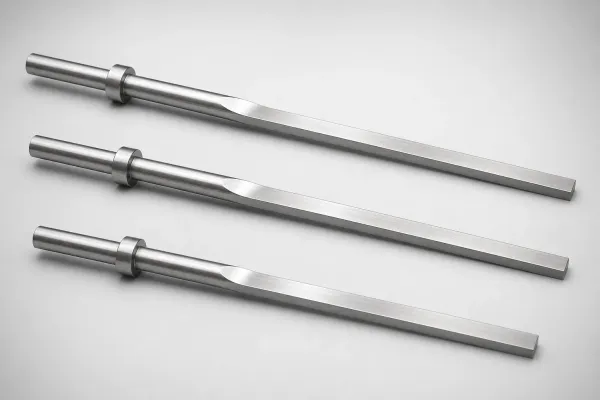
Dimensional and after-shrink check. Measure five parts immediately after ejection, then re-measure the same five at 24 and 48 hours. PC moves less than 0.05 percent, while PA66 unfilled can move 0.1 to 0.3 percent. Both numbers belong in the first article report, because a mold approved at t=0 can be out of tolerance on the customer's floor a day later.
Ejection quality. Inspect for drag marks, white stress marks and corner cracks on 20 consecutive parts, and confirm ejection force stays within 60 to 70 percent of machine capability. A thick-wall tool that only ejects cleanly at 90 percent of available force has no headroom for wear.
DieStrike runs these checks on thick-wall tools before shipment, with DFM feedback returned within 24 hours of drawing receipt, mold dimensions held to ±0.005 mm and part-forming geometry to ±0.002 mm, and cavity heat treatment at HRC 62 where the geometry demands it. Injection mold lead time runs 2 to 5 weeks from design freeze. That precision matters here more than on thin-wall tools: at 6 mm walls a 0.05 mm steel error changes cooling geometry, gate depth and the shrinkage the part will actually see.
FAQ
Q1. Why do thick-wall parts get internal voids instead of sink marks?
Because the skin hardens before the core shrinks. Once the gate freezes, the wall center is a closed volume that keeps cooling and shrinking, so melt pressure at the center drops into tension and pulls a bubble open. A stiff, well-cooled skin forces that shrinkage inward as a void. A thin or warm skin yields instead, and you get a visible sink of 0.1 to 0.3 mm.
Q2. How do I calculate cooling time for a thick wall?
Use t = s² / (π² α) times the logarithmic term for melt, mold and ejection temperatures, with α typically 0.08 to 0.10 mm²/s for PC and ABS. The practical shortcut is the squared law: a 6 mm wall needs about nine times the cooling time of a 2 mm wall, so 7 to 11 seconds becomes 63 to 99 seconds on the same tool.
Q3. What gate size does a 6 mm wall need?
Gate depth of 0.75 to 1.0 times the wall, so 4.5 to 6.0 mm, with a land length of 1.0 to 1.5 mm and a runner 1.5 to 2.0 times the gate depth. Gates this size stay open 40 to 60 seconds, long enough to feed the wall center while it is still molten. Thin tunnel gates freeze in 2 to 4 seconds and cannot pack a 6 mm section.
Q4. Can a thick wall be cooled from one side only?
Not on a void-critical or cosmetic part. One-sided cooling doubles the distance heat travels and keeps the wall center molten 40 to 60 percent longer, which raises both void size and cycle time. Two-sided cooling with matched capacity, plus a bubbler or baffle in the core, is the baseline for walls above 4 mm.
Q5. Is a hot runner worth it for a thick-wall tool?
Usually yes for parts over 200 g, because a cold runner at a 100 second cycle adds 15 to 30 percent scrap weight and a second cooling bottleneck. A valve gate also solves the early-freeze problem, since the gate stays open until the pin closes. The trade-offs are a 3 to 5 mm vestige, a manifold sized for a larger channel, and $25,000 to $60,000 of additional tooling cost.
The Bottom Line
Thick walls above 4 mm turn shrinkage into voids, cycle time into a squared cost, and packing into a gate-sizing problem. Fix the wall first, then size the gate at 0.75 to 1.0 times wall, cool both faces, put a bubbler in every core over 12 mm, and specify the trial around x-ray, weight and a 4 hour cycle run. DieStrike builds IATF 16949 injection molds with 120+ machines, ±0.005 mm mold accuracy and 2-5 week lead times, for programs with the same heavy-section demands as connector OEMs including TE Connectivity, Amphenol and Luxshare. Contact us before steel is cut, and send the wall thickness with the drawing.
KEEP READING
Related Reading
How to Design Thin-Wall Packaging Molds: Cavitation and Fast Cycles
The opposite end of the wall-thickness problem: 0.3-0.6 mm walls, 8-32 cavities and 3-6 second cycles.
Read articleArticleBaffles and Bubblers for Mold Cooling: When Straight Drilling Fails
Baffle and bubbler geometry for cores too deep to drill straight through, with flow and diameter rules.
Read articleArticlePolycarbonate (PC) Injection Molding: Material Guide
PC shrinkage, drying and mold temperature windows that decide thick-section cooling and packing design.
Read articleServiceInjection Mold Manufacturing
IATF 16949 certified mold building with 120+ machines, 2-5 week lead times and mold accuracy of ±0.005 mm.
Read articleNEXT STEP
Ready to Start Your Mold?
Send us your element dimensions or part numbers — our team responds within 24 hours with pricing and lead time.

Written by
Ray ChanMold Buyer's Guide Author · Precision Mold Manufacturing Specialist. Ray helps global importers, distributors and OEMs source factory-direct molds and mold parts.