
How to Design Molds for Home Appliance Parts: Housings and Class A Surfaces
Table of Contents
A 1.1 m washing machine top panel came out of a 900 ton press with a 4 mm bow across the diagonal. The cavity was cut from standard P20 plate at 60 mm thickness, and the mold flexed under 4,600 cm² of projected area at peak cavity pressure. Every part shipped that week failed the 0.5-1.5 mm per meter flatness gate at final assembly, and the buyer stopped the line for a full tooling review. Large appliance housings fail in slow, expensive ways: plate deflection, texture drag marks, warpage that only shows up after the part cools for 24 hours. Appliance programs run one to three million parts per model life, so a mold defect repeats itself a million times.
Home appliance tooling sits between consumer electronics molds and automotive interior tooling. Panels are big, walls are 2.0-3.5 mm thick, cosmetics matter on visible faces, and annual volumes justify serious steel. This guide covers the mold-side decisions that make or break washer, refrigerator, air conditioner and dishwasher programs: clamp tonnage math, resin selection, texture draft, mold base stiffness, cavity strategy, cooling, ejection, mold life and cost. Process parameters appear only where they drive tooling decisions.
The Snapshot
- Appliance panels of 0.8-1.2 m carry projected areas of 3,000-8,000 cm² and typically need 400-1,200 ton presses at 250-450 bar effective cavity pressure.
- Texture draft on grained surfaces runs 1-3 degrees per side, versus 0.5-1 degree on polished faces, or the part drags and tears the grain.
- Large cavity plates use P20 or 718H pre-hardened steel at 76-126 mm thickness, with hardened HRC 46-52 inserts in wear and gate zones.
- Cooling dominates the cycle: large housings run 60-120 s cycles, and beryllium copper inserts pull heat from thick ribs and bosses 3-5x faster than steel.
- Large appliance molds cost $30K-150K typical and target one million shots or more, which rules out soft tooling construction.
What Appliance Housing Molds Demand
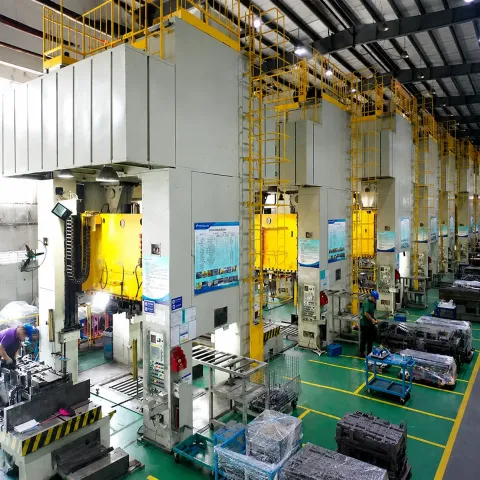
Appliance housings combine four demands that rarely appear together in other industries. First, size: a refrigerator door liner or washer cabinet panel spans 0.8-1.2 m, which puts the mold itself in the 1.5-3 ton weight class per half. Second, cosmetics: front panels and control bezels are Class A visible surfaces with texture or gloss specified by the OEM. Third, volume: a single washer model can run 300,000-800,000 units per year for five to eight years, so the mold must survive one to three million shots. Fourth, cost pressure: appliance OEMs squeeze piece price hard, which makes cycle time and cavity count the primary tooling levers.
Failure modes are size-driven. Small molds fail at features. Large molds fail at structure. Plate deflection of 0.05-0.15 mm under injection pressure shows up as flash on the parting line and dimensional drift across a 1 m panel. Uneven cooling across a 900 mm cavity produces warpage that cannot be fixed by the molder, because the mold itself is asymmetric. Texture surfaces add drag force on ejection that scales with projected area, so a 4,000 cm² textured panel needs ejector tonnage planning that a small housing never faces.
Appliance programs also punish schedule slips. A white goods OEM launches seasonal model years, and a mold that misses T1 by four weeks can push an entire SKU to the next season. That is why appliance buyers weight DFM turnaround and mold lead time heavily. Our injection mold lead time runs 2-5 weeks depending on size and complexity, with DFM feedback inside 24 hours.
Clamp Tonnage for Large Projected Areas
Clamp tonnage is the first hard number in any appliance mold design, because it fixes the minimum press size and drives mold base dimensions. The working formula is projected area times cavity pressure times safety factor. For large appliance panels in PP, ABS and HIPS, effective cavity pressure at the parting line runs 250-450 bar (25-45 MPa), and the industry safety factor is 1.1-1.25.
Take a washer top panel with 4,600 cm² projected area molded in PP at an effective 300 bar. The calculation is 4,600 cm² x 30 MPa x 1.15, which gives roughly 1,590 kN, or about 162 metric tons of clamping force. A refrigerator door liner at 7,500 cm² in HIPS at 400 bar lands near 345 tons. Add runner and sprue projected area, typically 5-10% for cold runner molds, and round up to the next standard press: 400, 500, 650, 800, 1,000 or 1,200 tons. Our clamp tonnage calculation guide walks through the full method with cavity pressure tables by material and wall thickness.
Tonnage is a mold design input, not just a press spec. The press platen constrains maximum mold size, and large appliances eat that envelope fast. A mold for a 1.2 m panel typically needs 1,400 x 1,200 mm or larger plates, which fits an 800-1,200 ton machine but not a 650. Design the cavity layout to the available platen first, then verify tonnage. If the mold is destined for a specific OEM press fleet, get the platen dimensions and tie-bar spacing before the first layout sketch.
| Appliance part | Projected area (typical) | Material | Typical press tonnage |
|---|---|---|---|
| Washer top panel, 0.8-1.1 m | 3,500-5,000 cm² | PP or HIPS | 400-650 t |
| Refrigerator door liner | 6,000-8,000 cm² | HIPS or ABS | 650-1,000 t |
| Air conditioner front panel | 3,000-4,500 cm² | ABS or HIPS | 400-650 t |
| Dishwasher inner door / tub panel | 4,000-6,500 cm² | PP or ABS | 500-800 t |
| Control bezel / trim (multi-cavity) | 300-800 cm² x 2-4 cavities | PC/ABS or ABS | 250-450 t |
← swipe to scroll →
Table note: Typical industry figures for single-cavity panel molds at 250-450 bar effective cavity pressure with a 1.1-1.25 safety factor. Verify against the target press fleet.

Material Selection for Appliance Parts
Appliance housings live on four commodity and engineering resins: PP, ABS, PC/ABS and HIPS. The material choice reshapes the mold, because shrinkage, stiffness and surface behavior differ enough to change cavity dimensions, gate sizing and texture strategy.
PP for structural housings. Polypropylene shrinks 1.2-2.0% depending on grade and nucleation, the widest band of the four, so cavity scaling must be agreed with the exact grade datasheet before cutting steel. PP tolerates living hinges and flexes without cracking, which is why washer detergent dispensers and dishwasher baskets carriers use it. It is also the cheapest resin in the group at $1.1-1.6/kg typical. Mold side, PP needs generous draft, 1-1.5 degrees minimum on polished faces, and it is forgiving on ejection marks because most PP parts are hidden structure.
ABS for visible panels. ABS shrinks only 0.4-0.7%, holds texture and gloss well, and machines into Class A surfaces with SPI A-2 or better polish. Air conditioner front panels, washer control housings and refrigerator trim run ABS for exactly that reason. Mold considerations: ABS needs 0.5-1.0 degree draft on polished surfaces and 1.5-2.5 degrees on textured faces, and its amorphous nature makes warpage mostly a cooling-symmetry problem rather than a crystallization problem.
PC/ABS where heat and impact meet. Dishwasher inner components and dryer housings see 70-95°C air, and PC/ABS carries heat deflection temperatures of 95-110°C versus 85-100°C for ABS. Shrinkage runs 0.5-0.7%, similar to ABS, so the same texture draft rules apply. PC/ABS costs $2.5-3.8/kg typical, roughly double ABS, so designers reserve it for zones that actually see heat.
HIPS for hidden interiors. High impact polystyrene is the refrigerator liner workhorse: cheap at $1.2-1.7/kg, easy to thermoform and mold, shrinkage 0.4-0.7%. It scratches easily and degrades above 70°C, so it stays behind the door gasket. For molders, HIPS flows readily and tolerates long flow paths, which matters on a 1.8 m refrigerator liner.
Front panels and bezels on premium models increasingly specify high gloss ABS with mold temperature control at 60-90°C instead of texture, trading a polished mold surface for a paint-free piano black look. Gloss molds raise polishing and handling cost by 15-25% typical because any scratch shows. Structural parts behind the panel can stay on a coarse VDI 3400 #27-34 texture that hides flow marks and ejection witness.

Textured Surfaces and Class A Finishes
Appliance panels ship with two surface classes on the same part. Visible faces get texture or gloss. Hidden faces get as-machined or coarse grain. Texture is the cheapest cosmetic fix in appliance tooling: a VDI 3400 #21-27 grain hides flow lines, weld marks and minor sink on a 1 m panel that would show on a polished surface.
Texture depth sets draft. This is the rule that kills appliance programs when it is missed at DFM. Texture is etched into the steel, typically 0.01-0.05 mm deep for fine grains and up to 0.1 mm for deep leather patterns. The part must pull off that roughened surface without dragging. Industry practice adds roughly 1-1.5 degrees of draft per 0.025 mm of texture depth, so most appliance textures need 1-3 degrees total draft per side. A polished Class A face needs only 0.5-1 degree. Specify the texture standard early, because draft is cut into the steel and cannot be added later without welding and re-machining the cavity.
Two texture standards dominate appliance programs. VDI 3400 numbers grains from #12 (fine, near-polish) to #45 (deep), and European appliance OEMs specify by VDI number. SPI/Mold-Tech designations (A1-D3, or Mold-Tech MT prefixes) rule North American programs. Texture also changes ejection: drag force on a #34 grain can double versus a polished face, which feeds directly into the ejector layout math below. Our mold texture specification guide covers grain selection, draft per texture depth and etching process controls in full.
Class A gloss surfaces on premium panels flip the problem. A gloss finish requires SPI A-1 to A-2 polish, Ra 0.025-0.1 μm on the cavity, and mold temperature of 60-90°C for ABS to replicate the polish. Gloss cavities demand extra handling: dedicated storage, soft-finger hoists, and polishing rework tolerance built into the schedule. Budget one extra polishing pass per major trial for gloss tools. This is the same discipline we apply to high-gloss appliance bezels, and the tradeoff is real: gloss removes a paint step from the assembly line but adds 15-25% typical mold cost.
Mold Base Steels and Plate Stiffness
Appliance molds fail on stiffness before they fail on hardness. A 4,600 cm² panel at 300 bar effective pressure pushes roughly 138 metric tons of opening force against the cavity plate. If that plate is 60 mm of P20 spanning a 900 mm support distance, it deflects 0.08-0.15 mm at the center. The result is parting-line flash, texture drag marks near the cavity center, and slow dimensional drift as the plate work-hardens and fatigues.
P20 and 718H carry appliance production. P20 pre-hardened to HRC 28-32 is the standard cavity and core steel for large appliance panels: it machines fast, polishes to SPI B-1, welds cleanly for repairs, and costs $3-6/kg typical. 718H (a modified P20 with higher hardenability, HRC 33-37 pre-hardened, supplied hardened through thicker sections) goes into the biggest plates, where P20 would leave a soft core at 100+ mm thickness. For high-volume programs with abrasive or glass-filled materials at ribs, hardened inserts of 420-series stainless or H13 at HRC 46-52 protect gate zones and wear areas. Where cosmetics rule, S136 hardened stainless at HRC 48-52 takes the SPI A-1 polish and resists corrosion from texture etching baths and coolant chemistry.
Plate thickness follows span, not habit. The deflection of a plate scales with the cube of unsupported span and inversely with thickness to the third power. Doubling span multiplies deflection by eight; increasing thickness by 25% cuts deflection roughly in half. Appliance mold bases commonly run cavity and core plates of 76-126 mm with support pillars sized to keep the unsupported span under 500 mm. Shimming a deflected plate after trial is a bandage: the correct fix is pillar layout at design time, with pillars directly under cavity mass and plate thickness verified by deflection calculation before the base is ordered.
| Steel | Hardness | Typical appliance use | Tradeoff |
|---|---|---|---|
| P20 (1.2311) | HRC 28-32 | Large panels, liners, housings | Cheapest, fastest to machine; softens in wear zones |
| 718H (1.2738) | HRC 33-37 | Thick plates, high-volume panels | Hardened through 100+ mm; 15-25% cost over P20 |
| H13 (1.2344) | HRC 46-52 | Gate areas, slides, wear inserts | Tough and hard; slower EDM-heavy machining |
| S136 (1.2083/1.2316) | HRC 48-52 | Class A gloss faces, corrosion zones | Best polish; highest steel and machining cost |
| Beryllium copper (C17200) | HRC 36-42 | Cooling inserts at ribs and bosses | 3-5x thermal conductivity; soft, wears as a forming surface |
← swipe to scroll →
Table note: Typical industry hardness ranges and material costs for appliance production tooling. Final selection depends on volume, resin and cosmetic class.
Dimensional control on appliance molds runs looser than connector tooling but tighter than commodity packaging. Critical dimensions, snap-fit posts, screw boss diameters and assembly datums, hold ±0.05 mm typical, while the mold shop cuts cavity features to ±0.005-0.02 mm to leave shrinkage compensation margin. Flatness across a 1 m panel is the real battleground at 0.5-1.5 mm per meter, and that number is set by cooling symmetry and plate stiffness, not by machining tolerance.
Multi-Cavity and Family Mold Strategy
Appliance bills of materials split into two groups, and each group wants a different mold strategy. Large panels are one-cavity tools: a 1 m washer panel already consumes a 650-800 ton press, and adding a second cavity pushes tonnage past any standard machine. Small parts are multi-cavity territory: bezels, knobs, dispenser levers, filter covers and brackets run 2-8 cavities on a 250-450 ton press.
Balance decides cavity count. A 4-cavity bezel mold with unbalanced runners produces four different parts: cavity 1 fills at 85% of nominal pressure while cavity 4 overpacks, and shrinkage differs by 0.1-0.3% across the mold. For cosmetic bezels that difference shows as gloss mismatch. Design for balance from the start: H-pattern or full-perimeter runner layouts, identical runner lengths to within 1-2 mm, and gate sizes matched per cavity. Naturally balanced layouts keep filling within 5-8% of nominal cavity to cavity; anything worse needs sequential valve gating or runner sizing fixes. Our multi-cavity balancing guide details the runner and gate math.
Family molds are tempting on appliance programs because one mold covers a trim kit. They rarely pay off at appliance volumes. Unequal part sizes mean unequal filling, and balancing a family runner is a compromise that satisfies no cavity fully. Use family molds only for prototypes and low-volume derivatives under 50,000 parts per year. At appliance volumes, separate single- or multi-cavity molds per part, each running on its own cycle, beat a family mold on both quality and total throughput.
Hot runners earn their keep on multi-cavity appliance tools. A 4-8 cavity bezel mold with hot manifolds drops the runner scrap entirely, which at ABS $2.5-3.8/kg and 25-40% runner-to-part ratios pays back a $8K-20K typical manifold investment inside 12-18 months of two-shift production. Valve gates give the cleanest cosmetic gate mark on Class A faces. Single-cavity panel molds usually stay cold-runner or use a simple hot sprue, because the shot is already 2-6 kg and the manifold savings shrink.
Cooling Design for 60-120 Second Cycles
Cooling owns 60-70% of the cycle time on a large housing. A 2.5 mm thick ABS panel at 900 mm length cannot drop below its ejection temperature of roughly 70-80°C in under a minute with standard straight-through channels. Appliance cycles land at 60-120 s typical, and every second saved on a two-shift, 300-day program is worth thousands of dollars per year in press time. Cooling design is a mold-side decision, so it belongs in the tooling budget conversation, not the process sheet.
Channel layout follows the panel, not the plate. Standard practice is 8-12 mm channels at 2-3x channel diameter from the cavity surface and 3-5x diameter spacing between channels. Large flat panels respond well to baffled or bubbler circuits running perpendicular to the long axis, with inlet and outlet manifolds at the mold edges. Turbulent flow matters: keep Reynolds number above 10,000, which for a 10 mm channel means flow velocity of 1.5-2.5 m/s and a temperature drop of less than 3°C between inlet and outlet. Coolant inlet temperature of 20-40°C for ABS and HIPS and 40-60°C for PP keeps cycle time and warpage both under control.
Thick zones need metal, not just water. Screw bosses, mounting pads and rib intersections hold 3-5x the local material volume of the surrounding panel, and they stay hot long after the face freezes. That thermal asymmetry is the number one warpage driver on appliance panels. Beryllium copper inserts at HRC 36-42 conduct heat 3-5x faster than P20 and pull these hot spots down 15-30 s typical on a 90 s cycle. The tradeoff: BeCu wears as a forming surface and cannot take texture well, so inserts belong on hidden faces and non-cosmetic bosses only. Where cosmetics and cooling collide, use hardened steel inserts with conformal cooling channels cut by metal additive or gun-drilling instead.
Cycle time also constrains ejection temperature. Pulling a panel at 85°C instead of 70°C might save 8-12 s, but it hands the molder a part that warps in the cooling fixture and a texture surface that stretches under ejector load. The honest number is the cycle at which the part holds 0.5-1.5 mm per meter flatness after 24 hours at 23°C, not the fastest cycle the press can run.
Ejection and Warpage on Large Panels
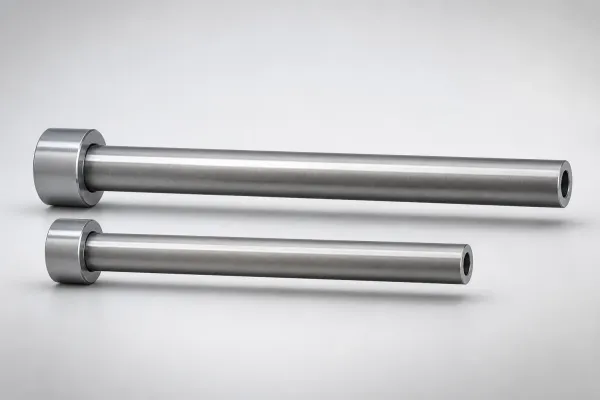
A 1 m panel with 2 degrees of texture draft still needs 15-40 kN of ejection force, because drag scales with contact area and grain depth. Spread over too few pins, that force marks the part. Spread too thin, the pins flex and gall. The layout rule for large appliance panels: ejector pins every 80-150 mm across the panel, sized 8-16 mm diameter, always landing on ribs, bosses or thick sections rather than the cosmetic face. Blade ejectors handle deep ribs; ejector sleeves take over screw bosses; stripper plates are rare on panels this size because the parting line would show across a visible face.
Ejection must be simultaneous and square. A 4,600 cm² panel pushed from one corner bows and whitens before it releases. Design the ejector plate to travel square within 0.05 mm across the full stroke, use four or more return pins on molds this size, and keep ejector stroke 5-10 mm longer than the deepest feature. On textured faces, every pin leaves a witness, so the pin faces get the same texture as the surrounding cavity, usually by etching after assembly with pin pockets masked.
Warpage on appliance panels comes from four sources, ranked by how often they burn programs. Differential cooling across the panel causes the most rejects: fix it with symmetric circuits and BeCu inserts at hot spots. Then shrinkage differential between the ribbed side and the smooth side: PP panels with 3 mm ribs on a 2.5 mm face bow toward the rib side by 1-3 mm per meter unless the mold compensates. Gate location drives orientation and pressure gradients: a 1 m panel wants two or three edge gates or a full-perimeter diaphragm gate, never one central gate with 500 mm flow length on a 2.5 mm wall. Finally, ejection timing: demolding hot releases frozen-in stress that relaxes over 24-48 hours and shows up as late warpage at the OEM assembly line. Mold-side fixes are cavity compensation of 0.3-1.0 mm on known bow directions, gate relocation, and cooling rebalance. All three are cheaper at design review than after T1.
Flatness verification belongs in the trial protocol. Measure the panel on a granite surface plate or CMM at three time points: 1 hour, 24 hours and 72 hours after molding, at 23°C. The 24-hour number is the acceptance gate for 0.5-1.5 mm per meter. Parts that pass at 1 hour and fail at 72 have a cooling or gate problem, not a process problem.
Mold Life and Maintenance at Million-Shot Scale
Appliance molds are long-life assets. A washer panel program at 500,000 units per year over six years asks the mold for three million shots. That class of life requires design intent, not luck: hardened inserts in wear zones, SPI Class 101 or 102 construction standards, and a maintenance plan written before the first trial.
Life limits are component limits. The cavity itself rarely wears out in appliance service; the soft P20 face lasts millions of shots with non-abrasive resins. What fails first are the moving parts. Ejector pins gall and seize at 300,000-500,000 cycles if clearance and lubrication lapse. Leader pins and bushings wear out of alignment tolerance of 0.02-0.05 mm around 500,000-750,000 cycles. Return pins and springs fatigue at 250,000-400,000 cycles. Cooling channels scale and lose 20-40% of flow capacity within two years on untreated water, which silently stretches cycle time back toward 90-120 s. Build these as scheduled replacements: pins and springs at every major service, leader pins measured quarterly, cooling flushed and descaled annually with flow verified at 1.5-2.5 m/s per circuit.
Texture needs its own renewal budget. A VDI #27 grain on a P20 face degrades visibly at 400,000-700,000 shots as polishing during repairs and general wear flatten the peaks. Plan one re-etch every 500,000 shots typical on high-volume cosmetic panels, at $800-2,500 per re-etch depending on panel area, and protect texture areas during every repair weld. Class A gloss faces need light re-polishing at similar intervals to hold Ra below 0.1 μm.
Mold storage between seasonal runs is where appliance programs leak value. A tool that sits six months without preservation rusts in the cooling lines and on polished faces. The standard: clean, dry, coat all steel with rust preventive, plug cooling ports, and store in a humidity-controlled rack. Our mold repair and maintenance service covers scheduled overhauls, texture touch-up and cooling restoration for tools at the 500K and 1M shot marks.

What Large Appliance Molds Cost
Large appliance molds run $30K-150K typical, and the spread is driven by five levers. Size and steel: a 900 mm panel mold in P20 starts around $30K-50K, while the same panel in 718H with hardened inserts and S136 cosmetic zones climbs to $70K-100K. Surface class: texture adds $1,500-4,000 per side; SPI A-1 gloss adds 15-25% to cavity machining and polishing. Cavity count on small parts: a 4-cavity hot-runner bezel mold at $45K-80K beats four single-cavity molds at $18K-25K each once runner scrap and press hours are counted. Cooling complexity: baffles and bubblers add modest cost; BeCu inserts add $1,500-4,000 per location; conformal cooling adds $8K-20K. Lead time compression: standard 8-14 week appliance tooling can be pulled to 4-6 weeks at a 15-30% rush premium.
Cost per shot is the real comparison. A $90K panel mold amortized over two million shots costs $0.045 per part in tooling. A $45K soft-construction mold that dies at 300,000 shots costs $0.15 per part plus a replacement program. At appliance volumes, the hard tooling math always wins, and the question worth asking in every quote review is what shot life the supplier actually designed for. Require the cavity and core steel grade, insert hardness, and the component brand list in writing. A quote that omits steel specification is quoting a different tool than you think.
Piece price sensitivity pushes appliance OEMs toward regional tooling sources. The numbers that matter are the same everywhere: tonnage capacity for 1,200 ton molds, lifting capacity for 3 ton mold halves, and CMM verification of flatness on panels over 1 m. Those capabilities, not price per kilogram of steel, separate shops that can actually run appliance programs from shops that quote them.
DFM Checklist for Appliance Tooling
Most appliance tooling failures trace to decisions made before the mold design review. The checklist below is what we walk through in DFM on every housing program, and buyers can run it against their own CAD before releasing an RFQ.
Geometry and draft. Wall thickness uniform within 3:1 max-to-min ratio across the panel, ribs at 50-75% of nominal wall to control sink, and draft of 1-3 degrees on every textured surface with 0.5-1 degree minimum on polished faces. Any face with less than the texture-driven draft needs either a texture change or a cavity split with slides, and slides on a 1 m panel add $6K-15K typical to the mold.
Gates and fill. Flow length to wall ratio under 150:1 for PP and ABS at 2.5 mm walls, which on a 1 m panel means two to three edge gates or a diaphragm gate. Gate locations agreed with weld line placement: welds must land on hidden faces or non-structural zones, never across a visible panel crown or a screw boss.
Assembly features. Screw bosses sized with 0.3-0.5 mm clearance on pilot holes, snap fits designed for the actual molded shrinkage of the specified grade, and every critical assembly datum identified on the drawing with its tolerance, typically ±0.05-0.1 mm for appliance fit features.
Tooling verification items. Shrinkage factor confirmed against the exact resin grade datasheet, not a material family average. Press platen and tie-bar dimensions confirmed against the target machine fleet. Ejection witness acceptable zones marked on the part print. Texture direction and grain number specified per surface with the etching vendor named. These four lines prevent most trial-stage surprises.
A DFM review that catches a draft or gate problem costs engineering hours. The same problem caught at T1 costs a welded, re-machined and re-textured cavity, usually two to four weeks of schedule. That is why we return DFM feedback within 24 hours on every quote, including appliance programs where the seasonal launch window leaves no slack.
FAQ
Q1. How big of a press do I need for a washing machine panel mold?
A 0.8-1.1 m washer panel with 3,500-5,000 cm² projected area typically needs 400-650 tons at 250-400 bar effective cavity pressure with a 1.1-1.25 safety factor. Refrigerator liners at 6,000-8,000 cm² move into the 650-1,000 ton range. Always verify against the actual gate count and flow length, not just projected area.
Q2. What draft angle do textured appliance panels need?
Plan 1-3 degrees per side on textured surfaces, scaled to grain depth at roughly 1-1.5 degrees per 0.025 mm of texture. Polished Class A faces need only 0.5-1 degree. Draft is cut into the steel, so the texture spec must be frozen before cavity machining starts.
Q3. P20 or 718H for a large appliance cavity?
P20 at HRC 28-32 covers most panels up to about 76 mm plate thickness and under one million shots. Move to 718H at HRC 33-37 when plates exceed 100 mm, when the program passes one to three million shots, or when stiffness analysis shows deflection over 0.05 mm under injection pressure. 718H adds 15-25% typical steel cost and pays back in deflection control alone on the biggest panels.
Q4. How long is the cycle time on a large appliance housing?
60-120 seconds typical for panels at 2.0-3.5 mm walls, with cooling taking 60-70% of it. BeCu inserts at thick bosses and symmetric baffle circuits pull the low end of that range. Any cycle quote below 60 s on a 1 m panel deserves a cooling layout review before you believe it.
Q5. What does a large appliance mold cost and how long does it last?
$30K-150K typical depending on size, steel, surface class and cavity count, with 8-14 week lead times standard and 4-6 week rush options. Design life for appliance production tooling is one to three million shots, limited first by ejector pins, leader pins and springs at 250,000-750,000 cycles, and by texture refresh around 500,000 shots. Scheduled component replacement keeps the cavity itself running well past two million.
The Bottom Line
Appliance housing molds fail on stiffness, texture draft, cooling symmetry and component life, almost never on machining accuracy. Lock the press fleet, the texture spec and the resin grade before the first layout sketch, and design for one to three million shots with hardened inserts and scheduled maintenance. DieStrike builds large-format production tooling to ±0.005 mm mold accuracy with 2-5 week lead times and 24-hour DFM feedback. If you have an appliance panel or housing program in review, send the CAD through our contact page for a tooling assessment.
KEEP READING
Related Reading
How to Design Molds for Consumer Electronics Housings
Small-housing mold rules for consumer electronics: wall thickness, gate placement, cosmetics and tight-tolerance assembly features.
Read articleArticleHow to Balance Multi-Cavity Molds: Runner, Gate and Cooling
Runner sizing, gate balancing and cooling symmetry rules that keep every cavity filling identically shot after shot.
Read articleArticleHow to Extend Mold Life: 5 Proven Strategies
Five proven ways to push a production mold past its rated shot count: steel, coatings, maintenance and running discipline.
Read articleServiceMold Design & DFM
24-hour DFM feedback on steel selection, gating, cooling and tolerance feasibility before your tooling gets cut.
Read articleNEXT STEP
Ready to Start Your Mold?
Send us your element dimensions or part numbers — our team responds within 24 hours with pricing and lead time.

Written by
Ray ChanMold Buyer's Guide Author · Precision Mold Manufacturing Specialist. Ray helps global importers, distributors and OEMs source factory-direct molds and mold parts.