
How to Prevent Black Specks and Gels in Injection Molding
Table of Contents
A 0.3 mm black speck on a Class A automotive bezel scraps the shot, and a hunt for its source can idle a press for 4 to 8 hours. That is 2 to 5 percent of an 8-hour shift lost on every occurrence, before scrap resin and re-inspection. The cost is higher than most teams think because the speck usually rides inside the melt, not on the cavity face, so polishing the mold does not touch it. This guide proves a sorting method, a 15-minute triage and a cost-ranked fix ladder that closes the defect in the right order.
It walks the five root-cause families, from barrel carbonization to mold-side dead zones, and gives the number that identifies each one.
The Snapshot
- Only 1 of the 5 root families is mold-side. Barrel carbonization, degraded resin, moisture and additives, and mechanical wear sit upstream of the tool, so mold work alone fixes at most 20 percent of cases.
- Specks are 0.1 to 2 mm, gels are 0.2 to 5 mm. A speck is an opaque carbon or oxidized-polymer particle; a gel is an un-melted or cross-linked streak with a soft core that shows under a paint lamp.
- Char sheds every 3 to 20 shots after a purge. That cycle count is the signature of screw-tip and check-ring carbonization, and a 3 to 5 shot-volume purge is the reset.
- Fixes cost 0 to 6,000 USD in ladder order. A purge reset costs nothing, a 100 to 200 micron melt filter runs 500 to 3,000 USD, a check ring 200 to 800 USD, screw and barrel reconditioning 2,000 to 6,000 USD.
Sort the Defect Before You Fix It
A speck is an opaque particle, 0.1 to 2 mm across, of carbonized polymer or oxidized resin. It sits on the surface, inside the wall, or both. A gel is different: a 0.2 to 5 mm streak or blob with a soft core, formed when resin never fully melted or when a cross-linked fraction stopped flowing. Gels are near-invisible on natural PP and obvious on clear parts or painted Class A faces.
Sort the population before chasing causes. Cut a suspect part, sand the section and read the cross-section under 10x magnification. A particle that only touches the surface came from the cavity boundary: a mold-side origin such as baked-on film or vent residue. A particle buried in the wall travelled inside the melt, so the origin is the process or the material.
The particle shape narrows the source further. Sharp flakes of 0.1 to 0.3 mm are char breaking off the screw tip or check ring. Rounded nodules of 0.5 to 2 mm are oxidized resin, usually from long residence or dirty regrind. Soft smears that smear under a blade are gels from un-melted cores. This reading is the whole difference between a 20-minute purge and a 6,000 USD barrel rebuild.

Do not confuse this family with streak defects. Splay and silver streaks are voids and moisture boiling drawn out along the flow, not particles, and they move differently when you raise back pressure. If the defect reads as streaks rather than dots, work the moisture and shear path first, as covered in the splay and silver streaks guide. Specks and gels survive a shear increase; splay changes character with it.
Log every finding with three data points: size in mm, depth (surface or buried), and shot position (every shot, every 3 to 20 shots, or lot-correlated). A plant that fills this log for one shift has the origin family before the maintenance team arrives.
The Five Root Cause Families
Five families produce almost every black speck and gel report: barrel and screw carbonization, degraded resin and regrind, moisture and additive bloom, mechanical wear in the plasticizing unit, and mold-side dead zones. Four of the five live in the machine or the material. Only the fifth lives in the tool, which is why mold-side arguments alone close roughly 20 percent of cases.
The table below maps each family to the signature that gives it away and the first number to check. Read it together with the cross-section sort: surface-only rules a material origin in, buried particles rule a cavity origin out.
| Family | Typical signature | Size band | First number to check |
|---|---|---|---|
| Barrel and screw carbonization | Sharp char flakes shedding in a 3 to 20 shot cycle after a purge | 0.1 to 0.3 mm | Nose shadow above 20 C over setpoint |
| Degraded resin and regrind | Rounded oxidized nodules tracking a resin lot | 0.5 to 2 mm | Regrind above 25 to 30 percent, 3-plus reuse cycles |
| Moisture and additive bloom | Dots that re-melt, waxy bloom film, haze on clear parts | 0.1 to 1 mm | PA moisture above 0.2 percent |
| Mechanical wear | Slow drift plus soft gels, tonal mottling, longer shots | mixed | Barrel-screw clearance 15 to 20 percent over spec |
| Mold-side dead zones | Surface-only specks, shedding tied to freeze-out or clamp events | 0.1 to 2 mm | Runner volume cycling 3 to 10 extra shots |
← swipe to scroll →
Table note: signatures and bands are typical industry values for polyolefin and nylon processing. Confirm residence time, regrind limits and moisture specs against the resin datasheet and the machine record before assigning a family.
Barrel and Screw Carbonization
Carbonization starts where melt stagnates and heat runs away. The three classic sites are the screw tip, the crevices behind the check ring, and the dry zone above a heater band that reads 20 C high because the band is failing or the thermowell is bridged. Polypropylene and nylon are the most sensitive common resins: both oxidize to black char at hot metal long before the part temperature tells you anything.
Char does not shed continuously. It builds through 3 to 20 shots, cracks off in a fragment burst, and the burst frequency is the family signature. If your speck count rises and falls on that cycle after every color change or purge, the source is inside the plasticizing unit, not in the tool.

Two rules prevent most bake-in. First, purge 3 to 5 shot volumes on every color or material change, and log it. Second, when the machine is going into an idle, drop the nose zone 20 to 30 C below processing temperature before the stop, so residual melt is not held against hot steel while the line is down. A 30-minute stoppage at full temperature bakes the nose; a dropped setpoint does not.
For recovery, run a closed-hand purge compound at 3 to 5 kg rather than scraping and re-tuning for a shift. Never blow compressed air into an open hopper or a naked nose: it drives dust and moisture into exactly the crevices that shed. Where the char burst is paired with tan streaks or blackened edges, check the dieseling and venting route in the burn marks guide, because the two failure sets share overheated melt.
A plant that writes purge volume and nose temperature into the shift log turns this family from a hunt into a routine. The log is also the evidence that keeps the argument away from the mold when the mold is innocent.
Degraded Resin and Regrind
Resin degrades on a clock and on a counter. The clock is residence time: high-temperature engineering resins such as PA6T and PPS leave a black tail if they sit above 280 C in the barrel for more than 10 to 20 minutes. A small-shot machine on a large barrel exceeds that window easily. The counter is reuse: regrind oxidizes with every thermal pass, and most speck reports on recycled-content parts trace to regrind above 25 to 30 percent or to stock past 3 reuse cycles.
Contamination rides with regrind. A sprue picked up off the floor carries grit, label adhesive and last week's PPE fibers into the next lot. That is why the chain of custody matters more than the percentage: clean, single-resin, sealed-container regrind at 20 percent causes fewer specks than mixed floor sweepings at 10 percent. The same logic drives gel and ash control in molds built for recycled plastics.

Check the dryer and the staging, not just the bag. Regrind left open in a humid plant absorbs moisture overnight, and wet regrind is both a gel source and a hydrolysis source for PA and PET. If moisture is in the story, the setpoints belong in the resin drying guide: PA entering the throat above 0.2 percent moisture is already a defect risk before the first screw recovery.
Two numbers close this family: lot traceability and residence time. Correlate the speck burst with the resin lot and the purge log for one shift, and compute residence as barrel capacity divided by shot size times cycle time. If material sits longer than 10 minutes at melt temperature, shrink the barrel or move to a smaller screw.
Moisture and Additive Bloom
Not every dot is burned carbon. Slip agents, anti-block additives and mold release transfer ride on pellet surfaces and on the cavity face, then re-melt as soft dots or waxy streaks in the part. Bloomed slip on a film-grade PP can exceed 1,000 ppm at the surface after weeks of storage, and that surplus is what shows up as pale-to-dark specks in clear or painted parts.
Moisture works the same way from the inside. Wet nylon above 0.2 percent boils at the nose, foams the melt and leaves a streak-dot mix that readers confuse with char. The test is cheap: a drying reset to the datasheet dew point for 4 to 6 hours removes the moisture family in one hopper load, while carbonization bursts do not respond to drying at all.
Release-agent discipline is the additive cousin of the purge rule. If the process uses spray release, keep it thin, keep it off the parting-line steel where it bakes into film, and never let overspray pool in vents. Aerosol silicones transferred from gloves and dies are the classic origin of the re-melted dot that follows a shift change more than a machine change.
When the dots are additive-born, the fix is chemistry and housekeeping: lower additives, fresher pellets, covered staging, and solvent wipe-downs of cavity film at the planned interval. The filter path below still catches them, but prevention beats 3,000 USD of screens when the bloom is known.
Mechanical Wear in the Plasticizing Unit
A worn screw and barrel make gels by trapping material. The clearance between flight root and barrel wall is a spec. Once wear opens it 15 to 20 percent beyond OEM value, a stagnant annular layer forms, oxidizes slowly, and sloughs into the melt as old carbon flakes mixed with new resin. The tell is time: the defect drifts upward over months on a running machine instead of appearing after a change.
Glass-filled resins accelerate this. A 30 percent GF PA or GF PP walks a nitrided screw toward the 1.5 to 2.0x OEM clearance limit far sooner than unfilled material, which is why abrasion-resistant bimetallic barrels and nickel-alloy or PM-steel screws earn their premium on optical and automotive cosmetic jobs. Measure the clearance at every PM event, not at failure.
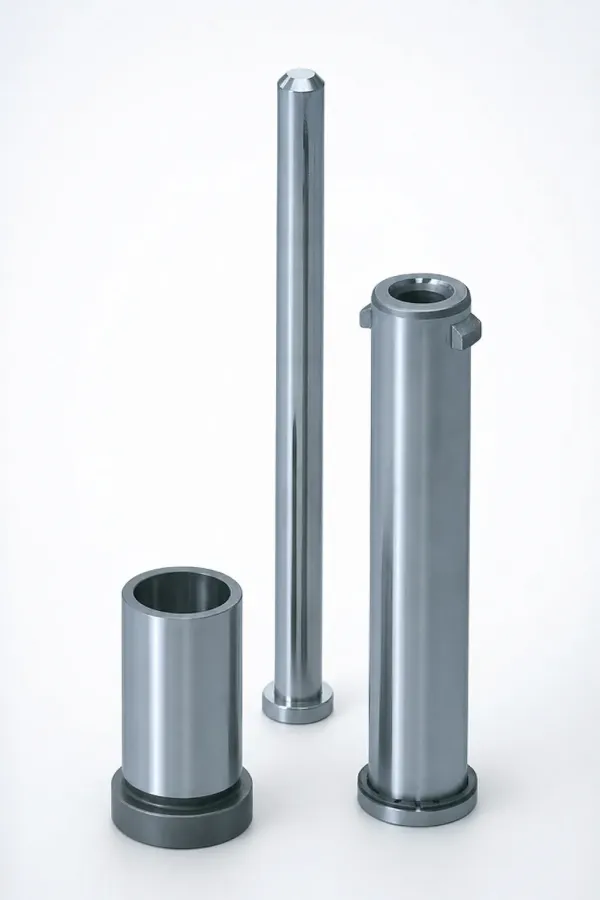
The non-return check ring is the second wear site. A cracked or stuck ring lets melt backflow during the hold, shearing the interface and generating soft un-melted gels plus a shot-size drift. The field signatures are 3 to 8 percent shot-to-shot weight variation and longer screw recovery at the same setpoints. Replacement runs 200 to 800 USD plus 4 to 8 hours of labor, and it is the cheapest mechanical check that pays.
Put the three numbers in the maintenance sheet: barrel-screw clearance against OEM spec, check-ring service hours, and shot weight variation. When clearance reads 15 percent over spec and specks read lot-independent, the rebuild is the fix, not another purge compound.
Mold-Side Dead Zones
Now the mold earns its place on the map. The tool causes specks when material stops moving. A cold-runner pocket, an oversized sprue well, a blind corner in a manifold or a slug that never ejects holds melt that cycles 3 to 10 shots longer than its neighbors. That stranded layer ages, blackens and is eventually swept into a live flow path. Design the runner so every gram is refreshed every shot, and size the cold-slug well to the cut rather than to habit.
Hot-runner sheds in two ways. A leaking tip seal lets melt sit against a 150 to 200 C housing wall, carbonize, and blow a fleck back into the cavity at the next open. Tip-seal service costs 1,000 to 3,000 USD per tool and should follow the maker's shot interval, not the leak. Freeze-out that is over-packed then re-sheared at opening does the same job mechanically: gate freeze timing should eject the frozen plug with the runner, not shred it into the part.
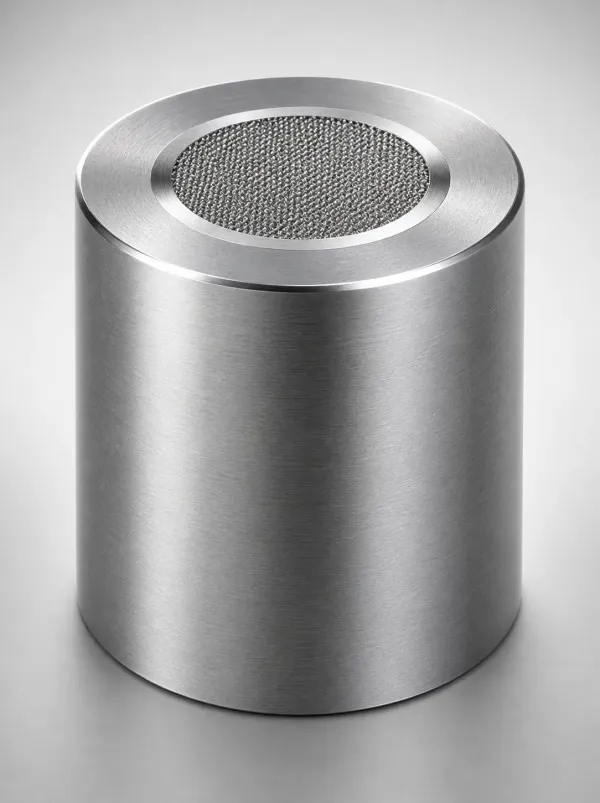
Vents knock residue back in. A vent land packed with oxidized film spits fragments into the cavity at clamp speed, and the speck lands on the surface side, exactly where the cross-section sort predicts a cavity origin. Clean vents on an interval that matches resin aggressiveness, from 20,000 to 50,000 shots for PVC-bearing compounds to double that for clean PP, and keep cooling circuits free of the scale that shifts the mold face temperature and bakes fresh film onto it.
The mold-side defense list at design stage is short. Dead volume near zero, radii of 1.5 mm or more on every flow path, no trapped corner where material can sit for 3-plus cycles. Gate freeze should release a whole plug, and vents should be reachable by a cleaning crew without a partial teardown. That list belongs in the DFM review long before the first shot, because most of it cannot be fixed with a purge.
The 15-Minute Triage
Run this sequence on the press before anyone pulls a screw. It costs one shift-supervisor window and assigns the defect to a family with three observations.
Step one, the paper catch. Catch a shot onto white paper as it leaves the runner and inspect it with a 10x loupe. Fire an empty sprue-only cycle into the paper: specks on a shot with no new resin means mold or hot-runner origin, because the only material involved was already in the tool.
Step two, the purge test. Purge 5 shot volumes of fresh, lot-certified resin and fire 3 parts. Specks vanish: barrel carbonization, go to the purge and nose-temperature rules. Specks persist through clean resin and correlate with the regrind lot on the pallet tag: material origin, quarantine the lot.
Step three, the size map. Sort the caught particles: 0.1 to 0.3 mm sharp flakes point at screw-tip or check-ring char, 0.5 to 2 mm rounded nodules point at oxidized resin or long residence, soft smears point at un-melted gels and wear or moisture. Then section one finished part: surface-only particles hand the case to the mold team, buried particles keep it in machine and material.
Write the four results on one line: paper catch, purge response, lot correlation, size and depth. That line is enough to open the right work order and to stop three teams digging in the same machine.
Fix Ladder Ranked by Cost
Work the ladder from the bottom. Every rung is cheap, fast and evidence-producing, and the top rungs are only justified after the triage line names a family. Skipping straight to a barrel rebuild is how a plant spends 6,000 USD to fix a wet hopper.
| Rung | Cost band | Time | Target family |
|---|---|---|---|
| Purge 3 to 5 shot volumes, drop nose 20 to 30 C before stops | 0 USD | 20 min | Barrel carbonization |
| Closed-hand purge compound at 3 to 5 kg plus heater audit | 100 to 400 USD | 1 to 2 h | Barrel carbonization |
| Resin reset: dry, quarantine lot, cap regrind under 25 percent | Material cost only | 4 to 6 h | Degraded resin, moisture |
| Clean vents, polish cavity bake-on, service hot-runner tip seals | 1,000 to 3,000 USD | One PM window | Mold-side dead zones |
| Non-return check ring replacement | 200 to 800 USD | 4 to 8 h | Mechanical wear |
| Melt filter: screen pack or 100 to 200 micron transducer plate | 500 to 3,000 USD | 1 to 2 h | Any residual on optics |
| Screw and barrel reconditioning at 1.5 to 2x OEM clearance | 2,000 to 6,000 USD | Days | Mechanical wear |
← swipe to scroll →
Table note: cost and time bands are typical shop values for a 100 to 350 ton press cell. Confirm filter rating against the resin supplier's guidance, since a fine screen on a glass-filled compound raises pressure drop and shifts the fill.
A melt filter is a dam, not a cure. On critical optics, a 100 to 200 micron screen catches what the ladder above misses while the true root cause is still being hunted. On glass-filled resins, a fine screen becomes a fiber-cutting and pressure-drop problem, so filter first on unfilled cosmetic and clear parts, then ask the supplier before filtering reinforcement.
Housekeeping closes the gap between rungs. No compressed-air blow-offs into open hoppers or naked noses, purged compound bagged and dated rather than scraped back into the regrind bin, and glove and release aerosols kept away from the throat. These rules cost nothing and they are the difference between a 4 ppm annual speck report and a recurring one.
Prevention Checklist and Buyer Specs
Prevention is a written standard, not a mood. Run this checklist against the cell and the tool every quarter, and the defect family stays rare enough to schedule around rather than fight.
- Purge standard. 3 to 5 shot volumes on every color or material change, logged, with a 20 to 30 C nose drop before planned stops.
- Residence budget. Barrel capacity divided by shot size checked monthly; no PA6T or PPS sitting above 280 C for more than 10 to 20 minutes.
- Regrind rules. Cap at 25 percent, maximum 3 reuse cycles, single-resin closed containers, no floor pickup, lot tags kept with the parts.
- Drying verified. PA below 0.2 percent moisture at the throat, measured with a meter once per shift, not inferred from the dryer lamp.
- Mechanical readings. Barrel-screw clearance and check-ring hours in the PM sheet, action triggered at 15 percent over OEM spec.
- Mold-side audit. Dead volume near zero, 1.5 mm-plus radii on flow paths, tip seals on the maker's interval, vents cleanable in under 30 minutes.
- Catch-and-log discipline. One white-paper shot per startup read with a 10x loupe, size and depth written down before production release.
Buyers carry a second line of defense: the spec. On optical and Class A cosmetic grades, write an outgoing acceptance standard into the PO, for example zero specks above 0.2 mm on Class A surfaces at 10x magnification across 100 parts per inspection lot. Require the purge log and the regrind chain of custody as deliverables, the same way a dimensional report is required. A molder who cannot produce those two records will not keep the defect rate down on demand.
Then make the trial prove it. A T1 through capability sequence should include a startup paper-catch, a 4-hour continuous run with speck counts logged every 30 minutes, and a shutdown purge demonstration. If the process cannot pass that window with regrind capped and drying verified, the cell is not ready for the program, and finding that out at trial is cheaper than finding it out on launch. The shot-by-shot evidence is built in the mold trial and T1 sampling service, where the trial record becomes part of the tool file.
The Bottom Line
Black specks and gels are a family of five root causes, and four of them live upstream of the mold. Sort first: surface-only particles are cavity or hot-runner born, buried particles are process or material born, sharp 0.1 to 0.3 mm flakes are char, rounded 0.5 to 2 mm nodules are oxidation, soft smears are un-melted gel.
Then work the ladder in order. A 20-minute purge reset and a nose drop of 20 to 30 C answers the carbonization family at zero cost. Regrind capped at 25 percent with 3 or fewer reuse cycles, drying verified below 0.2 percent moisture and residence held under 10 to 20 minutes answer the material families. Check rings at 200 to 800 USD and clearance-based reconditioning answer wear. The mold's own share gets paid in design: no dead volume, no trapped corner holding melt for 3 to 10 extra shots, tip seals and vents on a real interval.
DieStrike builds injection molds inside that design discipline, to IATF 16949, with plus or minus 0.005 mm mold accuracy and plus or minus 0.002 mm on EDM and jig grinding. Cavity heat treatment runs to HRC 62 maximum across 120+ machines, standard components ship in 3 to 7 days and tool lead times run 2 to 5 weeks, with tier-1 references including TE, Amphenol, Luxshare and Dongshan. A tool that refreshes every gram every shot is built cheaply at the drawing stage and expensively at the third launch escalation.
KEEP READING
Related Reading
How to Fix Splay and Silver Streaks
Moisture and shear streaking sit next door to gels. Learn the difference before you tear down a screw.
Read articleArticleHow to Design Molds for Recycled Plastics
How gel, ash and regrind content change gate, vent and filtration decisions inside a production tool.
Read articleArticleHow to Set Up Resin Drying
Dew points, hopper loads and moisture meters that keep wet resin out of the speck count.
Read articleServiceMold Trial and T1 Sampling
IATF 16949 trials with documented purge logs, shot records and speck counts before sign-off.
Read articleNEXT STEP
Ready to Start Your Mold?
Send us your element dimensions or part numbers — our team responds within 24 hours with pricing and lead time.

Written by
Ray ChanMold Buyer's Guide Author · Precision Mold Manufacturing Specialist. Ray helps global importers, distributors and OEMs source factory-direct molds and mold parts.