
How to Select a Valve Gate Hot Runner: Pins, Timing and Control
Table of Contents
A 16 drop valve gate tool that opens its pins 0.8 seconds after injection start drags a partly frozen slug across a Class A lens and rejects the run. On the connector program behind this guide, one late pin contributed to 6,400 scrapped housings at 1.8 g each before the timer was corrected to a 0.3 second lead. The tool was sound and the sequence was wrong. Valve gate selection turns on five numbers: the force the pin must hold, when it opens, when it closes, its diameter against the local wall, and the 50 to 150 percent price delta over an open tip.
This guide covers the valve gate decision itself, from actuation family and pin geometry to timing, witness control, seal wear and the selection matrix, so manifold sizing and tip metallurgy stay with their own guides.
The Snapshot
Four numbers decide whether a tool needs a valve gate, and two more decide which hardware it needs.
- Pin force of 500 to 3,000 N. Pneumatic drives hold 500 to 1,500 N at 4 to 6 bar of air, hydraulic drives reach 500 to 3,000 N at 60 to 100 bar of oil, and a positive shut-off seat must hold the pin closed against 100 to 150 MPa of melt pressure.
- Timing resolved in 10 ms steps. The pin opens 0.1 to 0.5 s before injection and closes at pack end or at 8 to 15 mm of screw transfer stroke. A controller that cannot resolve 10 ms cannot repeat that window.
- Pin diameter at 60 to 80 percent of the local wall. A 1.2 mm pin serves a 1.5 to 2.0 mm wall, and a 0.6 mm pin in the same gate deflects, wears the seat and leaks within 200,000 shots.
- Price delta of 50 to 150 percent over open tips. On a 16 drop line the valve gate premium lands between $9,000 and $35,000 per tool, and it pays back in 3 to 7 months when scrap drops 2 to 5 percent.
When a Valve Gate Beats an Open Hot Tip
An open hot tip is a fixed orifice. It cannot close, so it relies on the melt freezing at the gate to end flow. That works on a 2.5 mm gate running polypropylene at 230 °C. It fails on a 0.8 mm gate running POM or 30 percent glass-filled PA66, where the tip strings 3 to 12 mm of melt onto the part every shot.
Four conditions force the valve gate decision on a tool program:
- A gate sits on a cosmetic face. An open tip leaves a blush ring of 0.8 to 1.5 mm on a glossy surface, while a valve gate leaves a flush witness of 0.1 to 0.3 mm that polishing can blend.
- One nozzle must feed several gates. A valve gate nozzle drives 2 or 3 drops into one long part, and each drop closes on its own timer so no region overpacks.
- The resin strings, drools or hangs. POM, PBT, PET and TPU above a 2 mm gate diameter leave strings of 3 to 12 mm, and open tips below 1.0 mm freeze off and short shot a 0.15 mm medical wall.
- Gates must close before packing finishes elsewhere. Family tools, cascade fills and two stage packing need a pin that shuts on command rather than on a thermal delay.
A freeze-off tip adds a second defect mode. The cold slug sits in the gate between shots and enters the cavity on the next injection, which is a visible speck on a 0.3 mm wall and a short shot on a thin lens.
The cost side belongs to the hot runner versus cold runner comparison, and the thermal side belongs to the nozzle selection guide. The decision itself is simpler. If two or more of the four conditions above hold true, the gate should be a valve gate at design freeze, before the manifold plate is cut.
Actuation Families: Pneumatic, Hydraulic, Thermal and Electric
The pin has to move at a known force, at a known moment, and stay where it is put for hundreds of thousands of cycles. Four actuation families cover essentially every production tool, and the differences between them show up as seal load, response time and control resolution.
Pneumatic drives are the default because shop air is already at the press. They are fast, cheap to maintain and adequate for unfilled and lightly filled resins where a 200 N force change costs nothing at the gate seat.

Hydraulic drives take over where force and repeatability matter more than plumbing simplicity. Oil at 60 to 100 bar gives 500 to 3,000 N on the same piston area, which is what a 2.5 mm pin needs to shear a glass-filled melt at a 20 MPa gate seal. Servo electric drives win on resolution: position feedback of 0.01 mm and closing velocity profiling let a pin decelerate into the seat instead of hammering it, which extends a seat from 300,000 to well past 1,000,000 shots.
| Family | Driving force | Response | Where it fits | Watch-out |
|---|---|---|---|---|
| Pneumatic | 500 to 1,500 N at 4 to 6 bar | 0.03 to 0.08 s | 1 to 16 drops on PP, PE, ABS and unfilled PA | Air is compressible, so a 1 bar line drop removes about 200 N of seal load |
| Hydraulic | 500 to 3,000 N at 60 to 100 bar | 0.05 to 0.15 s | Sequence gating on 2 to 8 kg parts and GF30 resins | A 10 °C rise in oil temperature changes force by 4 to 7 percent |
| Thermal expansion | 0.05 to 0.10 mm of stroke, no separate drive | 20 to 40 s | Micro tips under a 1.0 mm gate on 2 to 8 cavity tools | Too slow for sequencing, so it cannot time a cascade fill |
| Electric servo | 500 to 4,000 N with 0.01 mm feedback | 0.02 s with velocity profiling | Optical, medical, LCP and thin-wall parts | Cost index 2 to 3 times pneumatic, and the drive needs a 10 ms timer |
← swipe to scroll →
Table note: force and response figures are typical industry values for commercial pin drives. Confirm piston area, air supply and oil temperature against the supplier datasheet before the manifold pocket is cut.
Thermal expansion pins still earn a place on micro tools. A heated stem grows 0.05 to 0.10 mm and closes a sub-1.0 mm gate without any external plumbing. They are cheap and compact, and their 20 to 40 s response rules them out of any sequence.
Pin and Seat Geometry: Drip-Proof and Shut-Off Tips
The pin and its seat decide whether the gate leaves a witness mark or a leak. Two tip families carry almost all the work. A drip-proof tip uses a shallow cone that shears the melt as it closes. A shut-off tip uses a steeper seat that holds 100 to 150 MPa of melt pressure while neighbouring drops continue to pack.
Sizing follows the local wall. A pin diameter of 60 to 80 percent of the local wall gives a gate mark that reads as a small dimple rather than a ring. On a 2.0 mm wall a 1.2 to 1.6 mm pin is correct. A 0.6 mm pin in the same gate bends under 1,500 N of closing force, wears the seat asymmetrically and leaks within 200,000 shots.

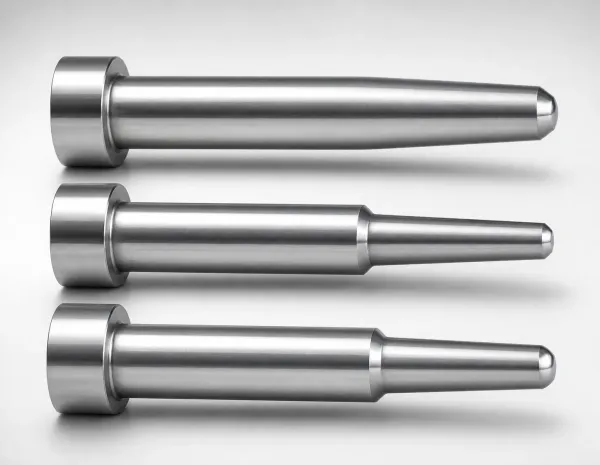
Three clearances set the working life. Pin travel runs 0.5 to 1.5 mm, enough to clear a 0.3 mm gate vestige without a long unsupported stroke. Guide clearance runs 0.01 to 0.02 mm; below 0.008 mm the pin seizes when the manifold reaches 250 °C, and above 0.03 mm melt migrates up the guide in a shift. Seat land width runs 0.3 to 0.8 mm, lapped flat, with a seat angle between 20 and 60 degrees depending on resin viscosity.
Material choice follows the resin. H13 pins at HRC 48 to 52 hold up on unfilled PP and ABS for 1,000,000 shots. A PVD layer of 2 to 5 µm takes that past 500,000 shots on GF30 and keeps the seat land dimension stable. On a 30 percent glass-filled PA66 at 290 °C, an uncoated seat erodes 0.01 to 0.05 mm per million shots, and a 0.02 mm gap is already a drool path.
Match the pin to the plate stack, not only to the gate. A pin that runs through a cold plate and a hot manifold sees a 200 °C gradient over 80 to 150 mm, so its hot position sits 0.02 to 0.06 mm away from its cold position. The seat is set hot, at operating temperature, never on the bench.
Timing Inside the Cycle: Open, Close and Dwell
Pin timing is where a gate either seals cleanly or drags a slug into the cavity. The sequence has four edges that belong in the process sheet: open, close, dwell and the repeated cycle.
The open edge sits after mold close and 0.1 to 0.5 s before injection starts. Opening 0.2 s late lets melt fill the drop and freeze at the gate, which shows up as a short shot on the last cavity of the set. Opening more than 1 s early leaves the gate standing open while the previous part ejects, and a 300 °C drop exposed to shop air oxidises a skin that enters the next part as a black speck.
The close edge is normally set at pack end, or earlier at a transfer position of 8 to 15 mm of screw stroke. A cascade fill closes each drop at 60 to 80 percent of fill so the last gate packs the part without overpacking the region behind the first gate. On a 1.2 kg battery cover this single timer change cut cavity pressure spread from 22 MPa to 8 MPa across six drops.

Dwell is the window after the pin closes and before the mold opens. A 1 to 3 s dwell lets the pin shear the gate cleanly while the part cools enough to hold the witness mark. The window is bounded on the other side by residence time: PA66 at 280 °C degrades after 4 to 6 minutes in the manifold, so a gate held closed through a 10 minute stoppage leaves a 0.2 to 0.5 g degraded slug sitting in the drop.
Three timing faults cover most production complaints. A pin that closes 0.2 s after transfer leaves a 0.5 to 1.0 mm gate string on every part. A pin that opens before the previous part has cleared the drop drops a cold slug onto the core. A timer that runs on a 100 ms step is 5 percent of a 2 s injection and cannot hold a 0.3 s lead across a shift.
PPVS Positive Mechanical Shut-Off
PPVS stands for positive pin valve shut-off, a seat geometry where the pin is mechanically held closed against the melt instead of being held by spring pressure or by thermal contraction. The distinction matters above 100 MPa of injection pressure.
A positive shut-off seat holds 500 to 1,000 N of closing force on a 1.5 to 2.5 mm pin, so it seals against a full 150 MPa injection pressure while the neighbouring drops keep packing. That is what allows one manifold to feed a 300 to 600 mm flow path into a 0.8 mm wall without the gates leaking into each other.
Without positive shut-off, packing from an adjacent drop pushes melt back through a closed gate and lifts the surface. The part then carries a gate blister 0.1 to 0.3 mm high, and the defect appears 30 to 60 mm away from the gate that caused it, which sends most investigations to the wrong drop.
Three capabilities come with the seat design. Gates can sit anywhere in the part rather than at a thick section, because the gate no longer needs a cold plug to seal. Long thin parts can be gated in sequence at a flow length to thickness ratio of 200 to 400. And the gate can close before the pack stage on a part with a heavy boss, so the boss packs through its own path rather than through the cosmetic face.
The seat carries a service cost. A positive shut-off seat that runs against GF30 at 290 °C has to be inspected at 300,000 to 500,000 shots and lapped or replaced. Skip the interval and the seat gap grows from 0.005 mm to 0.05 mm, at which point 0.1 g of melt passes per cycle and the drool becomes continuous.
Gate Witness Control: Blush and Frost Rings
Gate witness is the visible mark the gate leaves on the part. It is measured as the diameter of the ring and its depth below the surface. A hidden gate inside a boss can carry a 0.5 mm witness. An exposed Class A face needs under 0.15 mm.
Two defects sit on either side of the correct setting. A blush ring of 0.8 to 1.5 mm at the gate diameter means the pin is retracting too far and leaving a shoulder for the melt to fill. A frost ring, or a white halo of 1.0 to 2.0 mm, means shear heating at the gate, usually from a gate diameter below 0.8 mm at 250 °C and a shear rate above 40,000 per second.
Blush and frost appear at 20 to 40 MPa of injection pressure when the seal is weak, which is why the defect grows with fill speed. Work the checks in this order. Confirm pin stroke at 0.5 to 1.5 mm and pin seating with a blue check on the lapped seat. Confirm gate diameter against the wall, which for PC at 280 °C means 0.8 to 1.2 mm. Confirm tip protrusion at 0.05 to 0.10 mm and seat land width at 0.3 to 0.8 mm. Then check cavity temperature uniformity, which should hold within 5 °C across the face.
Gate diameter, tip geometry and vestige bands by resin belong to the hot runner nozzle selection guide. The witness check itself belongs on the first article inspection report, measured at 20x and recorded as a diameter, not as a pass or fail note.
Seal Wear and Leak Paths
Every valve gate leak starts as a clearance that grew past its specification. The useful question is which clearance moved, because the five leak paths on a hot runner fail in a known order.
Seat erosion is the first. A coated seat on an unfilled resin loses under 0.01 mm per million shots, while a 30 percent glass-filled resin takes 0.01 to 0.05 mm per million shots off an uncoated seat. A 0.02 mm gap on a 1.5 mm gate passes roughly 0.1 g of melt per cycle, which is 12 kg over a 24 hour run at a 30 second cycle. That is not a cosmetic problem, it is a material loss and a cold slug on the next part.
Thermal mismatch is the second path. A 500 mm steel manifold grows 0.5 to 1.5 mm from 25 °C to 250 °C. If the nozzle body is bolted cold to a cold plate, that growth loads the seat and opens a gap at the tip. The bolts belong on a hot torque procedure, with expansion allowed to slide in the locating slots, not absorbed by the seat.
Cold startup is the third and the most misdiagnosed. At 25 °C the pin sits 0.02 to 0.06 mm away from its hot position, so a tool that seeps on a cold start and seals at 250 °C is showing normal thermal growth rather than a seat defect. Tighten anything on a cold manifold and the same tool will over-stress the seat when it heats up. Soak the tool 30 to 45 minutes at setpoint before judging a seal.
Check the remaining paths in order: nozzle body thread, thermocouple hole, manifold plug, then the gate seat. A cold start leak test at 30 to 50 percent of maximum injection pressure, held for 5 minutes with zero drool at any gate, separates a real leak from a start-up smear. The full diagnostic order belongs to the guide on hot runner leaks.
Multi-Nozzle Sequencing for Long Parts
Long parts need more than one gate. A 700 to 1,200 mm automotive trim panel or battery cover typically runs 3 to 6 drops into one cavity, or into a family of two, and the drops must open in a controlled order rather than together.
The standard cascade opens the first drop 0.1 to 0.3 s before injection and staggers the remaining drops 0.2 to 0.5 s apart as the flow front reaches each gate position. The result is a moving front that passes each gate while the melt is still fluid. Skip the stagger and each gate fills from a cold front, which produces a weld line with 15 to 30 percent less strength at the meeting point.
Closing follows the same logic in reverse. Each drop closes at 60 to 80 percent of fill, and the last drop holds through pack end at 30 to 60 MPa of cavity pressure. Sequencing also moves the weld line to a position the designer chooses, usually at a rib or a hidden flange, instead of leaving it where two fronts meet by chance.
Two machine-level benefits follow. Clamp tonnage can drop 20 to 35 percent, because the projected area is packed in zones rather than all at once, which can move a part to a smaller press or free a larger one. Cycle time usually falls 5 to 15 percent, because the pack stage runs over a partly filled cavity instead of a full one.
The manifold has to support the sequence. Melt channels must balance within 2 percent of shot weight across drops, otherwise the stagger compensates for a pressure error rather than controlling the front. Channel sizing and heater placement belong to the hot runner manifold design guide.
Controller Inputs That Matter
The hardware can only be as good as the timer that drives it. Five controller inputs decide whether a valve gate system repeats shot to shot, and each one has a number attached.
Per-pin timing in 10 ms steps is the first. On a 2 s injection a 100 ms step is 5 percent of the shot, which is enough to move a weld line 15 to 30 mm and enough to scrap a cosmetic part. The second is a pressure-linked close. Triggering the pin from screw position at 0.1 mm resolution, or from hydraulic pressure at a set point, keeps the close edge tied to the melt rather than to a clock that drifts with viscosity.
The third is position feedback of 0.01 mm on the pin, which turns stroke drift into an alarm instead of a defect. The fourth is a zone count that matches the tool: a 16 drop valve gate system needs 16 pin outputs and at least 16 nozzle thermocouples, so a 32 zone controller is the realistic minimum and 48 zones is normal on a 24 drop manifold. The fifth is an alarm window, with pin stroke at plus or minus 0.05 mm, zone deviation at plus or minus 5 °C and a pin cycle counter that flags the seat inspection at 500,000 shots.
Buy the timer with the system, not after it. A controller that holds 10 ms on a 16 drop tool costs 10 to 20 percent more than a 100 ms unit, and it is the difference between a cascade fill that repeats and one that has to be trimmed every shift. The acceptance procedure for those timers belongs to the hot runner validation guide.
Selection Matrix by Material and Part Class
Selection resolves fastest when material and part class are read together, because the wall thickness sets the pin diameter and the resin sets the actuation family. The matrix below covers the part classes that reach a precision tool shop most often.
| Material and part class | Wall and gate | Actuation | Witness target | Verdict |
|---|---|---|---|---|
| PP and PE thin-wall packaging | 0.4 to 0.8 mm wall, 0.8 mm gate | Pneumatic, or none | 1.0 to 1.5 mm, hidden in trim | Open tip holds at 4 to 16 drops; valve gate only when one nozzle feeds two gates |
| PA66-GF30 automotive connector | 1.0 to 2.0 mm wall, 1.0 mm gate | Pneumatic, 500 to 1,500 N | 0.15 to 0.30 mm | Valve gate, coated pin; stringing rules the open tip out above 290 °C |
| PC and PC-ABS Class A cosmetic | 2.0 to 3.0 mm wall, 1.2 mm gate | Hydraulic or servo | Under 0.15 mm | Valve gate with PPVS seat and a 1.5 to 2.0 mm pin |
| POM gears and precision parts | 1.0 to 2.5 mm wall, 0.9 mm gate | Pneumatic | Under 0.30 mm | Valve gate, or a freeze-off tip at 4 drops with a verified 1.0 mm gate |
| LCP and PPS medical micro parts | 0.2 to 0.5 mm wall, 0.6 mm gate | Electric servo, 10 ms timer | 0.10 mm maximum | Servo valve gate; the 0.02 s response is the only way to hold the close edge |
| PEEK and high-temperature housings | 1.5 to 3.0 mm wall, 1.5 mm gate | Hydraulic at 60 to 100 bar | 0.20 to 0.40 mm | Valve gate with PPVS; at 380 to 400 °C melt the 0.5 to 1.5 mm expansion must be designed in |
← swipe to scroll →
Table note: bands are typical values for production tools and must be confirmed against the resin datasheet, the wall section on the drawing and the gate vestige the customer accepts at first article inspection.
Price is the last column of the decision, not the first. A complete valve gate system costs 50 to 150 percent more than an open tip line. On a 16 drop tool, open tips with a shared manifold land at $12,000 to $25,000, and valve gates land at $18,000 to $60,000, so the premium runs $9,000 to $35,000 per tool. The delta buys a closed gate, a controlled witness and a sequence, and it scales with drop count rather than with part size.
Payback follows scrap and cycle time. Take a plant running 500,000 connector parts a month at $0.35 each. Removing 3 percent scrap recovers about $5,250 a month, and the 1.5 to 3 s of cycle time that comes with sequence gating frees machine hours on top. On those numbers a $9,000 to $35,000 premium pays back in 3 to 7 months, and the tool then runs 5 to 10 years. On a 4 cavity commodity part with no cosmetic face, the same calculation never closes, which is why the verdict column above reads open tip.
The system page for the hardware itself, including manifold plate sets, drop assemblies and controllers, sits with the hot runner systems range.
Valve Gate Hot Runner FAQ
Q1. When does a valve gate beat an open hot tip?
When two or more of four conditions hold: a gate on a cosmetic face, one nozzle feeding several gates, a resin that strings above 3 mm, or a fill that needs gates closed before packing finishes. Below that, an open tip at a 1.0 to 1.5 mm gate does the job for less money.
Q2. What pin diameter should a valve gate use?
Pin diameter runs 60 to 80 percent of the local wall, so 1.2 mm on a 2.0 mm wall and 0.6 to 0.8 mm on a 1.0 mm wall. Below 60 percent the pin deflects under 1,500 N of closing force; above 80 percent the gate witness grows past 0.5 mm on a cosmetic face.
Q3. How is valve gate timing set inside the cycle?
The pin opens after mold close and 0.1 to 0.5 s before injection, then closes at pack end or at 8 to 15 mm of screw transfer stroke. In a cascade fill each drop closes at 60 to 80 percent of fill. The timer needs 10 ms resolution to repeat that window across a shift.
Q4. Why does my part show a blush or frost ring at the gate?
A blush ring of 0.8 to 1.5 mm points to excessive pin retraction or a weak seat at 20 to 40 MPa of injection pressure. A frost ring points to shear heating from a gate below 0.8 mm at 250 °C. Check pin stroke, gate diameter, tip protrusion and mold temperature uniformity in that order.
Q5. What does the 50 to 150 percent price premium actually buy?
A gate that closes on command, a witness of 0.1 to 0.3 mm instead of 0.8 to 1.5 mm, melt that stays in the drop between shots, and the ability to sequence 2 or 3 drops into one cavity. On a 500,000 part per month program the scrap and cycle gains pay that premium back in 3 to 7 months.
The Bottom Line
Valve gate selection reduces to five numbers. The pin holds 500 to 3,000 N, the timer resolves 10 ms, the open edge leads injection by 0.1 to 0.5 s, the pin diameter sits at 60 to 80 percent of the local wall, and the premium runs 50 to 150 percent over an open tip. The seat geometry then decides whether the gate seals at 150 MPa or drools 0.1 g a cycle, and the specimen to watch is the witness ring, held under 0.3 mm in production and under 0.15 mm on a Class A face.
Two habits keep a valve gate tool producing. Soak the manifold 30 to 45 minutes before judging any seal, because the hot and cold pin positions differ by 0.02 to 0.06 mm. Then inspect seats by shot count: 300,000 to 500,000 shots on a glass-filled resin, 1,000,000 on an unfilled one, with lapping recorded in the tool file.
DieStrike builds precision injection molds and valve gate hot runner systems to IATF 16949, with mold accuracy of +/-0.005 mm and +/-0.002 mm on EDM and jig-ground features, cavity heat treatment to HRC 62 and 120+ machines in house. Standard components ship in 3 to 7 days and complete injection mold programs run 2 to 5 weeks, with tooling references that include TE, Amphenol, Luxshare and Dongshan.
KEEP READING
Related Reading
How to Select Hot Runner Nozzles: Open Gate vs Valve Gate
Nozzle architecture, gate vestige bands and pin actuation choices for a 4 to 64 drop tool.
Read articleArticleHow to Design Hot Runner Manifolds
Melt balance, heater placement and the 0.5 to 1.5 mm thermal expansion that moves every drop.
Read articleArticleHow to Troubleshoot Hot Runner Leaks
Locate drool, seepage and manifold leaks in the sequence that finds the fault fastest.
Read articleServiceInjection Mold Manufacturing
IATF 16949 mold building with valve gate integration at +/-0.005 mm accuracy and 2 to 5 week lead times.
Read articleNEXT STEP
Ready to Start Your Mold?
Send us your element dimensions or part numbers — our team responds within 24 hours with pricing and lead time.

Written by
Ray ChanMold Buyer's Guide Author · Precision Mold Manufacturing Specialist. Ray helps global importers, distributors and OEMs source factory-direct molds and mold parts.