
How to Transfer a Mold to a New Manufacturer
Table of Contents
A connector OEM shipped a 16-cavity mold to a new molder with no drawings and no 3D data. The tool arrived with a cracked manifold plate, and the receiving plant could not confirm a single critical dimension. Requalification failed twice, and the production line sat idle for 11 weeks. Mold transfers look like a logistics job, but they are engineering projects. The tooling itself is only half of the asset. The other half is the data, the process history and the verification record that travels with it.
A mold transfer moves production of an existing tool from one manufacturer to another. It happens after supplier disputes, capacity shifts, cost reviews or company relocations. Industry surveys of tooling buyers put unplanned transfer downtime at 4 to 12 weeks per tool, and refurbishment surprises add $2,000 to $15,000 per mold when wear was never assessed before shipping. Most of that loss is avoidable. Every failed transfer we investigate skipped the same 3 steps: ownership confirmation, data handover and pre-shipment wear assessment.
The Snapshot
- A complete data package has 6 items: 2D drawings, 3D STEP files, BOM, electrode records, heat treatment certs and the last CMM report. Missing 3D data alone adds 2 to 4 weeks of reverse engineering.
- Pre-shipment wear assessment costs $300 to $1,200 per mold and catches the defects that turn a $4,000 refurbishment into a $25,000 rebuild.
- Requalification at the new plant needs 1 full dimensional report on critical features plus a 30 to 50 shot capability run. Budget 2 to 4 weeks.
- Shipping a 3 to 10 ton mold costs $800 to $4,000 domestic and $2,500 to $8,000 overseas. Rust prevention buys 12 months of storage life.
- Refurbishment before restart typically runs $1,500 to $15,000. Seals, hoses and leader pins are consumables on every transfer.
Why Mold Transfers Fail
Mold transfers fail for 5 recurring reasons, and only one of them is physical damage. The far more common killer is missing information. A tool that ran 2 million shots at the old plant carries process knowledge that never appears on the steel: gate freeze times, vent depths after polishing, cooling circuit restrictions and the shims that hold alignment. When that knowledge stays behind, the new plant starts from zero.
Failure mode 1: no data package. Without 2D drawings and 3D models, the receiving shop must reverse engineer the mold. A full CMM scan and model rebuild of a 4-cavity tool takes 2 to 4 weeks and costs $3,000 to $8,000. Tolerances reconstructed from scans are guesses, not specifications.
Failure mode 2: undisclosed wear. A mold at 1.5 million shots may have 0.05 to 0.15 mm of flash at worn shut-offs and elongated ejector pin holes. If nobody measures this before shipping, the new plant inherits the defect and the blame argument that follows.

Failure mode 3: utility mismatch. Cooling ports, heater connectors and ejector stroke differ between plants. European molds often use HASCO or Meusburger fittings while North American shops run NPT threads. Adapters cost $15 each, but a mismatched hot runner controller can cost $6,000 to replace.
Failure mode 4: machine mismatch. Tie-bar spacing, clamp tonnage and daylight at the new plant may not fit the tool. A 600 ton mold on a 400 ton machine produces flash from day one. Checking this before the truck moves costs nothing. Checking it after costs a full return shipment.
Failure mode 5: ownership disputes. If the mold payment was never completed or the contract assigns tooling to the molder, the old supplier can legally refuse release. Roughly 1 in 5 contested transfers we hear about stalls 30 to 90 days on paperwork alone. The 8-step process below closes every one of these gaps in order.
Step 1: Confirm Ownership and Contract Terms
Before anything moves, confirm in writing that you own the tool. Check 4 documents: the original purchase order, the tooling contract, the payment records and any amortization agreement. If the mold price was amortized into piece price, ownership may transfer only after a defined shot count or dollar threshold.
Verify payment completion. A mold quoted at $45,000 with a 50/50 payment split belongs to the builder until the second half clears. Request a paid-in-full letter that states the tool number, the cavity count and an explicit ownership statement. Keep it with the mold file forever.
Check for liens and escrow terms. Some contracts hold tooling as security for unpaid piece-price invoices. If your account carries a balance of any size, settle it before requesting release. Suppliers legally withhold tooling under many jurisdictions until invoices clear, and a dispute adds 30 to 60 days.
Sign a release and handover agreement. The agreement should list every physical item: mold halves, loose inserts, spare electrodes, spare components and special fixtures. Attach the serial numbers. A typical precision mold carries $2,000 to $8,000 of loose inserts and spare parts that vanish if nobody lists them.
Notify both plants in one thread. Introduce the outgoing supplier and the receiving shop in the same email chain. Technical handover works 3 times faster when the two tool rooms can talk directly about shut-off conditions and process quirks. At DieStrike we respond to incoming transfer inquiries within 24 hours, including DFM and tooling-condition questions, because every day of silence is a day of downtime.
Step 2: Assemble the Data Package
The data package is the single biggest predictor of transfer success. Request it from the outgoing supplier as a written deliverable, item by item. A complete package for a production mold contains 6 categories, and each one prevents a specific class of delay.
2D drawings. Assembly drawings plus detail drawings for cores, cavities and slides. They must carry tolerances. For precision tooling, key mold dimensions hold ±0.005 mm and part-forming features hold ±0.002 mm. Drawings without tolerances are pictures, not specifications.
3D CAD models. STEP or IGES files of the full assembly, ideally with native files if the license permits. 3D data lets the new shop program repair electrodes directly. Without it, every repair starts with a scan.

Bill of materials. Every standard component with brand and part number: ejector pins, core pins, sprue bushings, springs, leader pins and hot runner elements. A 32-cavity mold easily carries 200 to 400 standard parts. The BOM tells the new plant what to stock as spares.
Material and heat treatment records. Steel grade certificates for cores and cavities, plus hardness results. Cavity steels in high-wear tools are typically hardened to HRC 58 to 62. If the record says H13 at HRC 46 where the drawing calls for HRC 62, you have found a repair item before shipping.
Maintenance and shot history. Total shots, polish dates, weld repairs, component replacements and last preventive maintenance. A tool at 3 million shots with documented maintenance every 50,000 shots is a very different asset from a tool at 3 million shots with no records. This history feeds the wear assessment in Step 3.
Last dimensional report. The most recent CMM report or first article inspection, even if it is 2 years old. It gives the new plant a baseline. After the transfer trial, deviations from this baseline separate transport damage from normal wear.
Step 3: Assess Wear Before the Tool Leaves
Never ship a mold without an independent condition assessment. The outgoing supplier has an obvious conflict of interest in declaring the tool healthy. Commission a third-party inspection or have the receiving shop audit before packing. Budget $300 to $1,200 per mold and 2 to 5 working days.
Measure the parting line and shut-offs. Blue the parting surfaces and check contact. Healthy shut-offs show 80 percent or better contact across the sealing land. Worn areas with 0.03 mm or more of gap will flash immediately at the new plant. Record every location with photos.
Check ejector and core pin clearances. Measure pin-to-hole clearance on a sample of 10 to 20 percent of the pins. New precision fits run 0.005 to 0.02 mm of diametral clearance. Anything above 0.05 mm produces flash on pins and marks the tool for refurbishment.
Inspect slides and lifters. Look for galling on wear plates and measure angle-pin clearance. Slide wear above 0.1 mm per side changes part dimensions at the undercut and causes drag marks. Worn wear plates are cheap at $50 to $150 each. A scored slide face costs $800 to $2,500 to weld and re-machine.
Pressure-test the cooling circuits. Run each circuit at 5 to 6 bar for 15 minutes and log the flow rate. Scaled channels lose 30 to 60 percent of flow and add 5 to 15 seconds to cycle time. A blocked circuit found now costs $200 to $600 to clean. Found after installation, it costs a failed trial plus the cleaning.
Inspect the hot runner system. If the mold runs hot, test every heater for resistance and every thermocouple for response. Replace heaters that read outside plus or minus 10 percent of nameplate. Note the controller brand and firmware. A discontinued controller adds $4,000 to $8,000 and 4 to 8 weeks to the transfer.
Document everything in one report. The output is a condition report with measurements, photos and a traffic-light rating per component. This document becomes the refurbishment budget in Step 4 and the liability baseline for shipping damage in Step 6. Without it, every dispute after arrival is unresolvable.
Step 4: Budget Refurbishment Before You Ship
Every transferred mold deserves a refurbishment budget, even a healthy one. The condition report from Step 3 converts directly into line items. Industry practice prices a full transfer refurbishment at $1,500 to $15,000 per mold depending on cavity count, hours run and hot runner content. Approve this budget before the tool moves, not after it fails a trial.
Always-replace consumables. Budget for new seals, O-rings, water hoses, clamps and any ejector pin with visible wear. This package runs $200 to $800 per tool. Fresh seals eliminate the mystery leaks that plague transferred molds in the first month.
Typical wear repairs. Worn shut-offs need welding and re-machining at $500 to $2,000 per area. Elongated pin holes get bushing inserts at $150 to $400 per location. Polish restoration on textured or glossy surfaces runs $300 to $1,500 per cavity set. Price each item from the condition report and get sign-off.
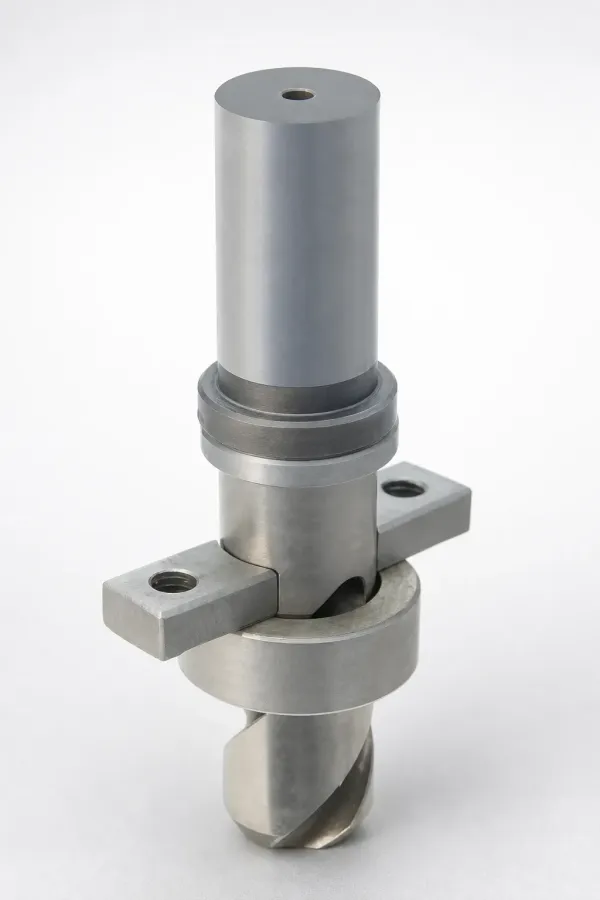
Standard component refresh. Springs fatigue at 300,000 to 1,000,000 cycles depending on grade and compression. Leader pins and bushings wear above 0.05 mm of clearance. A full standard-parts refresh for a 16-cavity tool costs $600 to $2,000. Suppliers stocking DME, HASCO and MISUMI lines ship standard components in 3 to 7 days, so this work rarely adds lead time if ordered early.
Decide refurbishment location carefully. Repairing at the outgoing plant risks another handover delay. Repairing at the receiving plant means their tool room learns the steel. A neutral third option works well for contested transfers. Whoever does it, require a post-repair dimensional check on every touched feature.
Hold 10 to 20 percent contingency. Condition reports find surface defects. Hidden cracks in cores and broken heaters inside manifolds show up only during teardown or trial. On a $6,000 refurbishment plan, hold $600 to $1,200 aside. Transfers that bust budgets almost always skipped this line.
Step 5: Packing, Lifting and Shipping
Physical damage in transit is the failure mode everyone fears and the easiest to prevent. Molds are dense, precision assemblies. A 4-cavity automotive mold weighs 2 to 6 tons and a large housing tool can exceed 15 tons. One dropped corner or one day of rain on bare steel undoes years of careful maintenance.
Prepare the mold for travel. Close and lock the mold with the safety strap or lock blocks engaged. Retract all slides and lifters to their home positions. Drain every cooling circuit completely and blow it out with dry air at 3 to 5 bar. Trapped water freezes, corrodes or bursts lines in transit.
Apply rust prevention. Coat all exposed steel with a long-term rust preventive. A quality VCI product protects for 6 to 12 months indoors and 3 to 6 months overseas. Skip this step and a 3-week ocean voyage delivers surface rust that needs $500 to $2,000 of polishing to remove.
Protect the parting line. Never let the two mold halves ride unsecured. Bolt them closed or install mechanical locks. Add edge protection on all machined faces. Loose inserts travel in a separately labeled and cushioned box, listed against the BOM from Step 2.
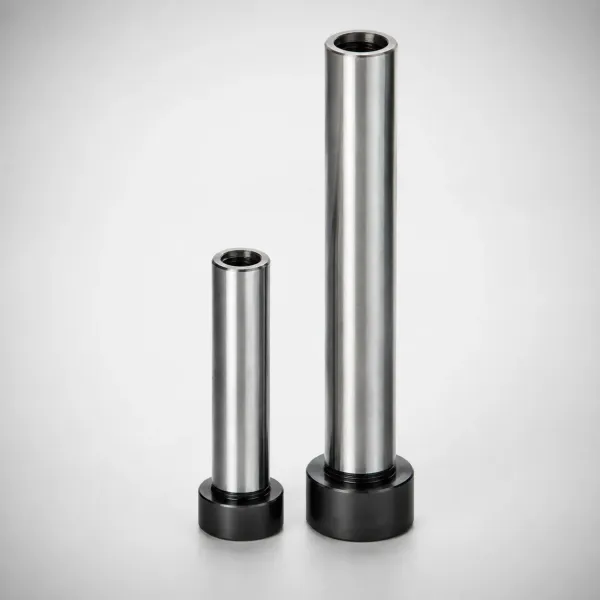
Use certified lifting points. Molds carry forged eyebolts rated for the tool weight. Check every eyebolt for the stamped load rating and inspect threads before the crane hook touches the tool. A 5-ton mold needs eyebolts rated at 5 tons or more each, with angular derating applied. Forged shoulder nuts on loose inserts prevent point-loading damage.
Ship on a skid or cradle, never on its side. Bolt the mold to a hardwood or steel skid sized to the footprint. A mold shipped lying on a slide face arrives with bent components. Typical domestic freight for a 3 to 10 ton mold runs $800 to $4,000. Ocean freight with crating runs $2,500 to $8,000 plus 2 to 5 weeks of transit.
Insure for replacement value, not book value. A 12-year-old mold may carry a book value near zero while replacement costs $60,000 to $200,000. Insure at replacement cost and photograph the loaded tool from 8 or more angles before the doors close. Those photos settle every damage claim.
Step 6: Receiving Inspection in the First 48 Hours
The first 48 hours after arrival decide who pays for any damage. Carrier claims require immediate documentation, and most freight insurance demands written notice within 2 to 5 days. Build the receiving inspection into the schedule before the truck arrives.
Inspect before signing clean. Check the crate for forklift holes, crushed corners and water stains. If damage is visible, note it on the bill of lading before the driver leaves. A clean signature on a damaged shipment voids most claims.
Compare against the pre-shipment report. Open the mold and walk the condition report item by item. Every new mark, crack or bent component gets photographed against the shipping photos. New damage found within 48 hours is a carrier or packing issue. Damage found in month two is a maintenance issue. The report is what separates them.
Verify the packing list against the asset list. Count loose inserts, spare electrodes, fixtures and spare parts against the handover agreement from Step 1. Missing items on a 16-cavity tool average $2,000 to $8,000 in replacement cost. Chasing them from an uncooperative ex-supplier takes 4 to 8 weeks.
Run a static functional check. Cycle the ejector system by hand through its full stroke. Move every slide and lifter. Check heater resistance against the nameplate values in the data package. These 30 minutes of checks catch transport damage before the mold ever sees a machine.
Clean and re-preserve if storage will be long. If the mold will wait more than 2 weeks for its slot, remove the shipping preservative from sealing faces, apply fresh long-term rust preventive and log the date. Molds in climate-controlled storage still need preservation renewal every 6 to 12 months.
Step 7: Verify Utilities and Machine Match
A mold that ran perfectly at the old plant can be incompatible with the new one. Verify the physical interfaces before scheduling any trial. This step costs half a day of engineering time and prevents the most expensive class of transfer failure: a tool that cannot run at all.
Check machine fit first. Measure mold height against the machine daylight with the clamp fully open, and mold width against tie-bar spacing minus 20 to 30 mm of installation clearance. Confirm clamp tonnage covers the projected area at the intended cavity pressure. Our mold-machine compatibility checklist walks through all 12 checks, from locating ring diameter to KO hole pattern.
Map every utility connection. List each cooling circuit with its port thread type and size. European tools commonly use G threads or HASCO couplers while US plants run NPT. Adapters cost $10 to $25 each and are a 1-day fix if ordered before the trial, or a 3-day delay if discovered during it.
Confirm electrical interfaces. Hot runner connectors vary by controller brand. Check voltage, phase count and connector type against the plant supply. Hydraulic core-pull circuits need matching hose sizes and pressure ratings, typically 100 to 150 bar for mold-mounted cylinders.
Verify ejection interface. Compare the mold ejector plate pattern with the machine knockout pattern. Metric and imperial knockout layouts differ by enough to require an adapter plate at $300 to $800. Confirm ejector stroke against the machine KO stroke, with at least 5 mm of margin.
Check crane and handling capacity. The shop must lift the full mold weight plus a 25 percent safety margin into the machine. A 6-ton mold needs a 7.5-ton-rated lift path. Confirm bridge crane height clears the machine tie-bars during installation.
Document the utility map in the mold file. One page with thread types, voltages, pressures and stroke requirements turns every future changeover into a routine task. At DieStrike, mold builds and transfers ship with SPI-standard utility connections documented on the data plate, because a mold that any plant can plug in holds more resale value.
Step 8: Requalification Trial and Dimensional Verification
The mold now sits in a new machine, in a new plant, with new utilities. Nothing about the process is identical, so the parts are not qualified until proven. Requalification is the step that turns a transferred asset back into a production asset, and it has 4 gates.
Gate 1: dry cycle and function test. Run the mold empty for 30 to 50 cycles. Verify ejection, slide timing, hot runner heating and cooling flow rates. Any abnormal sound, drag or temperature deviation stops the run. This gate typically takes half a day and catches 80 percent of setup issues.
Gate 2: process development shots. Run 30 to 50 shots while developing the process window. Expect to redevelop settings from scratch. Cooling water temperature, residence time and machine response all changed. Record the final parameter sheet and attach it to the mold file as the new baseline.
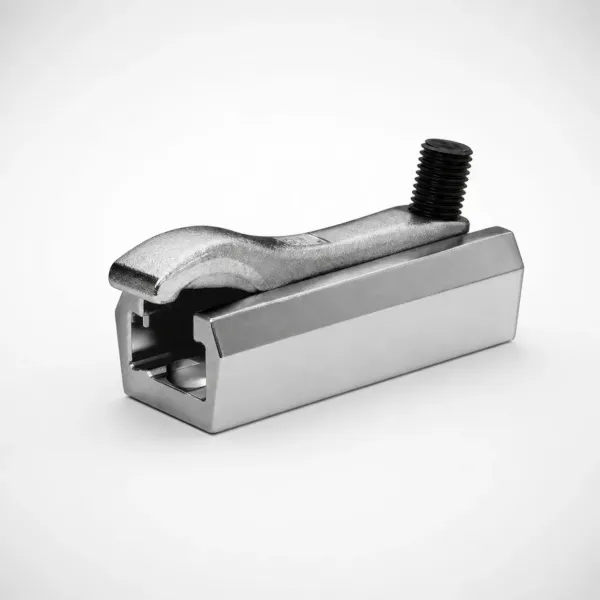
Gate 3: dimensional verification. Inspect 5 to 10 consecutive shots against the 2D print. Measure every critical dimension and all features flagged in the last CMM report from the data package. For automotive and connector customers, run a full first article per PPAP or ISIR requirements, typically 30 to 100 measured features.
Gate 4: capability run. For high-volume parts, run 100 to 300 consecutive shots and calculate Cpk on critical dimensions. A Cpk of 1.33 or better matches typical automotive requirements. If a dimension drifts, check the mold against the pre-shipment condition report before touching the process. Steel problems never respond to parameter changes.
Handle deviations methodically. A dimension out of print tolerance by up to 0.05 mm may be correctable through process. Beyond that, suspect wear or damage and pull the CMM report comparison from Step 6. Shrinkage differences between machines typically explain 0.02 to 0.10 mm on semi-crystalline materials like POM or nylon.
Close the loop with documentation. The transfer is complete when the file holds the new process sheet, the dimensional report, the capability study and the updated maintenance schedule. For automotive customers, this package supports PPAP resubmission at level 2 or 3, which most OEMs require after a tool moves plants.
When a Mold Should Not Transfer
Transferring is not always the right move. A worn 20-year-old tool can cost more to move, refurbish and requalify than a new one costs to build. Run these 5 checks before committing. If 2 or more flags appear, price a replacement mold in parallel.
Flag 1: repair cost exceeds 40 percent of replacement. If the condition report totals $30,000 of repairs on a mold that costs $70,000 to rebuild new, the transfer rarely pays. New steel also resets the shot counter and comes with a fresh warranty.
Flag 2: no 3D data and an uncooperative supplier. Reverse engineering costs $3,000 to $8,000 and still misses design intent. For tools with complex slides or unscrewing cores, missing data pushes transfer risk past the point of sanity.
Flag 3: obsolete hot runner or controller. A discontinued controller with no spare heaters turns every failure into a 4 to 8 week stoppage. Retrofitting a 24-drop system costs $15,000 to $40,000, which often exceeds the mold residual value.
Flag 4: the tool is past its design life. A mold designed for 1 million shots that has run 1.4 million carries fatigue in cores, parting lines and shut-offs. Expect dimensional drift that no refurbishment fully removes.
Flag 5: ownership is contested. If the ex-supplier claims the tool or holds unpaid invoices, legal resolution averages 30 to 90 days. During that window the product stops shipping either way, so a fast replacement quote may win.
Mold Transfer Timeline and Cost
A complete transfer of one production mold takes 6 to 12 weeks when data is complete, and 3 to 4 months when it is not. The table below shows typical phase durations and costs for a mid-size 4 to 16 cavity mold, using industry-typical figures. Multiply engineering phases by the number of tools only if they can share one data review.
| Phase | Typical Duration | Typical Cost (USD) |
|---|---|---|
| Ownership and contract confirmation | 1 to 2 weeks | $0 to $500 (legal review) |
| Data package assembly | 1 to 2 weeks | $0 if supplier cooperates, $3,000 to $8,000 if reverse engineered |
| Pre-shipment wear assessment | 2 to 5 days | $300 to $1,200 |
| Refurbishment | 1 to 3 weeks | $1,500 to $15,000 |
| Packing and shipping (domestic) | 3 to 7 days | $800 to $4,000 |
| Packing and shipping (overseas) | 2 to 5 weeks | $2,500 to $8,000 |
| Receiving inspection | 1 to 2 days | Included in labor |
| Utility and machine verification | 0.5 to 1 day | $100 to $800 in adapters |
| Requalification trial | 1 to 2 weeks | $500 to $3,000 (machine time, inspection) |
| PPAP or ISIR resubmission (automotive) | 2 to 4 weeks | $1,000 to $5,000 |
← swipe to scroll →
Table note: Industry-typical figures for a mid-size 4 to 16 cavity production mold. Actual costs vary with tool weight, cavity count, hot runner content and freight lane.
The cheapest transfers share one trait: all engineering work happens before the truck arrives. Data review, wear assessment and refurbishment can overlap in weeks 1 to 3. Shipping and requalification then run back to back, landing production parts 6 weeks after kickoff instead of 12.
FAQ
Q1. How long does a mold transfer take?
Plan 6 to 12 weeks per tool when the data package is complete. Contested ownership or missing 3D data pushes that to 3 to 4 months. The fastest transfers confirm ownership and receive the condition report within the first 2 weeks.
Q2. How much does it cost to transfer a mold?
Typical total is $3,000 to $30,000 per mold, covering assessment, refurbishment, freight and requalification. A healthy 4-cavity tool moving domestically can land under $5,000. A worn hot-runner tool crossing oceans can exceed $30,000.
Q3. Can the old supplier refuse to release the mold?
Only if they retain legal grounds, such as unpaid invoices or a contract clause assigning ownership. With full payment and a clear title clause, release is your right. Settle any balance first, then send a written release request with a 10 to 15 day deadline.
Q4. Do we need to redo PPAP after a transfer?
Yes for most automotive programs. A change of manufacturing site is a reportable change, and OEMs typically require PPAP resubmission at level 2 or 3, including dimensional results and a capability study with Cpk of 1.33 or better. Budget 2 to 4 weeks.
Q5. What if the mold arrives damaged?
Note visible damage on the bill of lading before the driver leaves, then photograph everything within 48 hours and file the claim inside the insurer notice window of 2 to 5 days. A pre-shipment condition report is what proves the damage happened in transit.
The Bottom Line
Mold transfers fail on missing data, hidden wear and skipped verification, not on freight. Confirm ownership, collect all 6 data items, assess wear before shipping, budget refurbishment and requalify with 4 gates. DieStrike runs IATF 16949 precision tooling at ±0.005 mm and accepts transferred molds with 24-hour technical response. Planning a transfer or a replacement quote? Talk to our tooling team.
KEEP READING
Related Reading
Mold to Machine Compatibility Checklist: 12 Checks Before You Cut Steel
Verify tie-bar spacing, clamp force and utility ports before the transferred tool ever runs.
Read articleArticleHow to Run a Mold Trial: T0, T1, T2 and First Article Approval
Run the requalification trial at the new plant with a documented T1 workflow.
Read articleArticleHow to Read a CMM Report: Dimensional Data for Mold Buyers
Read the CMM report that proves the transferred mold still holds print tolerances.
Read articleServiceMold Repair and Maintenance
Refurbishment, wear repair and preventive maintenance for transferred tooling.
Read articleNEXT STEP
Ready to Start Your Mold?
Send us your element dimensions or part numbers — our team responds within 24 hours with pricing and lead time.

Written by
Ray ChanMold Buyer's Guide Author · Precision Mold Manufacturing Specialist. Ray helps global importers, distributors and OEMs source factory-direct molds and mold parts.