
Mold Safety Standards: SPI Utility Connections and Buy-Off Checklist
Table of Contents
A 14,000 kg mold dropped 1.2 m during crane transfer because the lifting holes were undersized. A technician lost two fingers to a slide that had no mechanical lock. A hot oil line burst at 200°C because the mold used non standard fittings nobody had inspected. Every one of these accidents traces back to the same failure. The mold left the tool room without passing a documented safety and standards buy off. SPI utility standards and a written acceptance checklist exist precisely to stop that. When a mold arrives with wrong water fitting threads, missing heater cartridge specs or no nameplate, the press room improvises, and improvisation is where injuries and scrapped tools come from.
The Snapshot
- SPI mold classes run from Class 101 (1,000,000+ cycles, hardened steel) to Class 105 (prototype, soft tooling), per the public SPI/ASME classification.
- Standard mold water fittings are 3/8 in NPT female inlets typical, with 1/4 in NPT plugs typical for unused ports.
- Ejector knockout holes follow SPI standard diameters of 1 in, 1.5 in and 2 in typical, centered on the mold.
- A T1 buy off should verify 100% of critical dimensions on the CMM report, with mold accuracy at ±0.005 mm and cavity hardness documented at HRC 62 typical for hardened steels.
- Shipping preservation needs VCI film or emitter, mechanical mold locks, and cooling lines blown dry to under 0.5 bar residual pressure before crating.
This guide walks the full standards stack. We cover SPI mold classification, the standard water, electrical and ejection interfaces every press expects, and a buy off checklist you can run at T1 or at final acceptance. DieStrike builds injection molds to IATF 16949 controls, holds ±0.005 mm on critical mold dimensions, and ships standard components like ejector pins and sprue bushings in 3 to 7 days, so the acceptance workflow below matches what our tool room documents in practice.
Why Mold Safety Standards Matter
A mold is a pressure vessel clamped between two platens at 50 to 500 tons. The stored energy in one hydraulic clamp exceeds what any body part can survive. The SPI mold classification system, published as a public industry standard and mirrored in ASME and DME/HASCO catalogs, gives buyers and builders a common language for how tough, how standard and how safe a tool must be before it ships.
Non standard tools fail in the press room.When water fittings are M10 metric instead of 3/8 in NPT, a US press room cannot connect cooling without adapters. Adapters leak at 4 to 6 bar typical working pressure, water hits hot steel, and a steam burn follows. Standardization is not bureaucracy. It is the difference between a 10 minute hookup and a shift long plumbing project.
Safety hardware prevents the top three mold injuries.Industry incident reviews put crushing, burns and lacerations at the top of mold handling injuries. Mechanical slide locks, correctly sized lifting holes, and mold open controllers that verify ejection reset all attack those three modes directly. Every item on the buy off checklist in this article maps to one of them.

Standards protect the asset, not just people.An unmarked water circuit takes 3 to 4 times longer to troubleshoot during a cooling failure. A mold shipped without VCI protection can show surface rust within 72 hours in humid transit. Rust on a parting line means rework measured in thousands of dollars, and rework that delays production by weeks.
SPI Mold Classification: Class 101 to 105
The SPI classification is the first safety and quality decision in any mold quote. It tells the builder how much steel hardness, how many cycles of life, and how much documentation the tool needs. Class 101 tools are built for production runs above one million cycles and use hardened steels like H13 or S136 treated to HRC 48 to 62 typical. Class 105 tools are prototype cavities in aluminum or mild steel, good for 10 to 100 shots, and they carry no production safety obligations because they never run unattended.
| SPI Class | Expected Cycles | Typical Steel / Hardness | Use Case |
|---|---|---|---|
| Class 101 | 1,000,000+ | Hardened H13/S136, HRC 48 to 62 typical | High volume automotive and connector production |
| Class 102 | 500,000+ | Hardened or pre hardened P20/H13, HRC 30 to 50 typical | Medium to high volume production |
| Class 103 | 100,000+ | Pre hardened P20, HRC 28 to 34 typical | Medium volume, secondary programs |
| Class 104 | Low volume, under 100,000 | P20 or mild steel | Low production or spare tooling |
| Class 105 | Prototype, 10 to 100 shots | Aluminum 7175 or soft steel | Design verification and bridge tooling |
← swipe to scroll →
Table note: Cycle counts and steel pairings follow the public SPI mold classification. Hardness ranges are typical industry figures.
Class drives every downstream standard.A Class 101 mold must have hardened leader pins, mechanical slide locks, and a full spare parts list at buy off. A Class 104 mold may skip locks if the buyer signs off in writing. The mistake buyers make is ordering Class 103 pricing and expecting Class 101 documentation. State the class in the RFQ, and hold the builder to the checklist that class requires.

DieStrike builds to class on paper and in hardware.Our injection mold lead times run 2 to 5 weeks depending on class and size, and every IATF 16949 mold ships with the steel certificate and heat treatment report that its class requires. Cavity heat treatment reaches HRC 62 on hardened grades, which is the number a Class 101 buy off should verify line by line.
Standard Water Connections: 3/8 in NPT
Cooling circuits are the most mishandled interface on any mold. The SPI standard calls for female 3/8 in NPT water inlets typical, with the in and out lines grouped on the operator side or on both mold halves. Unused ports get 1/4 in NPT hex plugs typical. These dimensions appear in DME, HASCO and MISUMI catalogs, so any press room in North America or Europe can hook the mold up in minutes.
Circuit marking prevents cross connections.Every circuit needs an engraved or stamped ID like B1 IN and B1 OUT, matched on both halves when lines are manifolded. A mold with 12 unmarked circuits takes 3 to 4 hours to map during a trial. Marked circuits take 30 minutes. At buy off, count the stamped IDs against the water line diagram in the mold manual. Any mismatch is a rejection item.
Pressure test at acceptance, not in production.Run each circuit at 6 to 10 bar for 10 minutes during T1 buy off and check for drops and seepage at o ring seals. Turbulent flow matters too. A 3/8 in circuit should run at 1.5 to 2 m/s typical water velocity to stay turbulent, which is what removes heat evenly. Laminar flow at under 0.6 m/s leaves hot spots and warpage that show up 10,000 cycles later as dimensional drift.

Seals and plugs are consumables, so count them.Buy off should record the number of o rings, plugs and fittings by size, because the spare parts kit needs at least 2 of each. A missing 1/4 in plug discovered at 2 am on a production night costs a full shift of downtime. Our standard components ship in 3 to 7 days, which is fast, but it is not fast enough to cover an overnight stoppage.
Standard Electrical and Heating Connections
Hot molds carry live electricity and hot oil inside a steel box that people handle by hand. The SPI practice for heating circuits is standardized cartridge heaters and hose connections so that any temperature controller can plug in without custom wiring. Typical heater cartridges run 220V or 240V at 400 to 1000 W per cartridge depending on mold mass. Thermocouples are J type or K type with standard miniature plugs, and each zone gets a stamped ID on the mold face.
Zone mapping is a buy off item, not a nice to have.A 16 zone hot mold without a wiring diagram takes a full day to commission and risks cross connected heaters that overcook one cavity while another stays cold. Verify at T1 that every zone number stamped on the mold matches the controller schematic, and that each thermocouple reads within 2°C of its setpoint at steady state. Record the readings in the buy off report.
Cable exits must stay clear of moving steel.Heater and thermocouple leads should exit the non operator side through strain relief clamps, routed at least 50 mm clear of clamp strap travel and slide paths. A lead sheared by a closing mold arcs at 220V, and the fix is a scrapped harness plus a burned plate. At acceptance, open and close the mold through a full cycle by hand with the platens off and watch every cable. Nothing may pull tight or rub.
Hose connections follow the same standardization logic.Hot oil lines use threaded couplers rated for 250°C typical maximum service, with hose bore matched to the mold port. Never adapt a 3/8 in NPT port to a metric hose with a bushing on a hot oil circuit. The bushing is the weakest joint in the system, and a leak at 200°C sprays oil that ignites on contact with hot steel surfaces above its flash point.
Ejection and Return: Standard Mold Features
The ejection interface is where the mold meets the press, and mismatches here damage both. SPI standard practice defines the knockout hole size, the ejector travel limit, and the return mechanism so any compatible machine can run the tool. Standard knockout hole diameters are 1 in, 1.5 in and 2 in typical, drilled through the fixed or moving platen interface at the mold centerline, sized to match the press knockout bar.
Measure ejector travel against the press stroke.Ejector plate travel is typically 20 to 40 mm, and it must stay under the machine knockout stroke minus a 5 mm safety margin. At buy off, measure the actual travel with a depth gauge across three cycles and compare to the drawing. Over travel breaks ejector pins at the shoulder, and a broken pin in production stops the press until the mold is stripped.
Return pins protect the mold every single cycle.Spring loaded return pins or mechanical early return devices pull the ejector plate back before the mold closes. Without them, a stuck pin meets the cavity face at clamp speed and gouges hardened steel. Verify that all four return pins contact the fixed half within 0.05 mm of each other, measured with feeler gauge or blue ink. Uneven return bends the ejector plate and causes pin binding within 50,000 cycles.
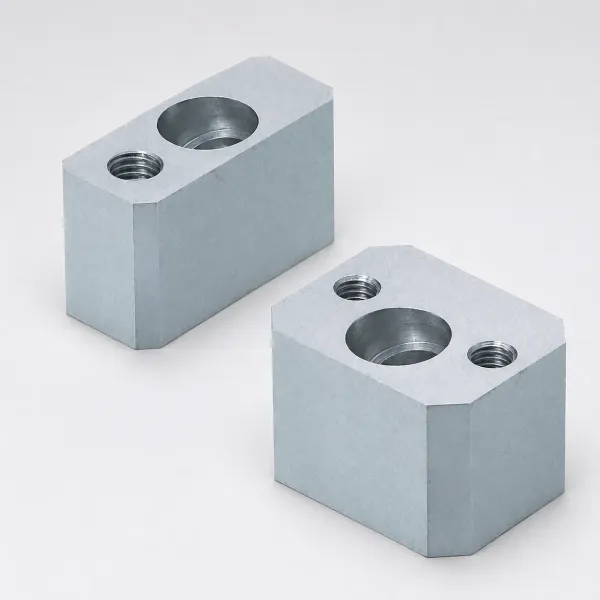
Ejector pins are the most replaced component on any mold.Standard pins are DIN or DME series in SKD61 or SKD11, hardness HRC 50 to 55 typical for the body. The buy off spare kit should include 2 of each pin diameter used, because a single broken pin halts production. For connector molds running glass filled resins, pin wear accelerates, and the replacement interval drops from 500,000 cycles to under 100,000 cycles, which is why we stock standard ejector components for 3 to 7 day shipment.
T1 Buy-Off Checklist: Documents and Hardware
Buy off is the moment ownership of risk transfers from builder to buyer. Do it at T1 with first articles in hand, and again at final acceptance before shipping. The checklist below is the document and hardware set an IATF 16949 mold must deliver. Print it, sign each line, and keep the signed copy with the mold for its whole life.
Documents first.These eight records prove the mold is what you ordered:
- First article CMM report.100% of critical to quality dimensions measured on a coordinate measuring machine, with nominal, actual, and deviation per feature. Mold accuracy of ±0.005 mm on critical dimensions is the DieStrike house standard, and part level features trace back to cavity measurements. If you cannot read the report, our guide on how to read a CMM report walks the datums and deviation columns.
- Steel certificates.Mill certificates for every cavity, core and plate steel, showing grade, heat number and hardness as delivered. Cross check heat numbers against the steel stamps on the plates when present.
- Heat treatment report.Furnace curves or summary records showing austenitize, quench and temper temperatures, with final hardness. Class 101 cavities should read HRC 48 to 62 depending on grade, and DieStrike hardens cavity steels to HRC 62 typical on through hardened grades.
- Spare parts list.Every consumable with part number, material, hardness and quantity shipped. Minimum kit: 2 ejector pins per diameter, 2 o rings per size, 1 set of return pin springs, spare heater cartridges and thermocouples for hot molds.
- Mold manual.Water line diagram, wiring schematic, ejection travel spec, lifting weight and center of gravity, recommended press tonnage, and maintenance schedule.
- Mold trial records.T0 and T1 process sheets with material grade, lot number, melt temperature, hold pressure and cycle time, plus the shot count to date. This links the mold to a PPAP mold sampling package when automotive documentation is required.
- Dimensional inspection plan.The list of features that will be checked in ongoing production, with gauges or CMM programs named per feature.
- Surface finish and texture records.Polish grade or texture number per cavity, verified against approved limit samples.
Hardware second.Then walk the mold itself:
- Nameplate engraved with mold number, cavity count, weight and year, readable and riveted not glued.
- Lifting holes sized for the full mold weight with a 5:1 safety factor minimum, threads clean and full depth.
- Mold locks or clamp straps installed on both halves, at least 2 per side on molds over 500 kg.
- All water fittings 3/8 in NPT female with plugs in unused ports, circuits stamped and mapped.
- Heater and thermocouple zones stamped, cables strain relieved and routed clear of moving steel.
- Knockout hole diameter matched to the target press, ejector travel measured and within spec.
- Return pins contacting evenly within 0.05 mm, verified with blue ink.
- Vents clean and open, typically 0.01 to 0.03 mm deep on the parting line for standard resins.
- Parting line shut off showing even blue ink contact across 80% or more of the sealing surface.
- All fasteners torqued, with shoulder screws at ejector plates tightened to spec and secured with thread locker.
Sign or reject, never accept with open items untracked.Every rejected line gets an owner and a due date written on the checklist before the mold leaves the builder. In our workflow the DFM feedback loop runs in 24 hours and buy off responses follow the same clock, because open acceptance items older than one week become permanent silent deviations.
Nameplate, Lifting and Safety Hardware
The nameplate is the mold's identity card, and its absence causes real accidents. A press room that cannot read the mold weight picks the wrong crane sling. A setter who cannot find the cavity count loads the wrong process sheet. SPI practice requires a permanent plate with mold number, cavity count, mold weight, year built and builder name, riveted to the fixed half where it stays visible after the mold is hung. Engraved or stamped text survives decades of oil and heat. Paper labels and glued plates do not survive one production year.
Lifting hardware follows a 5:1 rule.Lifting holes or eyebolts must carry at least 5 times the full mold weight in rated capacity, per general rigging practice. A 4,000 kg mold needs lifting points rated for 20,000 kg total, split across all engaged holes. Threads must be full depth and clean. A shoulder eyebolt screwed in 10 mm into a 25 mm deep hole carries a fraction of its rating and will pull out at the worst moment, which is when the mold is 2 m above the floor.
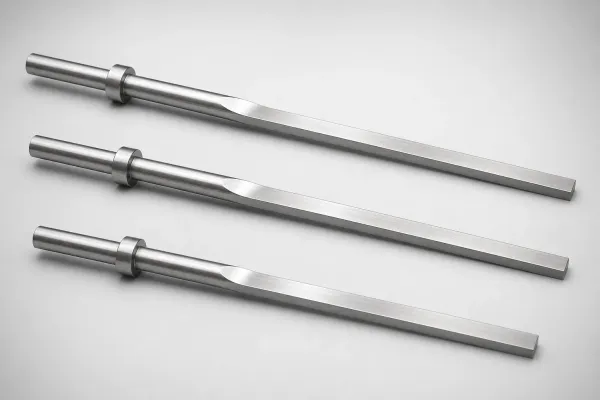
Center of gravity must be marked on heavy or lopsided molds.Any mold over 1,000 kg, or any mold with slides and hydraulic cylinders on one side, needs the CoG stamped or painted on the top face. Off center lifts swing the load the instant it clears the stand, and a swinging 4 ton mold is uncontrollable by hand. At buy off, verify the marked CoG matches the manual, and if the mold has cylinders, confirm they are locked or blocked for transport so nothing shifts during the lift.
Mold open controllers protect both halves.On molds with slides or lifters, a mold opening controller or mechanical interlock prevents the press from closing until ejection is fully reset. If the target press lacks that function, mechanical early return pins become mandatory rather than optional. Record which safety path the mold uses in the manual, so the next shop does not assume the wrong one.
Slides, Locks and Ejector Reset Verification
Slides store the most dangerous energy on a mold. A slide held back only by a spring can close under its own weight or from vibration during transport, and a hand reaching in to check a cavity meets 20 kg of moving steel. Every slide needs a positive mechanical lock for shipping and storage, and a wear face that keeps it aligned in production.
Lock slides mechanically, not with springs alone.At buy off, verify each slide has a lock screw, clamp or shipping bracket installed. Count them against the slide count in the manual. A 4 slide mold ships with 4 locks. Missing locks are a rejection item even if everything else passes, because the risk lands on whoever opens the crate at the destination.
Wear plates and gib clearances predict slide life.Slide gibs run with 0.02 to 0.05 mm clearance typical, lubricated with grease pockets or bronze wear plates. Measure clearance at three points with feeler stock. A slide at 0.10 mm on one corner will flash within 100,000 cycles and gall within 500,000 cycles. Check that grease fittings are accessible with the mold closed, because a fitting you cannot reach is a fitting nobody greases.
Ejector reset must be proven under load, not free air.Free air ejection looks perfect and proves little. The real test runs the mold in the press at full speed with the target resin and confirms the ejector plate returns to zero against the return pins every cycle, with no parts hanging. Five consecutive cycles with blue ink on the return pins should show full contact witness marks. Any pin showing partial contact gets shimmed or replaced before the mold is accepted.
Shipping and Storage: VCI, Locks and Dry Lines
A mold that passes every check can still arrive rusted. Ocean transit runs 2 to 6 weeks in containers where internal humidity cycles between 40% and 95% with daily temperature swings. Condensation forms on steel below the dew point, and bare polished cavities can show visible rust within 72 hours. Shipping preservation is part of the buy off because it is verified before the crate closes.
VCI protection is the baseline.Vapor corrosion inhibitor film, bags or emitters release a protective vapor that passivates steel surfaces. Wrap polished surfaces in VCI paper or film, and add VCI emitters inside the crate sized to its volume, typically one emitter per 1 to 2 cubic meters. For long term storage beyond 6 months, combine VCI with a light coat of rust preventive oil on parting lines and cavities, and re inspect every 6 months.
Blow cooling lines dry before crating.Trapped water in a 3/8 in circuit freezes, corrodes and blocks flow. Blow each circuit with dry air at 4 to 6 bar until the outlet runs clear, then cap or plug every fitting. Residual pressure in a sealed line should drop to near zero and stay there for 10 minutes, which also confirms there are no leaks. Record the blow out on the shipping checklist.
Lock both halves and block slides.Install the mold locks or clamp straps, engage every slide lock, and block any hydraulic cylinders. A mold that opens 5 mm in transit lets debris reach the polished cavity and shifts the CoG during the lift. Crates need the weight, CoG and this side up markings on at least two faces, matching the nameplate data.
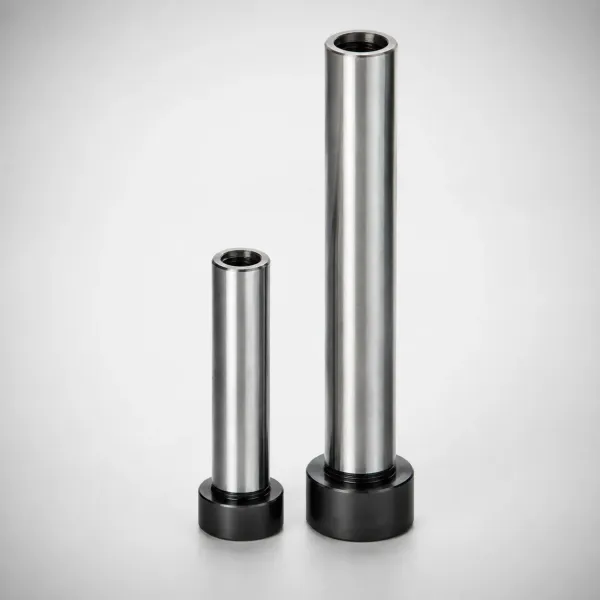
Storage between runs follows the same logic.Long term storage needs a dry rack, VCI refreshed annually, springs relieved where possible, and a dated inspection card. Our full preservation schedule is in the guide on how to store a mold, which pairs directly with the shipping steps here. A mold stored correctly for 2 years comes back to production in a day. A mold stored bare comes back needing re polishing, re fitting and sometimes re hardening.
Running the Safety Audit in 5 Steps
Step 1: Class review against the quote.Open the RFQ and confirm the delivered mold matches the ordered SPI class. Check steel grades on certificates against the class table, and hardness against the heat treatment report. A Class 102 mold delivered with P20 at HRC 30 when H13 at HRC 48 was ordered is a contractual rejection, not a discussion.
Step 2: Utility walk in 30 minutes.Stand at the mold with the manual. Match every water fitting to 3/8 in NPT female, count stamped circuit IDs against the diagram, plug check unused ports, and trace every heater lead to its stamped zone. Photograph each mismatch. Photos become the punch list.
Step 3: Mechanical verification at T1.Measure ejector travel, blue ink the return pins, feeler the slide gibs, and check parting line contact at 80% or more. Run 5 consecutive cycles and watch ejection reset under load. Record all numbers on the checklist rather than passing by eye.
Step 4: Documentation audit.Collect all eight records listed in the T1 checklist. Missing documents are open items with owners and dates. For automotive programs, feed the trial records and CMM report straight into the PPAP package so the paperwork is done once.
Step 5: Preservation sign off before crating.Watch the mold get VCI wrapped, lines blown dry, locks installed and the crate marked. Sign the shipping checklist only after you see each step happen. This last step is the one buyers skip most often, and it is where transit damage and rust claims are born.
Who runs the audit matters.The builder runs it first as a final QC gate under IATF 16949 controls. The buyer or a third party runs it again at T1 or final acceptance. Two independent passes with signed checklists give you a defensible record if the mold fails in month six. If you are still selecting a builder, our guide on how to choose a mold manufacturer covers the capability questions that predict whether a shop will pass this audit at all.
FAQ
Q1. What are the SPI mold classes?
SPI classifies molds from Class 101 to Class 105 by expected production life. Class 101 runs 1,000,000+ cycles in hardened steel at HRC 48 to 62 typical. Class 102 covers 500,000+ cycles, Class 103 covers 100,000+ cycles in pre hardened P20 at HRC 28 to 34 typical, Class 104 is low volume, and Class 105 is prototype tooling in aluminum for 10 to 100 shots.
Q2. What size water fittings are standard on molds?
The SPI standard is 3/8 in NPT female inlets typical, with 1/4 in NPT hex plugs typical in unused ports. These sizes match DME, HASCO and MISUMI catalogs, so North American and European press rooms connect without adapters. Every circuit should be stamped with an IN/OUT ID and pressure tested at 6 to 10 bar during buy off.
Q3. What documents should a mold buy off include?
Eight records minimum: first article CMM report with 100% of critical dimensions, steel mill certificates with heat numbers, heat treatment report with final hardness, spare parts list with quantities, mold manual with water and wiring diagrams, T0/T1 trial records with shot count, dimensional inspection plan, and surface finish records. Automotive programs feed the trial and CMM data into PPAP.
Q4. How do I protect a mold during ocean shipping?
Wrap polished surfaces in VCI film or paper, add VCI emitters at one per 1 to 2 cubic meters of crate volume, blow all cooling lines dry with air at 4 to 6 bar and plug every fitting, install mechanical locks on both halves and every slide, and mark the crate with weight, center of gravity and orientation. Without VCI, bare cavities can rust within 72 hours in container humidity cycles of 40% to 95%.
Q5. What safety hardware must be verified before a mold runs?
Five items are non negotiable: lifting points rated at 5:1 over full mold weight with full depth threads, a permanent engraved nameplate with weight and cavity count, mechanical slide locks, even return pin contact within 0.05 mm verified with blue ink, and heater cables strain relieved at least 50 mm clear of moving steel. Missing any one is grounds to reject the mold at acceptance.
The Bottom Line
Mold safety standards fail quietly and pay loudly. A wrong NPT fitting, a missing slide lock or an unsigned buy off sheet turns into burns, crushed steel and weeks of downtime. Run the SPI class check, walk the utilities, measure the ejection system, collect the eight documents, and sign the preservation checklist before the crate closes. DieStrike builds IATF 16949 molds at ±0.005 mm with every record in this checklist included, and standard components ship in 3 to 7 days when spares run out. To review your mold's acceptance package with our engineering team, reach us through the contact page.
KEEP READING
Related Reading
How to Read a CMM Report
Read CMM data like an engineer and catch out of tolerance features before mold buy off.
Read articleArticleHow to Run PPAP Mold Sampling
Turn T1 shots into a PPAP package with the dimensional and material records auditors expect.
Read articleArticleDFM Checklist for Injection Molds
Catch draft, wall thickness and gate problems in DFM review before steel is ever cut.
Read articleServiceInjection Mold Manufacturing
IATF 16949 mold building with ±0.005 mm accuracy and 2 to 5 week lead times.
Read articleNEXT STEP
Ready to Start Your Mold?
Send us your element dimensions or part numbers — our team responds within 24 hours with pricing and lead time.

Written by
Ray ChanMold Buyer's Guide Author · Precision Mold Manufacturing Specialist. Ray helps global importers, distributors and OEMs source factory-direct molds and mold parts.