
How to Design Molds for Quick Change: SMED Tooling and Base Systems
Table of Contents
A plant running three mold changes a week at 3 hours 20 minutes each burns about 500 press hours a year on one machine. At an 8 second cycle that is 225,000 shots of production that never happens. The same schedule at a 20 minute target change loses 50 hours instead.
Changeover time is also the cheapest OEE loss to remove, because most of it is designed into the tool. A mold with standard clamp slots and one junction box drops into a prepared press in 15 to 30 minutes. A one-off layout with loose fittings takes 2 to 4 hours whatever the press can do.
This guide covers the design side of quick mold change. It works through the SMED method, target change times, base standardization, clamping, quick connects, hot drops, transfer carts and preheat racks. Safety interlocks and the buyer specification list follow, with a closing comparison against stamping die change. Figures here are typical industry values unless they come from our own shop floor. Check each one against your press and tool documentation before a design is released.
The Snapshot
- Manual changeover runs 2 to 4 hours on a 250 to 650 t press. Quick-change tooling brings it to 15 to 30 minutes, and automated table transfer to under 5 minutes.
- Three changes a week at 3 hours 20 minutes costs about 500 press hours a year, or 12 percent of a 4,000 hour two-shift calendar.
- Preheating a 1,200 kg mold to 80 °C off press removes 30 to 60 minutes of in-press warm-up and 20 to 50 scrap shots per change.
- Quick-change features specified at the design stage add 1 to 3 percent to tool cost. Retrofitting them later costs 3 to 10 times that figure and adds 4 to 8 weeks of lead time.
Why Mold Change Time Kills OEE
OEE multiplies availability, performance and quality. A changeover hits all three at once. The press stops, the restart runs slow, and the first parts go into the scrap bin. On a high-mix schedule, availability is the largest of the three losses.
Take a press that runs 150 changes a year at 3 hours 20 minutes each. That is 500 hours of lost forming time, or 12 percent of a 4,000 hour two-shift calendar. Cut the same change to 25 minutes and the loss falls to 62 hours. The plant recovers about 440 hours, close to 200,000 shots at an 8 second cycle.

The restart has its own cost. A cold tool needs 20 to 60 shots before dimensions settle, and a 24 cavity tool at 40 scrap shots is 960 parts. At a $0.05 part that is $48 per change, or $7,200 a year at 150 changes. Scrap on restart is a warm-up problem, not a process problem.
Then there is the thermal ramp. A mold at 20 to 25 °C needs 45 to 90 minutes to reach a cavity face of 60 to 120 °C. During that ramp the melt freezes early, short shots appear and dimensions drift by 0.05 to 0.2 mm. Our guide to reducing injection cycle time treats that ramp as a separate loss.
Finally, changeover is a safety and damage window. A partly clamped mold can shift on the platen during a low-pressure close. A 2 mm shift shears an ejector coupling or scores a shut-off land, and the repair runs 4 to 8 days. Clamp confirmation is a design requirement, not an accessory.
The SMED Four-Step Method on a Press
SMED came out of Toyota stamping plants in the 1960s, where Shingo's teams cut a 4 hour die change to under 10 minutes. The method has four steps and all four apply to an injection press.
Step one separates internal work from external work. Internal tasks need the press stopped. External tasks can happen while it runs. Film one changeover and log every task with a stopwatch. Most plants find that 60 to 70 percent of the stoppage time is external work being done the slow way.
Step two converts internal tasks to external ones. Stage the next mold on a cart beside the press and preheat it. Set the ejector stroke, rig the slings, and stage the clamp bolts on a shadow board. Load the process recipe and the robot program before the press stops.

Step three streamlines what remains. Run two operators in parallel, one on utilities and one on clamps. Use a single wrench size, or no tools at all. Design out adjustments, because every adjustment is a decision made with the press stopped.
Step four standardizes and sustains. One instruction sheet per press, a target time posted at the machine, and a log entry for every changeover. Automotive plants working to IATF 16949 also keep a first-off approval record after each change. Shops that log changes keep finding another 10 to 15 percent per quarter.
| Changeover task | Manual change (min) | Quick change (min) |
|---|---|---|
| Safe the press, fit safety blocks | 10 | 3 |
| Remove clamps, 16 to 32 bolts | 35 | 1 |
| Disconnect water, air and electrics | 30 | 2 |
| Rig and lift the mold out | 15 | 5 |
| Clean and inspect both platens | 20 | 4 |
| Position and locate the new mold | 10 | 3 |
| Clamp and confirm pressure | 35 | 2 |
| Connect utilities | 30 | 3 |
| Warm up and first-off approval | 60 | 3 |
| Total | 245 | 26 |
← swipe to scroll →
Table note: task times are typical values from a 400 to 650 t press with a 1,000 to 1,500 kg tool. Measure your own changeover before setting a target, and rerun the audit after each round of tooling changes.
Target Change Times and What Drives Them
Define the clock before setting a number. The standard definition runs from the last good part of the previous order to the first good part of the next order. That includes warm-up and first-off approval, which is where optimistic plans collapse.
Three bands cover most plants. Manual changeover with threaded fittings and T-slot bolts runs 2 to 4 hours. Quick-change tooling with hydraulic clamps, preheat and dry-break couplings lands at 15 to 30 minutes. Automated table or cart transfer with docking couplers reaches under 5 minutes.

Inside the 15 to 30 minute band, expect 5 to 8 minutes of mechanical work. Utility connection takes 5 to 10 minutes and restart with first-off approval takes 3 to 6 minutes. A change that hits 20 minutes and then needs 40 to approve the first part is not improved, only relocated.
The automated band needs hardware on both sides: docking plates for water and electrics, a powered roller table or rail cart, and automatic clamps. It pays where changeovers exceed about two per day, and it requires the standardized base in the next section.
The payback is easy to frame. Cutting 150 changes a year from 3 hours 20 minutes to 26 minutes returns roughly 450 press hours. At a modest press rate of $45 per hour, that is over $20,000 a year from one machine.
Mold Base Standardization: Plate Heights and Clamp Pitch
Standardization starts at the base plate. Pick one height family and one clamp pattern for each press group, then hold every new tool to it. An ISA plate height family of 250 to 350 mm covers most 250 to 650 t presses without riser blocks or adapters.
Work to a height ladder rather than a single number. A 250, 300 and 350 mm family, each documented with its closed shut height, keeps press setup predictable. The daylight window absorbs a 100 mm spread. Document shut height to ±0.5 mm and adjust with the press, not with shims under the mold.
Clamp pitch matters as much as height. Standardize clamp positions on a fixed grid so the same clamp kit stays bolted to the platen across the press group. A one-off bolt pattern means moving studs and re-checking pressure on every change.
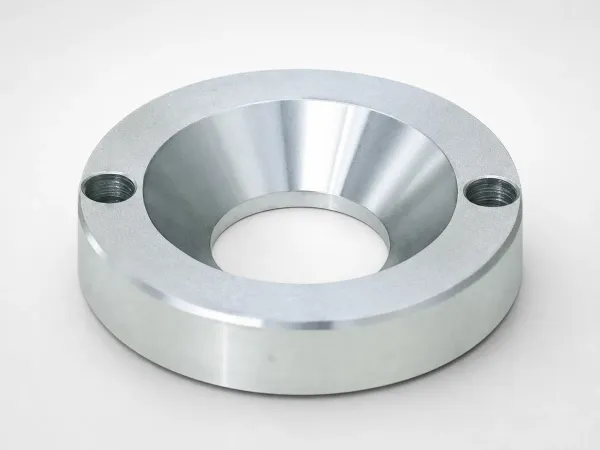
Locating features belong in the same standard. Use one locating ring diameter per press group, plus two ball-lock or tapered positions. Any mold in the family then self-aligns on any press. An odd ring diameter forces an adapter ring into the change, which costs 10 to 15 minutes and adds a stack-up error.
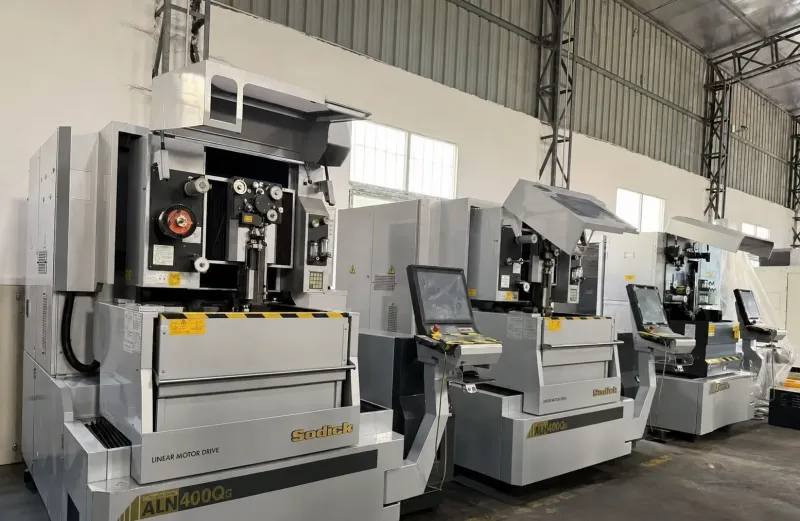
Standard bases also protect accuracy. We hold mold geometry at ±0.005 mm, and at ±0.002 mm on EDM and jig-grinding work. A duplicate cavity set built to those numbers fits a standard mold base without hand fitting. That matters when a spare tool has to drop into the same slot.
Standard plate sizes also ship faster. Interchangeability between the DME, HASCO and MISUMI standards is a separate decision, but pick one and stay with it across the fleet.
Manual Clamps vs Hydraulic Clamping Systems
Manual clamping is the largest single block of time in a changeover. A 1,000 kg tool typically takes 16 to 32 T-slot bolts at M16 to M24, torqued to 100 to 200 N·m. That is 20 to 40 minutes of the change, and a missed bolt is a dropped mold risk.
Hydraulic clamp cylinders mount in the platen T-slots and run on a 70 to 140 bar circuit. Four to eight cylinders per half clamp a mold in under 2 minutes, each delivering roughly 20 to 60 kN. Size the total against mold mass and press vibration. Confirm every clamp with a pressure switch that feeds the press interlock.
Magnetic clamping plates suit steel plate tools and cut clamping to seconds. They need a clean, flat platen face and a plate thickness above the supplier minimum. Verify holding capacity against mold weight with a safety factor of at least 2, and keep the same confirmation interlock.
The choice comes down to change frequency. At two or more changes per week, hydraulic clamps pay back in months through recovered press time. At one change per month, manual bolts plus a pre-staged clamp kit and a torque log are the better spend.
| Clamping method | Typical clamp time | Holding force source | Fits best where |
|---|---|---|---|
| Manual T-slot bolts, M16 to M24 | 20 to 40 min | Torque wrench at 100 to 200 N·m | One to two changes a month |
| Hydraulic clamp cylinders | Under 2 min | 70 to 140 bar circuit, 20 to 60 kN per cylinder | Two or more changes a week |
| Hydraulic plus quick couplers | Under 3 min total | Platen circuit with pressure switch | Automated transfer and docking |
| Magnetic clamping plate | Seconds | Magnetic holding on steel plates | Small tools with flat, clean plates |
← swipe to scroll →
Table note: clamp times assume the mold is pre-staged beside the press. Confirm cylinder force and circuit pressure against your press manual, and record the clamp pressure switch setting in the tool file.
Water and Air Quick Connects
A tool with 6 to 12 cooling circuits takes 20 to 30 minutes to connect with threaded hose tails and a wrench. A manifold block with dry-break couplings on the operator side does the same job in 1 to 2 minutes, with no spill on the platen.
Specify flat-face dry-break couplings sized DN12 to DN20. A working pressure of 6 to 10 bar and a 120 to 150 °C rating with FKM seals covers most water and oil circuits. Flow matters as much as the seal: a well-sized 12 mm coupling adds under 0.3 bar of drop at 8 L/min.
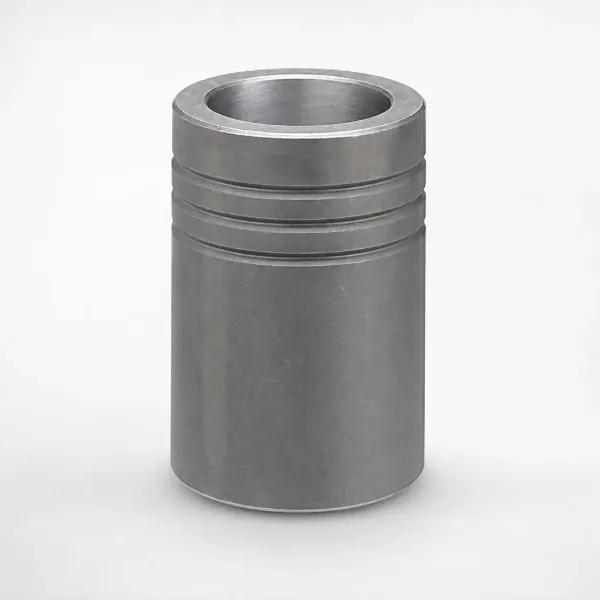
Layout decides whether the manifold saves time or creates defects. Group every port on one side, at one height, with labels and either different coupling sizes or color codes per circuit. A crossed supply and return can flip a thermal profile and cost 5 to 15 percent of cycle time on a tight part.
Air and vacuum lines deserve the same treatment. Core pulls and part handling run at 6 to 8 bar, and vacuum circuits for venting run down to 0.5 bar absolute. A quarter inch quick coupler takes about 5 seconds to connect, against 1 to 2 minutes for a threaded fitting and a leak check.
Close the loop with a verification step. Hold the circuit under pressure for 30 to 60 seconds after connection and look for a drip at every coupling. Water on a platen promotes rust, and a leaking coupling costs flow for the whole run.
Electrical Hot Drops and Thermocouples
Rewiring a hot runner tool with 8 to 16 zones takes 15 to 30 minutes. The work happens in a cramped space behind the platen. Zone mapping errors and reversed thermocouple polarity then consume more time, and a reversed pair can drive one heater 100 °C past setpoint.
A hot drop solves most of that. The connector assembly stays on the press, and a junction box on the mold mates with it in 30 to 90 seconds. Specify keyed plugs to IP67, either per zone or grouped as multi-pin, rated 240 V and 16 A per circuit. Keying prevents a cross plug between two similar tools.
On the mold side, the junction box needs labels, strain relief and wire chased into the base plate rather than run across the parting line. Add at least two spare zones for later heaters or sensors, and match thermocouple connectors to the type J or K sensors actually fitted.
Verify before the tool reaches the press. Ring out every circuit on the bench, check the zone map against the drawing, and run a heat-up ramp to log the baseline. After the change, a 5 minute heater test catches a reversed thermocouple before a scrap run.
Transfer Carts, Rails and Preheat Racks
Lifting a 1,000 to 1,500 kg mold with an overhead crane takes 10 to 20 minutes once rigging and the swing are counted. A cart on rails or floor rollers moves the same tool from rack to platen in 2 to 5 minutes.
Standardize the transfer interface. Set the cart deck within 1 to 2 mm of the platen height so the mold rolls across on ball transfer strips. That removes most of the manual handling risk in a change.
Preheating is the largest single time saver after clamping. Heating 1,200 kg of steel from 20 to 80 °C needs roughly 9 kWh, at 0.46 kJ/kg·K. A 12 kW rack delivers that in about an hour, off press, while the previous job still runs.
The payoff lands in three places. Press warm-up drops from 45 to 90 minutes to a few minutes and restart scrap falls by 20 to 50 shots. The first-off part also arrives closer to nominal, because the cavity starts at process temperature. Keep the hot runner controller on the rack so nozzles arrive at setpoint too.
Pair the rack with the cart and the change becomes a straight line. The mold moves from rack to cart to platen, with no second rigging step. Log the preheat setpoint and soak time in the tool file so the next change repeats it exactly.
Locators and Safety Interlocks During a Change
A centering ring gives rough location with 0.5 to 2 mm of clearance, which is enough for a manual change. Tapered locating pins or ball-lock units repeat to within about 0.02 mm. That matters when a robot, a core pull or a two-stage ejector interfaces with the tool.
Ejector alignment is the quiet failure in this group. A knockout bar coupling that sits 1 mm out of position bends ejector plates on the first ejection stroke. Standardize the ejector pattern to the press and mark it on the drawing. Check the coupling during the T1 trial, not at the next change.
Then lock the sequence down with interlocks. The press should not accept a cycle until every clamp pressure switch is satisfied, the safety blocks are removed and the guarding is closed. Use a low-pressure close of 10 to 20 bar over the last 30 to 50 mm of travel. A mis-set mold is then caught before full tonnage arrives.
Follow a machine safety standard rather than a habit. EN 201 and ISO 12100 cover the injection press and its change mode logic. Both call for accumulator blow-down before platen work. Write the interlock test into the changeover checklist and repeat it at every shift handover.
What a Mold Buyer Should Spec Upfront
Quick-change readiness costs 1 to 3 percent of tool price when it is designed in and much more when it is retrofitted. A new base pattern, added manifold machining and a junction box on a finished tool cost 3 to 10 times that. They also add 4 to 8 weeks to the schedule.
The specification list is short enough to put in an RFQ:
- Standard base size and plate height from the plant ladder, with shut height documented to ±0.5 mm.
- Clamp positions on the standard grid, plus a centered locating ring and two ball-lock or tapered locating positions.
- Water manifold on the operator side with specified dry-break couplings, labeled ports and sizes that prevent cross connection.
- Junction box with a keyed hot-drop socket, two spare zones and thermocouple connectors matched to the sensors fitted.
- Four lifting points rated to twice the tool weight, with weight and center of gravity on a nameplate.
- Preheat compatibility, including probe pockets and a rack height that matches the cart deck.
Documentation closes the loop. Record shut height, mold weight, the water circuit list, the electrical zone map and the spare parts list in the tool file. Our guide to building a mold asset register shows how those numbers attach to a tool number so the next change repeats exactly.
Timing is part of the specification. Standard components ship in 3 to 7 days and complete tools in 2 to 5 weeks. A quick-change requirement added after the base is machined costs money and calendar. Bring it into the DFM review and the pattern, couplings and zone count are settled before steel is cut.
SMED for Injection Molding vs Stamping
Stamping die change is mostly mechanical. The die is unclamped, moved out, replaced, the shut height is set and the feed timing is adjusted. A press with hydraulic die clamps and a die cart completes that in 10 to 20 minutes. A bolster transfer line does it in under 5 minutes.
An injection change carries a second layer. The tool brings 6 to 12 water circuits, 8 to 16 electrical zones and a hot runner that has to soak at temperature. First-off approval also depends on cavity temperature, so the restart phase is longer than it is on a cold press.
Count on 5 to 10 minutes of utility work that a stamping change does not have. The injection equivalent of a pre-set shut height is a preheated tool. A rack that holds the mold at process temperature moves the thermal work into external time.
The two disciplines share the same backbone. Standardized heights and clamp patterns, pre-staging, a written changeover sheet and a log per change apply to both. Stamping plants reach minutes with carts and clamps alone, while injection also needs the thermal step solved.
Quick Mold Change FAQ
Q1. What change time should we expect?
Manual changeover with threaded fittings and T-slot bolts runs 2 to 4 hours. Quick-change tooling with hydraulic clamps, preheated molds and dry-break couplings lands at 15 to 30 minutes. Automated cart or table transfer with docking couplers reaches under 5 minutes.
Q2. How do we justify the tooling spend?
Run the arithmetic on one press. Cutting 150 changes a year from 3 hours 20 minutes to 26 minutes returns about 450 press hours. That is over 200,000 shots at an 8 second cycle. Add 20 to 50 scrap shots saved per restart and the payback is normally inside a year.
Q3. What should be added at the design stage?
Specify a standard base size and height, clamp positions on the plant grid, and a locating ring with two ball-lock positions. Add a grouped water manifold with dry-break couplings and a keyed hot-drop socket with two spare zones. Budget 1 to 3 percent of tool price.
Q4. Can existing molds be retrofitted?
Often, yes. A base plate can be re-machined to the standard clamp pattern, and a manifold block or junction box can be added to a finished tool. Expect 3 to 10 times the design-stage cost and 4 to 8 weeks of lead time.
Q5. Where does a quick-change program usually start?
With one measurement. Film and time a single changeover, split the tasks into internal and external, and move the external work off the press. Most plants recover 60 to 70 percent of the stoppage time before spending anything on hardware.
The Bottom Line
Quick mold change is a tooling decision that shows up on a press log. The numbers that govern it are the change time target, the base plate height family, the clamp pattern, the coupling set and the preheat temperature. Get those five right at the drawing stage and a 3 hour 20 minute change becomes a 26 minute change.
The order of work matters. Standardize the base and the clamp pattern first, because every quick-change accessory depends on that geometry. Then add hydraulic clamps, quick connects, a hot drop and a preheat rack. Measure every change after each step, since the log is what shows whether the investment is working.
DieStrike builds injection molds and stamping dies to IATF 16949 with ±0.005 mm mold accuracy, and ±0.002 mm on EDM and jig-grinding work. Cavity heat treatment runs to HRC 62. The shop runs 120+ machines and serves tier-1 programs for TE, Amphenol, Luxshare and Dongshan. Standard parts ship in 3 to 7 days and complete tools in 2 to 5 weeks. That leaves room to standardize a base pattern before a press schedule is committed.
KEEP READING
Related Reading
Mold Bases: Standard and Custom
Standard plate sizes, height families and pre-machined clamp slot patterns that support 15 to 30 minute changeovers.
Read articleArticleDME vs HASCO vs MISUMI: Mold Standards Compared
Plate sizes, component interchangeability and spare part availability across the three main mold standards.
Read articleArticleMold to Machine Compatibility Checklist: 12 Checks Before You Cut Steel
Shut height, clamp pattern, ejector stroke and utility checks to run before a base plate is ordered.
Read articleServiceMold Design and DFM Service
DFM feedback in 24 hours, with base standardization and changeover review included before steel is cut.
Read articleNEXT STEP
Ready to Start Your Mold?
Send us your element dimensions or part numbers — our team responds within 24 hours with pricing and lead time.

Written by
Ray ChanMold Buyer's Guide Author · Precision Mold Manufacturing Specialist. Ray helps global importers, distributors and OEMs source factory-direct molds and mold parts.