
How to Put a Mold into Storage: Cleaning, Oil and Reactivation
Table of Contents
A tool parked at a coastal plant returns eight months later with flash rust on a polished cavity, seized ejector pins and a blocked cooling line. The shop rediscovers the damage at a cost between 5,000 and 20,000 USD per mold, plus a re-trial the customer never approved. An idle mold corrodes faster than a mold running weekly, because cycle heat drives condensation cycles on and off the steel all night. This guide is the lay-up card: the cleaning, oiling, packing and reactivation numbers that park a tool for 3 to 36 months and bring it back production-ready.
Everything below assumes the tool is worth preserving, the storage is indoor, and the reactivation is planned as a project with an inspection gate before the first plastic shot.
The Snapshot
- Water kills the lay-up in 3 to 6 weeks. Standing water left in cooling lines rusts inserts from the inside and cracks them by freezing, and it takes 6 to 8 bar of air to blow the circuits clear before oiling.
- The barrier is a 5 to 10 micron oil film plus VCI. A spray or dip rust preventive at SPI class thickness, combined with VCI emitters dosed at 100 to 200 g per cubic meter of boxed volume, holds bare steel quiet for 6 to 12 months.
- Springs remember the lay-up. A mold spring left at full static compression for 24 months loses 8 to 15 percent of its force, so ejector plates go to mid-stroke and guide pins get a coated top-up of NLGI 2 grease.
- Reactivation is 10 to 20 dry cycles, then a 15 minute pressure test. Clamp-cycling without plastic, a water test at 1.5 times working pressure and a first-off dimensional set catch a rediscovered 20,000 USD of corrosion before it reaches the press.
When Molds Go into Storage
Tools do not get parked for one reason. End-of-program storage is the commonest: the last contracted part ships and the mold waits for service, aftermarket or a follow-on program. Automotive connector tooling for a superseded platform can sit 24 to 36 months before a refresh pulls it back out.
Seasonal parts create a second wave, parking a tool for six months every year across 5 to 10 cycles. A customer tool bank is the third: you hold the asset, the customer owns the drawing, and any damage you allow becomes a commercial argument at the next PO.
The fourth and fifth triggers are decisions, not calendars. A tool parked while a rework decision is pending sits 1 to 6 months while engineers argue the steel, and a plant move parks everything for 2 to 12 weeks between buildings. Every window deserves a lay-up procedure, because every one ends with somebody needing the mold to run.
Storage duration changes the checklist. A 3 month lay-up is a clean, oil and cover job. A 12 month lay-up adds a scheduled re-oil at 6 to 12 months and a 90 to 180 day visual inspection. Past 24 months, the consumables in the tool degrade whether or not it runs.
Idle Corrosion vs a Tool in Service
Rust needs water, oxygen and time, and an idle mold in a plant collects all three. The steel sits at ambient temperature while the building air moves through day-night swings. At night, the cavity face drops below the dew point and condenses a film measured in microns. A tool running weekly never stays cold long enough to build that film, because cycle heat keeps the steel 10 to 30 degrees above the dew point for most of the shift.
Carbon dioxide in ordinary plant air dissolves into that condensate and forms dilute carbonic acid. On P20 at HRC 30 to 36, a bare spot under a persistent film starts visible flash rust within 48 to 72 hours at 70 percent relative humidity. In a coastal plant, airborne chloride pushes the same clock under 24 hours and attacks the chrome and nickel platings the rust-prevention article covers in detail in mold rust and corrosion prevention.
The condensate also finds geometry. A vent land, a slide pocket or a screw hole holds a droplet after the flat face has dried, which is why pitting after a lay-up shows up at the parting line first. A tool that ran glass-filled or flame-retardant resins carries residual acidic films into the shelf.
Temperature cycling matters even indoors. A pallet against an exterior wall runs 5 to 15 degrees colder than the aisle air and sweats first. The same mold stored 8 m from the wall can end the lay-up in visibly different condition.
The Pre-Storage Clean
The cardinal rule: oil never substitutes for cleaning. A rust preventive sprayed over bake-on residue seals an acid film against the steel, and the deposit keeps working while the tool sits. Clean first, protect second, in that order, every time.
Strip every deposit the tool carries. Release-agent bake-on builds a 5 to 50 micron film on the cavity over 20,000 to 50,000 shots. Plastic ghosting films the parting line. Hot runner areas carry carbonized oil. On a die casting die, zinc transfer and oxide scale accumulate over 20,000 to 50,000 shots and are actively corrosive against H13.
Pick the cleaning method by surface class. Solvent and a nylon pad handle light films on textured VDI 27 to 48 surfaces without embedding. Polished SPI A-2 or better wants solvent and soft media only, never an abrasive pad, because a 400 grit scratch on a mirror face is permanent. Dry-ice or fine plastic media reach slide pockets, vent lands and corner radii that hand lapping misses. Wire brushing belongs nowhere near a cavity.
Clear the passages while you are in there. Vents get opened with a wooden pick, not steel. Runner and gate freeze residue comes out before the sprue bushing is capped. Record the condition you found: photographs of the cavity, the core, the parting line and any slide faces, dated, before the first oil touches the tool. That photo pack is the evidence that your lay-up, not the storage, sets the baseline at reactivation.
Do one last mechanical pass. Rotate ejector plates fully in and out to work them free, stroke every slide and lifter, spin the guide pins. Anything seized on the bench while the tool is disarmed is a 30 minute job. Anything seized at the press during reactivation is a stopped line and a teardown.
Drain and Dry the Water Circuits
The water side is where lay-ups fail quietly. A closed circuit of stagnant tap water holds dissolved oxygen against bare bore surfaces, and internal rust starts inside 3 to 6 weeks. The corrosion never sees daylight until a hose is connected at reactivation and brown water runs onto the platen.
Blow every circuit out at 6 to 8 bar of dry compressed air until no mist leaves the return line. A 12 mm bore holds 0.9 to 1.1 L of water per meter of channel, so a mold with six circuits can carry 15 to 25 L that looks drained but is not. Tilt the mold and blow each direction, then cap and tag every fitting with its circuit number so reactivation reconnects in the same order.
Conformal and baffle circuits need the extra step. Run desiccant air or an inhibitor fog through them after the blow-out, because a 4 to 6 mm conformal line traps a plug of water at every bend. Freezing is the fast failure: a water-filled line in an unheated warehouse at minus 5 degrees C cracks the insert around it, and a cracked line under a cavity face cannot be repaired without pulling steel.
Open the oil passages on hydraulic cores and check the reservoir level before the tool moves. A hydraulic cylinder left with a wet breather in humid air corrodes its rod from the top down. Seal the ports with plugged fittings, not tape, and record the fluid type on the storage card so nobody refills with the wrong oil at restart.
The Protection Layer
Once the steel is clean and dry, build the barrier in three layers: oil on the metal, VCI in the air, desiccant in the box. Each layer fails alone. Together they hold a cavity for 6 to 12 months between checks.
Coat all bare steel with a rust preventive sprayed or dipped to a 5 to 10 micron film. That thickness blocks the condensate monolayer and wipes off with warm solvent at reactivation. Heavy greases look safer and cost more later, because they hold dust and drip onto clamp plates. One rule has no exceptions: never put petroleum grease on polisher-etched textures. The grease fills the grain permanently, and every part after restart reads dull.
Line the cavity with VCI paper or hang VCI sachets inside the closing volume. Dose the emitter at 100 to 200 g per cubic meter of boxed volume, and keep the enclosure tight enough that the vapor does not ventilate away. A loose tarp turns a VCI pack into a paper weight. Replaceable silica gel cards at 1 kg per cubic meter mop up the residual humidity, and the indicator beads tell you at a glance whether the box has been breathing damp air.
Protect the moving parts separately. Coating the guide pins and topping up the bushings with NLGI 2 grease keeps the slide packs from welding themselves with static corrosion. Ejector pin tips get oil like any bare surface. On hot runner tools, oil the nozzle seal faces and leave the thermocouple connectors sealed and off the floor, because a damp connector reads a false temperature for months before it finally fails a process validation.
Close or Open: Clamp Position and Rigging
Store the mold closed with a 5 to 10 mm air gap between the halves, then lock it with clamps or straps against accidental opening. The gap keeps the vent lands and shut-off edges from pressing a trapped moisture film into the parting line, and the lock keeps a forklift bump from swinging a 4,000 kg half onto someone's hands.
Orientation follows the tool design. Most molds store upright on the A-side clamp plate, on a pallet or a dedicated rack. Two-shot and slide tools store core side up so the slides drain and hang unloaded from their dovetails. Never store a mold resting on its parting face: a 30 mm scratch across a polished parting line is a permanent flash generator, and one nicked sprue face is a regrind of the gate.
Set the internals where springs survive. Ejector plates go to mid-stroke, not full compression. A coil spring held at solid height for 24 months loses 8 to 15 percent of its free load, and a 15 percent weak spring is enough to hang short shots on a rebuilt tool. Gas springs lose charge through slowly leaking seals on exactly the same clock, so the replacement budget at reactivation includes a spring audit at 24 months.
Rig it from the lifting holes, rated for the tool mass, with the mold balanced before it leaves the floor. A mold stored hanging off-center for weeks creeps its strap loads and dents its bearing feet. Put wood or plastic shims between the mold feet and any steel rack. Steel on steel in a damp shed is a galvanic couple, and the contact point corrodes invisibly under the foot where no inspection photo will ever show it.
Storage Environment and Packaging
Indoor storage means 10 to 40 degrees C with relative humidity under 50 to 60 percent, measured per pallet with a datalogger or a humidity indicator card, not measured once at the door. Keep the tool off the floor, away from exterior walls and away from floor drains, which are cold spots and damp spots at the same time. Dust covers go over the sprue bushing and the nozzle face even on a closed mold, because falling plant dust is abrasive and mildly hygroscopic.
Coastal plants and seasonal-humidity buildings get one more layer: a heat-sealed vapor-barrier foil bag with the VCI emitters and desiccant sealed inside it. The bag buys a controlled atmosphere the building cannot promise, and it survives the 3 to 6 month monsoon swing without re-oiling. The seal is only as good as the weld, so inspect the bag at the 90 to 180 day walk-by and log what you saw.
| Condition | Mold in weekly service | Mold in lay-up storage |
|---|---|---|
| Steel temperature | 10 to 30 degrees C above dew point during production | Cycles through dew point every night |
| Condensate risk | Low while hot; flash rust within hours after a cold shutdown | Flash rust within 24 to 72 hours on bare steel at 70 percent RH |
| Cooling circuits | Flushed and treated continuously | Stagnant water rusts or freezes within 3 to 6 weeks |
| Springs and slides | Re-lubricated every cycle | Loses 8 to 15 percent spring force at 24 months loaded |
| Required barrier | Short-term oil between shifts | 5 to 10 micron film plus VCI plus desiccant, re-checked every 6 to 12 months |
← swipe to scroll →
Table note: bands are typical shop values for carbon and pre-hardened mold steels in indoor plants. Coastal sites and uninsulated buildings corrode faster than these numbers and need the foil-bag route.
The practical reading is that idle is not neutral. Service heat, cycle lubrication and water treatment stop the moment the tool leaves the press, and every protection above replaces something the process used to provide for free.
The Storage Record Pack
Tag every mold with a storage card on the rack, physically attached to the tool, not filed in a system nobody walks to. The card carries the tool number, the last-shot count, the storage date, the oil used and its date, the VCI dose and the next re-oil due date at 6 to 12 months. Add the inspection interval: a 90 to 180 day visual check of the barrier, the bag seal and the desiccant color.
Attach the condition photo pack from the pre-storage clean, dated and labeled by face. A reactivation dispute is won or lost on the evidence of what the steel looked like going in. Keep the maintenance history, the last approved part samples and the process sheet with the tool. A mold without its history becomes an orphan tool, and an orphan re-qualifies from zero: new samples, new process validation, weeks of press time nobody budgeted.
Record the spares that travel with the mold. Ejector pins, return pins, springs and one set of tip seals cost a few hundred dollars and ship in 3 to 7 days as standard components, but a stored tool without them waits on a purchase order during the trial. The mold spare parts inventory guide sets the stocking logic; the storage rule is simply that the kit rides in the same bag as the tool.
The Reactivation Sequence
Reactivation is an inspection that happens to end with a trial, not a trial that starts when the mold arrives at the press. Budget it as three gates: visual and mechanical, hydraulic and thermal, then dimensional. A tool that fails gate one never touches plastic, and that single discipline is what prevents the rediscovered 20,000 USD refurbishment.
Gate one, at the storage rack. Remove the barrier with warm solvent and wipes, never an abrasive pad on a polished face. Photograph the cavity and the parting line in the cleaned state and compare against the pre-storage pack. Check every ejector pin by hand: a pin with a rust ring in its bore or a pitted tip gets replaced before molding, because a pitted pin scores its part on every shot forever after. Stroke the slides, feel the guide pins, count the springs that sit proud of their pockets.
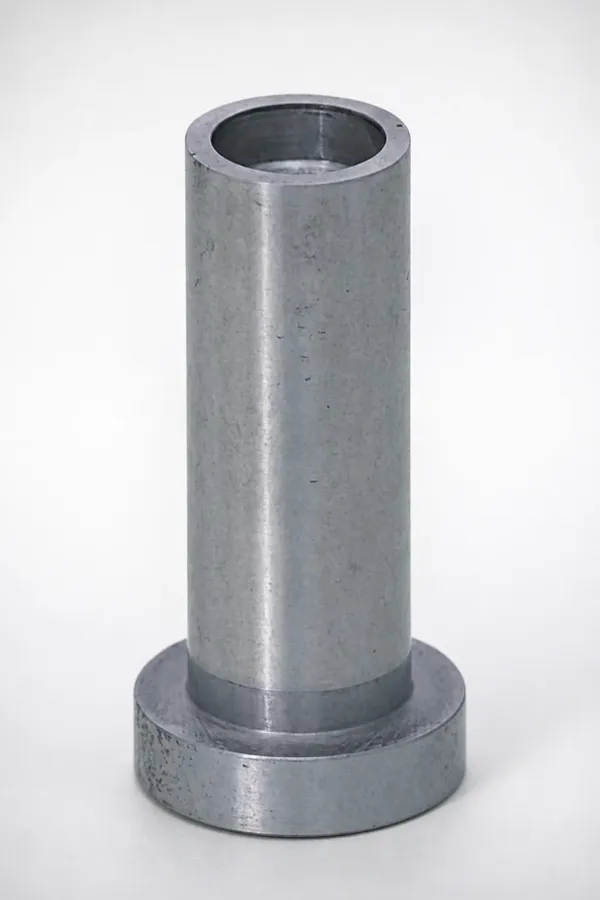
Gate two, at the service bay. Pressure-test every water circuit at 1.5 times working pressure for 15 minutes with the ends capped, and log the hold. Flush the circuits, reconnect in the tagged order, and run 10 to 20 dry cycles at full clamp pressure without plastic, working ejector, stripper and slides through full stroke. On a hot runner tool, ramp the manifold in 10 to 20 degree steps and verify every thermocouple reads within 2 degrees of its neighbor at soak. Anything the dry cycles expose, a seized pin or a weeping fitting, is a repair order now.
Gate three, at the press. Run the first-off set to the original process sheet, pull a full dimensional layout against the drawing, and compare the cosmetic faces to the retained approval samples. If the tool has been parked longer than 12 months or its history is thin, treat reactivation like a formal mold trial with a documented report instead of a quick five-shot sanity check. Re-oil anything you exposed during inspection before the tool waits again.
Orphan Tools and Transfers
An orphan tool is a mold whose paperwork did not travel with it: no shot count, no oiling date, no history. Its first cost is re-qualification from zero, and the second is that every unknown becomes your liability. If a tool you own is moving off your site into a customer bank, a supplier annex or a rented warehouse, get a joint inspection sign-off before it loads. Measure and record the cavity-critical dimensions, photograph all faces, count the pins and note spring free lengths. A transfer without a joint record means you inherit the storage argument later, and the mold transfer guide sets out the full sign-off sequence.
Plant moves catch shops unprepared, because hundreds of tools park for 2 to 12 weeks at once. Lay up to this checklist before the trucks arrive, and sequence the move so tools with the nearest restart dates get the lightest barrier. A mold that waits six weeks in a container with undrained circuits comes out needing a 3 to 6 week internal-rust repair.
One number frames the orphan conversation: re-qualification costs days of press time, sample approval and often a customer engineer on site, while the record pack that prevents it costs under 2 percent of the tool value. Shops skip the record because the saving is invisible.
Lay-Up and Reactivation Checklist
Print these two lists and pin them to the rack aisle. Each line carries the number an inspector should read off the tool, not off memory.
Lay-up, in order:
- Clean before oil. Strip bake-on at 5 to 50 micron films; solvent on polished SPI faces, media only on textures; no abrasive pads on mirror surfaces.
- Drain the water. Blow circuits at 6 to 8 bar dry air; fog conformal lines; cap and tag every fitting by circuit number.
- Film the steel. Rust preventive at 5 to 10 microns on all bare surfaces; no petroleum grease on etched textures.
- Dose the box. VCI emitters at 100 to 200 g per cubic meter; silica gel at 1 kg per cubic meter with an indicator card.
- Set the mechanics. Guide pins coated, bushings topped with NLGI 2, ejector plates mid-stroke, slides hung unloaded.
- Close and lock. 5 to 10 mm air gap, clamps or straps on, upright on wood or plastic shims, never on the parting face.
- Wrap the environment. 10 to 40 degrees C, RH under 50 to 60 percent, foil bag for coastal sites, dust covers on sprue and nozzle.
- File the record. Storage card, photo pack, shot count, re-oil due in 6 to 12 months, inspection every 90 to 180 days, spares kit riding with the tool.
Reactivation, in order:
- Inspect first. Warm solvent removal, photos compared to the lay-up pack, every ejector pin stroked by hand, pitted pins replaced before molding.
- Test the fluids. Water circuits at 1.5 times working pressure for 15 minutes; hydraulic ports plugged, correct fluid, no weeping seals.
- Work the metal. 10 to 20 dry clamp cycles exercising ejector, stripper and slides at full stroke.
- Prove the size. First-off full dimensional set against the drawing and the retained approval samples; trial report if the lay-up ran past 12 months.
The Bottom Line
A lay-up is won by sequence: clean fully, drain at 6 to 8 bar, film at 5 to 10 microns, dose VCI at 100 to 200 g per cubic meter, close with a 5 to 10 mm gap on shims, hold the room at 10 to 40 degrees C and under 60 percent RH, and tag everything with a re-oil date inside 12 months. Break any one step and the tool returns owing 5,000 to 20,000 USD of rediscovered corrosion plus a re-trial. Reactivation is three gates, not a hope: visual and mechanical, pressure and dry cycles at 1.5 times working pressure for 15 minutes and 10 to 20 dry shots, then the first-off dimensional set.
DieStrike builds and sustains precision molds to IATF 16949 at plus or minus 0.005 mm, with EDM and jig grinding at plus or minus 0.002 mm and cavity steel to HRC 62 max across 120+ machines. Standard components ship in 3 to 7 days, tool lead times run 2 to 5 weeks, and tier-1 programs with TE, Amphenol, Luxshare and Dongshan include tool banks where lay-up discipline is contractual. A tool parked for the next program should cost a checklist to preserve and an inspection to restart, nothing in between.
KEEP READING
Related Reading
How to Prevent Rust and Corrosion in Injection Molds
The corrosion chemistry, humidity thresholds and preventive coatings that keep bare steel clean between shots.
Read articleArticleHow to Set Up a Mold Spare Parts Inventory
Which ejector pins, springs and tip seals to stock so a stored tool restarts without a 3 to 7 day parts wait.
Read articleArticleHow to Transfer a Mold to a New Manufacturer
Joint inspection, wear measurement and sign-off rules for moving a tool between factories without inheriting blame.
Read articleServiceMold Repair and Maintenance
IATF 16949 refurbishment for stored tools: reconditioned surfaces, replaced pins and re-trials in 2 to 5 weeks.
Read articleNEXT STEP
Ready to Start Your Mold?
Send us your element dimensions or part numbers — our team responds within 24 hours with pricing and lead time.

Written by
Ray ChanMold Buyer's Guide Author · Precision Mold Manufacturing Specialist. Ray helps global importers, distributors and OEMs source factory-direct molds and mold parts.