
How to Maintain a Mold: Weekly/Monthly/Annual Schedule
Table of Contents
A 24-cavity connector mold failed at 14:30 on a Tuesday in the middle of a production run. A stuck ejector pin dragged across the core face, snapped at the head, and the press kept cycling. Three hours of machine time vanished at $120-$250 per hour, a $40,000 batch went to rework, and the mold spent two days on the repair bench. The failure was a maintenance miss, not a design flaw. A weekly pin check would have caught the drag before the pin broke.
Mold maintenance is a schedule problem with a dollar sign on both ends. Skip a check and the cost appears later as scrap, downtime, or a rebuild. Run the checks on time and a tool that cost $80,000 to build keeps producing at T1 quality for 500,000 to 1,000,000 cycles. This guide lays out the weekly, monthly, quarterly, six-month, and annual program that DieStrike's mold repair and maintenance service follows, with the tooling, the time budget, and the failure cost for every interval.
Every interval has a job and a threshold. Weekly checks catch wear that is still cheap to fix. Monthly work keeps moving parts lubricated and vents open. Quarterly and six-month checks protect the cooling circuit and the hot runner. The annual overhaul resets the whole tool. Read the schedule table first, then use each section below as your work instruction.
The Snapshot
- Weekly checks cover water lines, ejector pins, and gates. Each takes 10-30 minutes with the mold in the press.
- Monthly work adds lubrication, vent cleaning, and a torque audit. Budget 1-2 hours of bench time.
- Quarterly and six-month checks cover the cooling circuit, O-rings, and hot runner zones.
- The annual overhaul is a full teardown with bore inspection and steel recertification. Budget 1-2 days.
- Routine mold service runs $150-$500 per event, while unplanned downtime runs $120-$250 per hour (typical industry figures).
Why Molds Fail Mid-Production
Most mid-run mold failures trace to five wear paths: ejector pins that drag or stick, gates that erode, vents that clog, cooling channels that scale, and hot runner zones that drift. Each path starts small and ends expensive. A pin that drags for 10,000 cycles wears its bore oval by 0.005-0.01 mm, then snaps and damages the cavity steel. A blocked vent turns trapped air into burn marks in under 1,000 shots. A hot runner zone that drifts 10 degrees C past setpoint produces cold shots from every cavity on that zone.
The cost math is simple. One unscheduled stop of 8 hours at $150 per hour average press rate costs $1,200 in machine time alone. Add a damaged cavity insert at $500-$2,000 to recut and a scrapped batch at $10,000-$50,000 in material, and a single avoidable failure runs five figures. A full year of scheduled maintenance rarely costs more than one such event.
Prevention works because wear is measurable and gradual. Ejector pins lose outside diameter at a measurable rate. Gate lands grow a measurable amount. Vent depths change by microns. The program below catches each one inside its wear budget, before the failure threshold, and the numbers give every check a pass or fail answer.
The full program fits in one table. Every interval has a task, the tooling it needs, a time budget, and the cost of skipping it.
| Interval | Task | Tooling | Time | Cost of Skipping |
|---|---|---|---|---|
| Weekly or every 20k-50k cycles | Water line flow and inlet/outlet delta check | Flow meter, contact thermometer | 15-30 min | Scale build-up, hot spots, cycle time +10-20% |
| Weekly | Ejector pin return and drag check | Visual check, 10x loupe | 10-20 min | Stuck or bent pin, cavity damage, $500-$2,000 repair |
| Weekly | Gate condition: land wear, blush, pitting | 10x loupe, borescope | 15 min | Gate blush, flash, dimensional drift on parts |
| Monthly or every 50k-100k cycles | Lubricate guides, slides, ejector plate rails | Grease gun, specified lubricant | 30-60 min | Galling, seizure, mold base wear |
| Monthly | Clean vents at the parting line | Brass brush, solvent | 30 min | Burn marks, short shots, slow fill |
| Monthly | Torque audit on bolted joints | Calibrated torque wrench | 30-45 min | Loose plates, misalignment, flash |
| Quarterly | Cooling circuit scale check and descale | Flow meter, descaling kit | 1-2 hrs | 15-25% flow loss, cycle time +10-20% |
| Every 6 months | O-ring and seal replacement | Seal kit, documented sizes | 30-60 min | Water leaks, steel corrosion, rust on base |
| Every 6 months | Hot runner zone and thermocouple check | Multimeter, thermocouple calibrator | 2-4 hrs | Zone drift past ±10°C, cold shots, scrap |
| Annual or every 500k-1M cycles | Full teardown, bore inspection, steel recertification | Bench, air gauge, hardness tester | 1-2 days | Hidden crack, total failure, rebuild $10,000+ |
← swipe to scroll →
Table: typical industry figures; verify against your program.
The Weekly Mold Check
The weekly check runs with the mold in the press and takes 30-60 minutes total. It catches the three fastest wear paths: cooling flow, ejector pins, and gates. Run it every week of production or every 20,000-50,000 cycles, whichever comes first, and log every reading in the mold book.
Water Lines: Flow and Temperature Delta
Measure the flow rate on every cooling circuit with a flow meter. A drop of 10-20% against the T1 baseline means scale or debris inside the channel. Measure the inlet and outlet temperature with a contact thermometer. A delta above 5 degrees C means the circuit is not removing heat evenly, which shows up as a longer cycle or sink marks on the part.
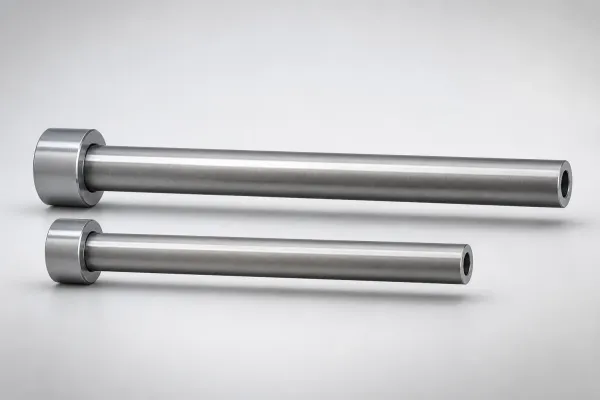
Record both numbers on the same page every week. Two consecutive readings that drop 10% or more trigger a descale, not a third reading. Scale that forms in a 6 mm cooling channel can cut heat transfer by 40-60% before you see the flow drop on the meter, which is why the temperature delta is the faster signal.
Ejector Pins: Return and Drag
Watch the pins return flush with the core face on every cycle. A pin that stands proud or lags by 0.1 mm is dragging. Look for drag lines and polish wear on the pin land with a 10x loupe. Pin OD wear of 0.005-0.02 mm against the T1 baseline is normal progression. Wear beyond 0.01 mm on the land calls for a micrometer measurement, not a guess.
Clean clearance classes hold at 0.01-0.02 mm for pins up to Ø12 mm, per DME and MISUMI fit classes. If the pin slides freely but the part sticks, the problem is draft or shrinkage grip, not the pin. Note it in the book and move on.
Gate Condition: Wear, Blush, Pitting
Inspect the gate with a loupe or a borescope. A healthy gate land runs 0.8-1.2 mm for most unfilled thermoplastics (typical). Blush around the gate, a frosty ring on the part, means early erosion. Pitting on the gate face means cavitation or corrosive gases from the melt. Land growth of 0.05 mm already shifts the pressure drop through the gate, and growth of 0.1 mm is a recut trigger.
The Monthly Mold Check
Monthly work moves the mold to the bench or runs between shifts. Budget 1-2 hours. Three tasks protect the moving and breathing systems of the tool: lubrication, vent cleaning, and torque.
Lubrication: Guides, Slides, and the Ejector Plate
Lubricate leader pins, bushings, slides, and the ejector plate rails every 50,000-100,000 cycles or monthly, whichever comes first. Use the grease grade written in the mold book, not whatever is on the cart. Over-lubrication traps dust and turns into lapping compound. Under-lubrication turns into galling. A dry guide that runs 20,000 cycles can score the bushing and shift mold base alignment by 0.02-0.05 mm.

Check the ejector plate return springs while you are on the bench. Free length loss beyond 5-10% means the springs are done. Replace them in matched sets, never one at a time, and record the set numbers in the mold book.
Vent Cleaning: Burns and Short Shots Start Here
Vents at the parting line release the air and gases trapped by the melt. Typical vent depth runs 0.02-0.05 mm depending on the resin, with a land of 1-3 mm and widths of 5-25 mm (typical industry values). Cleaning removes the carbon film and debris that accumulate in those microns. A vent packed solid burns the part edge in a few hundred shots and reads as a short shot on thin sections.
Clean with a brass brush or solvent, never steel tools. Steel scratches the vent land and changes the depth. After cleaning, verify depth with a depth gauge or a wax cast, and log the reading next to the cycle count.
Torque Audit: Bolted Joints Drift
Bolted joints on the mold base and the hot runner manifold relax in service. The monthly torque audit catches it before the joint moves. Re-torque plate bolts to 80-90% of proof load per the drawing. A loose plate moves under injection pressure and shows up as flash or a stepped parting line. The audit takes 30-45 minutes with a calibrated wrench and prevents misalignment that can take a full day to chase later.
Quarterly and Six-Month Checks
Quarterly and six-month work protects the systems that hide inside the mold: cooling channels, seals, and the hot runner. Budget 2-4 hours for the quarterly pass, and up to half a day for the six-month pass.
Cooling Circuit: Scale Check and Descale
Test each circuit's flow against the T1 baseline every 3 months. Flow loss of 15-25% is the descale trigger. Descaling with a 5-10% citric acid solution or a commercial scale remover takes 1-2 hours per circuit. Flush with clean water after, then re-test flow. Scale in a 6 mm channel cuts heat transfer by up to 50% before it reads on the flow meter, which is why the weekly temperature delta matters.
Check the water chemistry once a quarter. Chloride levels above 50 ppm attack unprotected steel, and hard water above 150 ppm calcium carbonate builds scale faster. A corrosion inhibitor in the loop protects the channels between descales, and the quarterly test tells you the inhibitor is still working.
O-Rings and Seals: Replace on the Clock
O-rings in the cooling circuit and on the hot runner manifold harden, crack, and leak. Replace them every 6-12 months on the schedule, not on failure. A leaking cooling seal drips water onto the mold base, and water against a P20 plate starts pitting within weeks. A leaking hot runner seal pushes melt into the manifold, and that failure means a full teardown.
Hot Runner: Zones, Thermocouples, and Tips
Healthy hot runner zones hold within ±5 degrees C of setpoint after a 30-45 minute soak. A zone more than ±10 degrees C from setpoint is a fault. Check thermocouple resistance against the type chart, check heater resistance between phases, and inspect tip seals for carbon build-up. The full run-through is covered in 7 hot runner maintenance checks before every run. Tips reseat flush to the gate within ±0.02 mm, and a gap above 0.05 mm causes stringing and blush.
The Shot-Count PM Milestones: Calendar Dates Lie
A mold running three shifts on a 15-second cycle racks up 12x more wear per month than an identical tool on a single shift at 3 minutes a cycle. Calendar-based PM dates treat both tools the same — which is why production shops schedule maintenance by shot count, not by the wall calendar. The four-level milestone below is the industry-standard structure: each level is triggered by the cycle counter, not the date, and each adds depth to the checks above it.
| PM Level | Trigger | Typical Actions | Bench Time |
|---|---|---|---|
| Level 1 — Running | Every shift / daily | Visual cavity check, vent blow-out, water flow confirm, flash watch at parting line | 5-10 min / shift |
| Level 2 — Preventative | Every 20,000-50,000 shots | Clean parting lines and vents, lubricate ejector pins and slides, gate wear check, low-pressure close verification | 2-4 hours |
| Level 3 — Scheduled overhaul | Every 100,000-250,000 shots | Mold base alignment check, guide pillar and bushing inspection, cavity surface polish assessment, hot runner heater resistance check, replace worn ejector pins | 1-2 days |
| Level 4 — Major overhaul | Every 500,000+ shots | Full cavity/core dimensional survey, hot runner overhaul and heater band replacement, rebuild decision review, cavity repolish to original spec, alignment pin replacement | 3-5 days |
← swipe to scroll →
Shot-count PM milestone structure after industry practice (LongTeam, ZetarMold, and tooling maintenance guides). Intervals tighten for aluminum prototype tools (5,000-50,000 shot rating) and for glass-filled or corrosive resins — see the resin-specific cleaning triggers below.
Cleaning follows the same shot-count logic. Standard engineering thermoplastics get a full preventive cleaning at 50,000-100,000 shots; glass-filled, carbon-filled, or flame-retardant resins build residue roughly twice as fast and get cleaned at 25,000-50,000 shots. Part defects are the exception that overrides any schedule — burn marks mean vents are clogged now, flash means the parting line needs attention now. Do not wait for the next milestone when a part tells you something is already wrong.
The one number worth tracking on every tool: total cycle count, logged per shift. Mold life is measured in shots, not years. A tool that "lasts 5 years" is meaningless until you know whether it ran 200,000 or 2,000,000 cycles in that time. A documented shot counter is the single cheapest upgrade to any maintenance program — it turns every maintenance decision from opinion into math.
The Annual Overhaul
Once a year, or every 500,000-1,000,000 cycles, the mold gets a full teardown. Budget 1-2 days on the bench. This is the interval that finds the failures no running check can see, and it is where the mold book earns its keep.
Full Teardown and Cleaning
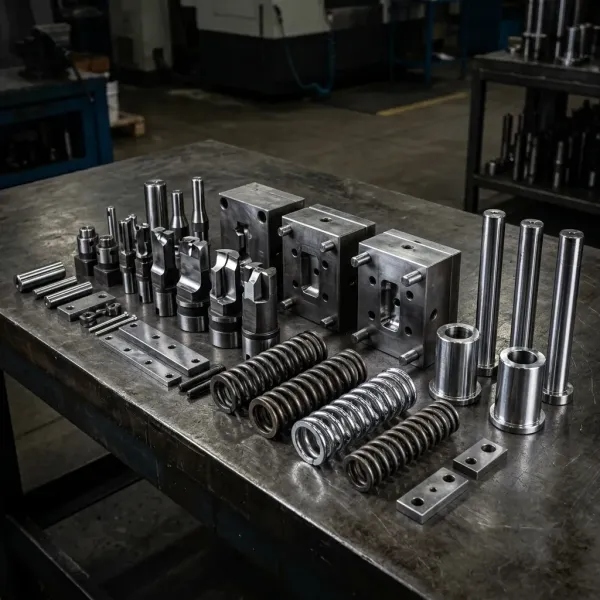
Strip the mold to its plates. Clean every component, degrease everything, and inspect every wear surface under a 10x loupe. Photograph what you find and file the images in the mold book. This is the only time you see the back of the cavity inserts, the bottom of the ejector bores, and the full length of the leader pins.
Lay the parts out in assembly order. Measure first, decide second, and order third. A teardown without measurements is just disassembly, and it cannot answer the one question that matters: what wore, and how fast?
Bore Inspection: The Micron Story
Measure pin bores with an air gauge or a bore gauge reading to 0.001 mm. A bore that has worn oval by more than 0.005 mm loses its fit class and will not hold a pin centered. Compare every bore to the T1 record. Bores that grew past the wear limit get sleeved or reamed to the next standard pin size, and the pins follow the bores.
Steel Recertification: Hardness and Surface
Check cavity and insert hardness against the drawing. DieStrike builds cavity inserts to HRC 62, and a part that has softened more than 1-2 HRC points has seen overtemperature or corrosion. Check the parting line and gate faces for pitting. P20 runs 28-32 HRC as-supplied, and S136 runs 48-52 HRC hardened, so the two grades fail differently. P20 pits from water and condensate. S136 resists it with roughly 13% chromium but still pits if the passivation layer is broken by grinding.
Replacement Parts Order
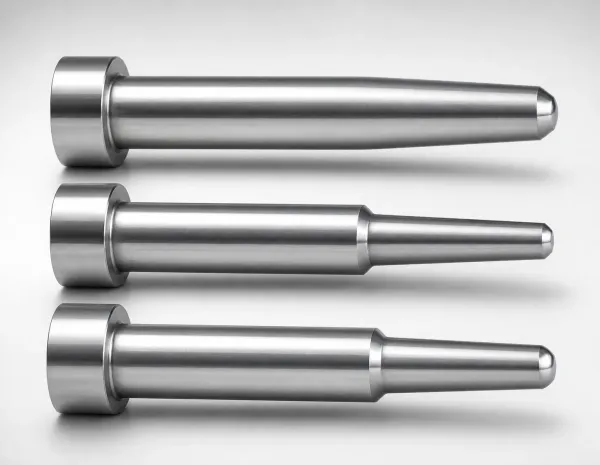
Order the wear items the inspection flags: ejector pins, core pins, springs, O-rings, bushings, and heaters. DieStrike ships standard ejector pins, core pins, and mold accessories in 3-7 days, so a planned annual order never idles the tool. If the inspection found damage beyond wear, the mold repair and maintenance service handles the rework to the same tolerances as a new build.
Wear Limits and Replacement Triggers
Wear limits turn maintenance from opinion into measurement. Every component has a new condition, a wear limit, and an action. Measure against the mold drawing, never against memory, and record the reading before you touch a wrench.
How to Measure Standard Parts
A micrometer reading to 0.001 mm measures pin OD. A bore gauge or air gauge measures the mating bore. A depth gauge measures vent depth, and a loupe with a scale checks gate land. Take readings at the same position every time so the trend stays honest. Two readings beat one, and ten readings beat two.
The reference table below covers the eight components that wear fastest in production molds. Values are typical industry figures, so confirm each one against your mold drawing and resin spec before triggering a replacement.
| Component | New Condition | Wear Limit | Action |
|---|---|---|---|
| Ejector pin OD vs bore clearance | 0.01-0.02 mm per DME/MISUMI classes | Clearance above 0.03 mm or OD wear above 0.01 mm | Replace pin and re-check bore |
| Gate land length | 0.8-1.2 mm (typical) | Land growth above 0.1 mm or blush on part | Recut gate, re-polish |
| Vent depth at parting line | 0.02-0.05 mm by resin (typical) | Depth growth above 0.01 mm or burn marks | Recut vent, deburr edges |
| Leader pin and bushing clearance | 0.02-0.05 mm | Clearance above 0.08 mm or galling marks | Replace pins and bushings in sets |
| Slide bearing surface | Ra 0.4 µm, no scoring | Step above 0.05 mm or deep scoring | Regrind or replace slide |
| Hot runner tip seal vs gate | Flush to ±0.02 mm | Gap above 0.05 mm, stringing, blush | Reseat tip, replace seal |
| Mold spring free length | Per drawing dimension | Loss above 5-10% of free length | Replace in matched sets |
| O-ring hardness and profile | No cuts, round section | Cracks, flat spots, hardness loss | Replace all seals in the circuit |
← swipe to scroll →
Table: typical industry figures; verify against your program.
Inspection Criteria for Critical Systems
Beyond component wear, four systems carry the mold's precision: the mold base alignment, the ejector system, the hot runner zones, and the cooling channels. Each one has a pass criterion with a number attached.
Mold Base Alignment
Leader pin and bushing clearance should run 0.02-0.05 mm on a new mold. Clearance above 0.08 mm, or galling marks on the pin, means the base no longer aligns the plates. Check plate parallelism to 0.01 mm with a dial indicator across the parting line. Misalignment of 0.05 mm shows up as flash on the far side of the cavity.
Ejector System
Measure ejector plate parallelism to 0.01 mm. A plate that rocks under load pushes some pins deeper than others, and the witness depth varies pin to pin. Compare ejection force to the T1 baseline with a load cell. Drift above 20% triggers a pin and bore review. Return springs lose free length with cycles, and loss beyond 10% means replacement in matched sets.
Hot Runner Zones
Zone temperature balance holds within ±5 degrees C after soak. Thermocouple drift of 2-3 degrees C is normal aging. Drift above 5 degrees C on one zone calls for a new thermocouple. Heater resistance should match the nameplate within 5%. A zone that needs more wattage than its neighbors is losing heat through a bad seal or a cracked insulator.
Cooling Channels and Corrosion
Flow per circuit holds within 10% of the T1 baseline, and the delta temperature across a circuit holds under 5 degrees C. For corrosion, the steel grade decides the risk. S136 stainless resists water damage, P20 does not. A P20 mold with a leaking O-ring pits within weeks, and each pit is a potential surface defect on the part. S136 costs roughly 1.5-2 times P20 per kilogram (typical). The grade choice is a maintenance decision as much as a build decision.
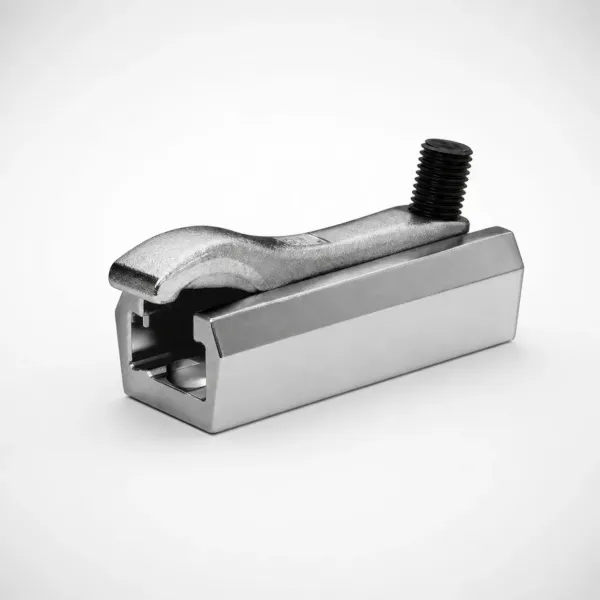
DieStrike applies this inspection standard to every mold it ships, including programs for TE Connectivity, Amphenol, Luxshare, and Dongshan Precision. The same pass or fail numbers apply whether the tool is 2 weeks old or 2 years old.
Documentation and Spare Parts
A maintenance program without records is a rumor. The mold book turns every check into a trend line, and trend lines predict failures before they cost a shift.
The Mold Book
Log every check with a date, a cycle count, and the reading. Keep the T1 baseline on the first page. Flow, delta temperature, pin OD, bore size, and ejection force all trend, and a 10-20% drift on any of them is the early warning. The annual overhaul compares against the same baseline, so the record decides what gets replaced and what stays in service.
Spare Parts Stock
Keep the fast-wear items on the shelf: ejector pins, core pins, springs, O-rings, thermocouples, and gate seals. A standard pin with 3-7 day delivery only helps if you order before the failure. Build the stock list from the annual overhaul findings. DieStrike stocks ejector pins, core pins, springs, leader pins and bushings, and other mold accessories, so the annual replacement order consolidates into one purchase.
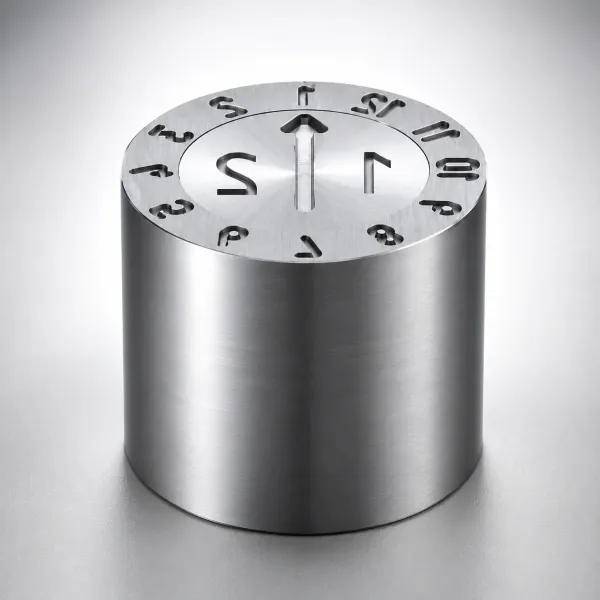
Tag every spare with the mold number it belongs to. Pins for a 24-cavity connector mold are not interchangeable with pins for a 32-cavity automotive mold, even at the same nominal diameter. The mold book holds the part numbers, and the shelf holds the parts.
DieStrike builds under IATF 16949 across 120+ machines, holding mold size precision to ±0.005 mm and part geometry to ±0.002 mm, with cavity inserts hardened to HRC 62. The documentation standard is part of the build standard: DFM feedback lands within 24 hours, and selection advice with a cost breakdown lands within 48 hours.
FAQ: Mold Maintenance
Q1. How often should an injection mold be serviced?
Run light checks weekly or every 20,000-50,000 cycles, lubrication and vent cleaning monthly or every 50,000-100,000 cycles, cooling and hot runner checks quarterly to every 6 months, and a full overhaul annually or every 500,000-1,000,000 cycles (typical industry cadence).
Q2. What does mold maintenance cost?
Routine service runs $150-$500 per event, and an annual overhaul runs $1,000-$5,000 depending on mold size (typical industry figures). Unplanned downtime costs $120-$250 per hour of press time, with scrap and repair on top.
Q3. How do I know an ejector pin is worn?
Measure OD wear above 0.01 mm, clearance above 0.03 mm, or ejection force drift above 20% from the T1 baseline. Drag lines on the pin land and a pin that returns proud of the core face are the running signs.
Q4. When should vents be recut?
Recut when depth grows more than 0.01 mm over spec or when burn marks appear at the vent edge. Expect recutting every 100,000-300,000 cycles depending on the resin and the vent depth.
Q5. What causes mold corrosion and how do I stop it?
Water leaks, condensate, and chlorides above 50 ppm cause pitting, and P20 is far more vulnerable than S136. Dry the mold after runs, replace O-rings every 6-12 months, and run a corrosion inhibitor in the cooling loop.
The Final Call
An injection mold is a precision asset with a maintenance schedule attached. Skipping the schedule costs $120-$250 per hour in downtime plus scrap and repair. Running it costs $150-$500 per event and keeps the tool at T1 quality for its full life. The schedule decides the bill.
Send us your part drawing for DFM feedback within 24 hours, or get selection advice and a cost breakdown within 48 hours.
KEEP READING
Related Reading
5 Mold Cooling Channel Design Tips for Faster Cycles
Mold maker's 5 cooling channel design rules: channel-to-cavity distance 2-2.
Read articleArticle5 Shrinkage Compensation Rules for Mold Design
Shrinkage compensation decides mold accuracy. Five rules: material rates from 0.3% to 2.
Read articleArticle5 Ways to Reduce Mold Cost Without Cutting Quality
Five proven ways to reduce injection mold cost without cutting quality: DFM before quoting, right-sized cavity count,…
Read articleArticle7 Gate Design Best Practices for Balanced Filling
Mold maker's 7 gate design rules for balanced multi-cavity filling: gate depth 50-80% of wall thickness, land 0.5-1.
Read articleNEXT STEP
Ready to Start Your Mold?
Send us your element dimensions or part numbers — our team responds within 24 hours with pricing and lead time.

Written by
Ray ChanMold Buyer's Guide Author · Precision Mold Manufacturing Specialist. Ray helps global importers, distributors and OEMs source factory-direct molds and mold parts.