
How to Select and Maintain a Shot Sleeve for Die Casting
Table of Contents
Every shot on a cold chamber machine pushes 680 to 720 °C aluminium through the same steel tube: the shot sleeve and its plunger tip. Nothing in the cell wears faster, and a solid sleeve costs only a few hundred US dollars. A bore worn 0.4 mm oversize drives 1 to 3 percent fill weight drift. The porosity rejects that follow cost multiples of the sleeve price each year. This article proves sleeve wear is a metered, scheduled and priced variable, not a surprise.
It covers sleeve types, sizing math, hardness specs, the bore measurement routine and tip clearance. It ends with the troubleshooting map from sleeve wear to casting defects on cold chamber aluminium cells.
The Snapshot
- Fill ratio 30 to 60 percent. Below 25 percent the charge entrains air in front of the slug; above 70 percent the plunger slams the end of the shot and risks hydraulic hammer.
- Biscuit 45 to 70 mm, bore 10 to 20 mm above. The biscuit diameter is the metering reference for every shot, and a worn bore changes it without changing anything else.
- H13 or 1.2344 at HRC 44 to 50. Tempered above the working heat: an undertempered sleeve sells out in 2,000 to 5,000 shots, and nitriding roughly doubles service life.
- Measure the bore every 5,000 shots, reject at 0.4 mm oversize. Three heights, pour side first; a 0.1 to 0.3 mm wear band at the pour hole is the normal shape of the damage.
The Shot Sleeve Is a Consumable, Not a Machine Part
The sleeve is where molten metal changes hands. It receives the ladle pour, converts a static slug into a metered volume, and delivers that volume into the runner system at shot velocity. The biscuit it leaves behind is the reference mass for every quality argument about the casting.
Three damage mechanisms run at the same time inside that tube. Hot metal, dross and hard intermetallic particles abrade the bore wall. The plunger tip slides against the steel under full intensification load, hundreds of times a shift. Surface heat at the bore wall runs 300 to 450 °C between shots, hot enough for aluminium to alloy with the steel when protection fails.

Treat the sleeve as a consumable with a known price, a known life and a known failure signature. A tool shop holds the die cavity to ±0.005 mm on critical features, yet many cells run the sleeve outside its own wear window and then chase the defects the sleeve created. The cheapest quality lever in a cold chamber cell is the one nobody budgets for.
Solid Sleeves vs Split Sleeves with Replaceable Liners
A solid sleeve is one machined piece: bore, pour hole and flange in a single steel body. A split sleeve keeps the outer body on the machine and presses in a replaceable liner carrying the wear bore, usually with a front plate sealing the shot end.
The choice trades cost against control. A solid sleeve is cheaper per piece and stands full intensification pressure with no seam to open, but changing it means pulling the whole assembly, re-shimming alignment to the runner block and re-establishing the die thermal map. That reset takes hours.
With a split design the changeover is 20 to 40 minutes at the liner, and the liner price sits at 20 to 35 percent of an equivalent solid sleeve. Two details decide whether the split design behaves. The liner shoulder face takes the plunger edge pressure every shot, and if it wears or distorts, metal walks into the liner-to-body seam and leaks at 600 to 900 bar of fill pressure. The body also never gets a free pass: once the bore behind the liner seat widens or the shoulder peens, the whole sleeve retires. Buy the liner as a matched wear pair with the tip, with hardness records attached, not as a spare that sat in a drawer for two years.
Sizing: Biscuit Diameter, Sleeve Bore and Fill Ratio
Three numbers define a shot system on a cold chamber machine. Biscuit diameter runs 45 to 70 mm for castings between about 0.2 and 4 kg. Sleeve bore sits 10 to 20 mm above the biscuit. Fill ratio, the share of the filled bore length occupied by metal, should land between 30 and 60 percent of the shot.
Run the volume math once and the bands stop being folklore. A 65 mm bore holds roughly 208 mm³ of aluminium per mm of length, about 0.56 kg per 100 mm at a 2.4 g/cm³ pour density. A 400 g charge in a 600 mm stroke fills about 29 percent of a 70 mm sleeve, which is workable. The same charge in a 90 mm sleeve fills 18 percent, a recipe for entrained air.
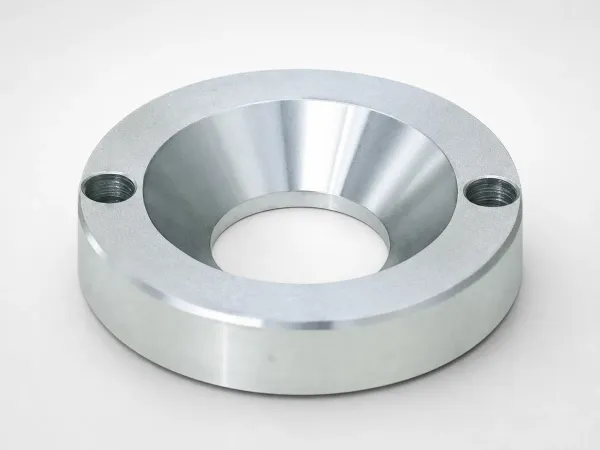
Below 25 percent the slug rides on a pocket of air. That air goes into the front of the shot, folds into the casting and arrives as gas porosity that intensification cannot fully crush. Above 70 percent the slug fills the bore before the plunger reaches full velocity, and the shot lands with a hydraulic hammer blow that cracks liner seats and breaks intensifier seals.
Between 30 and 60 percent is the working window; most foundries center on 40 to 50 percent and hold it with a weighed ladle. The pour hole matters at the same time: an oversized hole throws air into the front of the shot, while a small hole drags dross into the bore on every pour. How that metal then enters the die, gate by gate, is the subject of die casting gates and runners.
The reason sizing is a wear question is geometry. Slug volume scales with the square of bore diameter. When a 65 mm bore grows to 65.4 mm, its cross-sectional area is up about 1.2 percent, and a ladle that was on target now underfills the meter by that margin every shot.
Material, Hardness and the Tempering Trap
Sleeves are heat-check tough, not armor hard. The baseline spec is H13 or 1.2344 tool steel at HRC 44 to 50, the same hot-work family used for the die inserts, drawn to a hardness that survives thermal shock instead of chasing maximum wear resistance.
Two things set the band. Above HRC 52 the surface becomes brittle against the shock of a 40 to 70 kg ladle pour landing every 60 to 90 seconds: heat checking starts early and the cracks become aluminium anchors. Below HRC 44 the bore softens, abrades faster and deforms at the shoulder under 600 to 900 bar of intensification.
The trap is the temper, not the as-quenched hardness. A sleeve surface runs 300 to 450 °C between shots, and the steel is only stable if it was tempered above that working heat. A sleeve tempered at 500 °C and put onto a 450 °C bore wall keeps tempering in service: hardness falls a few HRC points per thousand shots, and the shop sees the answer as a soft sleeve sold out in 2,000 to 5,000 shots.
Buy the temper record with the steel. Specify 1.2344, HRC 44 to 50, and a tempering temperature at least 20 to 30 °C above the measured working temperature of the bore wall, taken from a pyrometer pass, not a datasheet guess.

Surface treatments then buy the life. Plasma nitriding or Mar-Mining builds a compound layer of roughly 10 to 25 µm over a diffusion case of 0.1 to 0.3 mm at 550 to 700 HV, and that layer is what aluminium actually touches first. Nitrided sleeves run about 2 times the uncoated life; 100,000 shots is a reasonable planning number against 40,000 to 50,000 for bare H13 on a 65 mm aluminium sleeve. Do not chrome a sleeve bore for a high-integrity casting: chrome flakes into the shot and becomes a hard inclusion. And preheat before the first pour: bring a cold new sleeve to 150 to 200 °C, because bare cold steel attracts soldering on its first contact with aluminium.
Wear Mechanics and the Bore Measurement Routine
Sleeve wear is not one process. Three mechanisms cut the bore, and each leaves a signature that tells you where to look.
The first is abrasive scoring. Aluminium carries dross and intermetallic particles, including FeAl3 and Al2O3, harder than the steel bore. The ladle drop throws them against the pour side, and they cut a helical band of scoring between the pour hole and the die end. Damage is never symmetric: the pour side wears faster.
The second is wash erosion. Turbulent metal at 30 to 60 m/s in the fast shot scours the last 50 to 100 mm before the gate, and any step or liner seam in that zone focuses the flow and digs a groove next to it. The third is soldering and galling: aluminium alloys with bare steel above roughly 300 °C surface, and each torn-off weld pit pulls out steel with it.
Track the wear with a fixed routine, not with a complaint. Measure the bore diameter with an internal micrometer or bore gauge at three heights along the axis, starting at the pour hole, every 5,000 shots, and write the numbers in the machine log. A wear band 0.1 to 0.3 mm deep at the pour-hole side is the standard shape of a sleeve that has run without measurement, and by then the biscuit diameter has already started moving.

Set the reject rule before the sleeve is needed. At 0.4 mm oversize on nominal bore the liner is finished: that diameter adds roughly 1.2 percent to cross-sectional area, which reads out as 1 to 3 percent fill weight drift, and the drift arrives as porosity plus dimensional scatter. Ovality or taper above 0.2 mm is also a reject: an oval bore lets the plunger tip rock, and a rocking tip opens clearance at the low point.
Soldering, Heat Control and the Re-Grind Schedule
Soldering is aluminium welding to steel. Once the bore wall runs above roughly 300 °C at the surface, iron and aluminium start alloying on contact, and the first drag of the slug tears a pit out of the sleeve. A pit is a permanent turbulence trip wire: it scoops air into every following shot and its edges shear the die conditioner film.
Heat control is the first defense. A sleeve that runs cool solders less. Die conditioner with water content pulls heat out of the wall between shots, and a sleeve held at its designed working temperature simply lives longer. Local hot spots at the pour hole and the gate end are the usual starters, and the fix is a spray-timing change aimed at those zones. The die-level thermal balance, circuit by circuit, is the subject of die casting die cooling design; the sleeve sees the same physics at a smaller scale.
Chemistry is the second defense. Boron nitride and graphite conditioners build a sacrificial film the aluminium wets instead of the steel. Over-dosing leaves carbon in the shot as black specks; under-dosing exposes bare steel within a handful of shots. The dilution ratios and application timing that hold that film are covered in die spray setup.
When the surface is already damaged, re-grind on schedule instead of running to failure. The standard interval is the tip face and the leading bore zone rebuilt every 2,000 to 10,000 shots depending on alloy: high-iron A380-type aluminium and thick-walled slow-cycle castings that hold heat against the sleeve sit near the 2,000 to 4,000 end, magnesium and clean-return melts run toward 10,000. A re-grind that closes the bore back to nominal with a fresh finish is a two-hour job at a surface grinder; the alternative is a scrapped liner and a week of porosity.
Plunger Tip Selection and Clearance
The plunger tip is the second wear couple inside the sleeve, and it decides how clean the back half of the shot stays. Two families dominate: hardened hot-work steel tips, typically H13 at HRC 46 to 52 with a nitrided surface, and tungsten carbide tips with a steel shank.
A carbide tip costs several times a steel tip and returns 2 to 4 times the life: plan on 150,000 to 300,000 shots for carbide against 40,000 to 80,000 for good steel on aluminium work. Steel stays the default on zinc. Carbide pays where the sleeve is the expensive half of the pair and a late tip change would score a new liner.
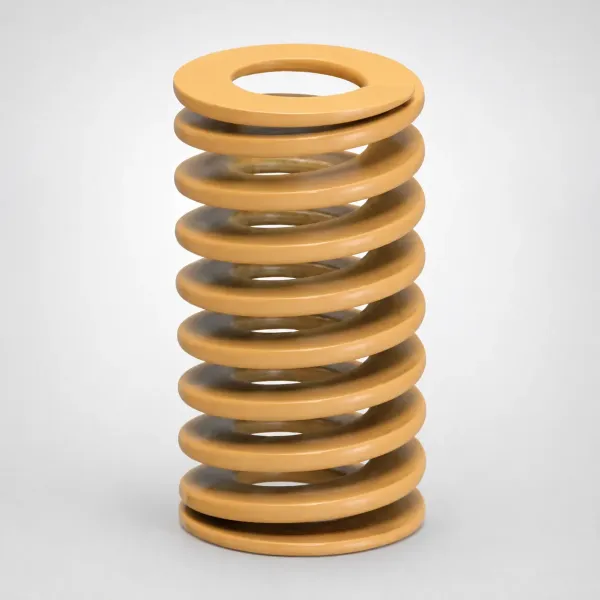
Clearance is the number that ties tip and sleeve together. New assemblies run 0.05 to 0.15 mm diametral clearance. Once clearance passes roughly 0.2 mm, molten metal flows past the tip ahead of the slug. That leakage is not just lost volume: the trapped film oxidises against the hot bore and returns as the black oxide bands and dark inclusions cutters complain about on machined faces, and the leaked slug skews the metered volume by 1 to 2 percent.
Check the pair, not the parts. Measure tip OD and bore ID with the same gauge set and compute the clearance; a "good" tip in a 0.4 mm oversized bore is a leaking assembly. Grind the tip land back on the same schedule as the sleeve re-grind, and log both numbers against shot count.
Inspection Intervals and Replacement Criteria
A sleeve program is three checks on three clocks. The daily check is a two-minute visual with the tip pulled: look for soldered aluminium patches, a grey glazed band at the pour hole, and scoring deep enough to catch a fingernail. The scheduled check is the bore gauge pass at 5,000 shots against the logged trend. The teardown check pairs the sleeve inspection with the die service windows, so the cell comes down once rather than twice.
Write the reject criteria down before the debate happens at the machine. The working set for aluminium cold chamber sleeves:
- Bore oversize 0.4 mm on nominal at any measured height, or ovality above 0.2 mm.
- Scoring or wash grooves deeper than 0.2 to 0.3 mm that a grind pass cannot remove within the liner's stock.
- Soldered patches that return within 500 shots after cleaning and re-conditioning: the surface is saturated.
- Tip-to-bore clearance above 0.2 mm with black oxide bands still appearing on castings.
- Visible seam leakage or shoulder peening at the liner seat on a split sleeve: the body is next, not the liner.
Every one of these belongs in the same log as the die's maintenance record so shot counts, fill weights and reject rates can be read together. The pattern that makes a cell predictable, die-side and machine-side, is laid out in die casting die maintenance planning, and the sleeve rows belong on that sheet.
Replacement Economics and Downtime
Run the numbers for a mid-size 65 mm aluminium sleeve on a two-shift cell at 200,000 shots per year. A solid sleeve costs full price plus 2 to 4 hours of changeover and alignment. A split liner costs 20 to 35 percent of that price and swaps in 20 to 40 minutes with the body still aligned to the runner block.
The split design halves downtime, and downtime is the larger cost. Every hour a 500 tonne cell stands idle is an hour of press capacity selling nothing. If changeover drops from three hours to half an hour and happens four times a year, you buy back roughly ten hours of press time annually, and that pays the split-design premium before counting scrapped castings from a rushed, misaligned solid-sleeve restart.
Stock by failure rate, not by fashion. Keep one liner and one tip per sleeve size in the plant, with hardness and dimension records attached. Standard replacement components from a tooling supplier ship in 3 to 7 days, so the emergency quantity is one, not five. The rest of the budget belongs to the nitriding and grinding account that extends the interval between orders.
One more line in the ledger: the sleeve feeds the quality arguments. When a buyer asks why fill weight moved 2 percent across a month, the answer is either the sleeve trend sheet or an apology, and automotive and EV structural programs audit that paperwork directly.
Troubleshooting Map: Sleeve Wear to Casting Defects
Most defect hunts start at the die. The table below starts one step earlier, at the sleeve, and gives the check that separates a sleeve cause from a tooling cause.
| Symptom on castings | Sleeve-side cause | Check that proves it | Action |
|---|---|---|---|
| Blistering gas porosity under the skin | Fill ratio under 25 percent, or wear band 0.1 to 0.3 mm deep at the pour hole | Bore gauge at 3 heights; ladle weigh against slug mass | Re-size the sleeve or adjust ladle charge; raise fill to 40 percent |
| Fill weight drifting 1 to 3 percent shot to shot | Bore oversize, oval bore rocking the tip, slipping ladle pickup | Compare biscuit diameter against nominal over 50 shots | Reject liner at 0.4 mm; true or replace tip |
| Black oxide bands on machined faces | Tip clearance over 0.2 mm leaking metal past the tip | Measure tip OD plus bore ID, compute clearance | Grind tip land or move to carbide tip |
| Short fills at the last-fill end | Soldered bore increasing drag, cold sleeve stealing heat | Pyrometer on bore wall plus visual for grey glaze | Re-grind bore, restore conditioner, preheat sleeve |
| Dimensional scatter on thin-wall bosses | Metered volume swing from sleeve plus tip wear pair | Trend fill weight against CMM data over one week | Change sleeve and tip as a matched pair |
← swipe to scroll →
Table note: thresholds are typical cold chamber aluminium practice. Confirm against your alloy, machine shot profile and the liner maker's wear limits before writing them into a control plan.
The map matters because the fixes compete. Air problems inside the sleeve get solved downstream by vacuum: a sealed evacuation system pulling 20 to 50 mbar ahead of the shot removes much of the entrained air a low fill ratio creates, and the tooling rules are in vacuum-assisted die casting dies. Vacuum is insurance, not compensation for a worn bore: the pockets a sleeve throws into the shot arrive as porosity even with the pump running.
Shot Sleeve FAQ
Q1. How do I know the sleeve is causing my porosity and not the die?
Start with mass, not X-ray. Weigh 20 consecutive biscuits: a spread above 1 percent points at the sleeve-tip pair before it points at gates. Then gauge the bore at three heights. A 0.1 to 0.3 mm wear band at the pour hole is a sleeve signature.
Q2. What fill ratio should a cold chamber sleeve run?
Hold 30 to 60 percent of the filled shot length, centered near 40 to 50 percent. Below 25 percent the slug pushes an air pocket into the casting; above 70 percent you risk hydraulic hammer at the end of the stroke and loads the intensifier seals.
Q3. Steel or tungsten carbide plunger tip?
Carbide gives 2 to 4 times the life, commonly 150,000 to 300,000 shots on aluminium, and protects an expensive nitrided liner from late-change scoring. Hardened steel at HRC 46 to 52 remains the value choice on zinc and on cells with variable shot volumes where clearance drift is tolerated better.
Q4. How often should the bore be measured?
Every 5,000 shots with an internal micrometer at three heights, logged against nominal. Reject at 0.4 mm oversize or 0.2 mm ovality. A trend gaining 0.02 mm per 5,000 shots tells you the month the sleeve loses fill-weight control.
Q5. When is a split sleeve worth it over a solid one?
When changeover downtime dominates sleeve price. A liner at 20 to 35 percent of solid cost, swapped in 20 to 40 minutes with the body still aligned, suits multi-shift cells with frequent sleeve changes. Solid sleeves stay simpler where change frequency is low and full intensification pressure favors a seam-free wall.
The Bottom Line
A shot sleeve is a metering instrument wearing armour, and it fails in measurable steps. Size it for a 30 to 60 percent fill ratio with a 45 to 70 mm biscuit and a bore 10 to 20 mm above it. Buy H13 or 1.2344 at HRC 44 to 50 tempered above the measured bore-wall heat, nitrided where aluminium is sticky, and expect 2,000 to 5,000 shots from an undertempered sleeve against six figures from a treated one. Gauge the bore at three heights every 5,000 shots, reject at 0.4 mm oversize, keep the tip at 0.05 to 0.15 mm clearance, and re-grind the wear zone every 2,000 to 10,000 shots by alloy. Run the split-liner math if downtime costs more than steel.
DieStrike builds die casting tooling to IATF 16949 with ±0.005 mm mold accuracy, ±0.002 mm on EDM and jig-grinding features, HRC 62 maximum heat treatment and tool lead times of 2 to 5 weeks from a 120+ machine plant, with standard components shipping in 3 to 7 days. The DFM review at quotation covers the shot system and biscuit alongside the die itself, so the sleeve spec is written into the program before the first pour.
KEEP READING
Related Reading
How to Set Die Spray and Release Agent
Dilution, application and conditioning rules for the fluid film that keeps aluminium off bare steel.
Read articleServiceDie Casting Mold Building
IATF 16949 aluminium and zinc die building with DFM review of the shot system before cutting steel.
Learn moreIndustryAutomotive Die Casting
Structural and closure aluminium castings, and the tooling records automotive programs audit.
Learn moreIndustryEV Energy Components
Battery housings and busbar castings where fill weight control and X-ray acceptance meet.
Learn moreNEXT STEP
Ready to Start Your Mold?
Send us your element dimensions or part numbers — our team responds within 24 hours with pricing and lead time.

Written by
Ray ChanMold Buyer's Guide Author · Precision Mold Manufacturing Specialist. Ray helps global importers, distributors and OEMs source factory-direct molds and mold parts.