
How to Design Vacuum-Assisted Die Casting Dies
Table of Contents
A 900 mm shock tower casting left the press with 2.4 percent porosity by volume and failed the leak test on 31 of 200 parts. The die was mechanically sound. The vacuum valve on it had a 50 mm bore that opened in 90 ms and the tank never pulled below 0.4 bar, so the cavity was still holding 300 mbar of air when the plunger advanced. Two wrong numbers turned a structural tool into a scrap stream, and both of them sit outside the cavity.
The scope here is the die and the vacuum circuit around it: valve and tank sizing, sealing, shot profile, port placement, steel, thermal control, ejection, verification and cost for aluminium structural castings of 3 to 8 kg.
The Snapshot
- 20 to 50 mbar before the shot. A sealed cavity at that pressure removes 95 to 99 percent of entrained air and takes porosity from 1 to 3 percent by volume down to under 0.5 percent, which is the level that allows welding, T6 heat treatment and a 1 to 2 bar leak test.
- A 70 to 120 mm valve that opens in 15 to 30 ms. A 1.5 to 3 cubic metre tank and a 100 to 600 cubic metre per hour pump hold the pull long enough for a 40 to 90 ms fill on a 3 to 6 mm structural wall.
- Seal leakage of 0.5 to 2 cubic metres per hour. A worn O-ring on a 2,000 mm parting line is 3 to 10 percent of the vacuum budget and is enough to hold the cavity at 100 to 300 mbar instead of 30 mbar.
- 1.2343 or 1.2344 ESR at HRC 44 to 48. H11 for large inserts, no soft corners near the gate, and nitriding at 0.05 to 0.15 mm case depth everywhere except the parting-line seal groove.
- 80,000 to 250,000 USD for the cell, plus 10 to 20 percent on the die. The payback is a scrap rate that drops from 4 to 8 percent to under 1 percent on parts that are already fully processed when they fail.
What Vacuum Changes in a Die Casting Die
A cold chamber machine injects aluminium at 650 to 700 °C into a cavity that holds air at 1 bar. In a conventional tool the plunger pushes that air ahead of the metal and vents and overflows carry it out, removing roughly 70 to 90 percent of it. The remainder becomes gas porosity, which in a 4 mm structural wall shows up as 1 to 3 percent porosity by volume.
A vacuum tool removes the air before the metal arrives. A pump and a tank pull the sealed cavity down to 20 to 50 mbar absolute, which is 95 to 99 percent of the gas removed, and the valve closes as the last section fills. Porosity in an aluminium structural casting then lands under 0.5 percent by volume, and often under 0.2 percent on a well-sealed tool. That difference is what allows a casting to be T6 heat treated without blistering, welded on a production cell, and leak tested at 1 to 2 bar.
EV structural parts are the reason the process moved from motorsport into volume production. Battery housings, shock towers, subframes and e-motor housings are typically cast in AlSi10MnMg at 3 to 8 kg with 3 to 6 mm walls, and each one has to hold pressure or pass a weld seam check. Conventional high pressure die casting at that wall section cannot meet the acceptance standard. The gates and runners still have to be right, because vacuum does not fix a gate that jets or a runner that fills the cavity in the wrong order. Our guide to die casting gates and runners covers that side of the tool.
Two consequences follow. First, the mechanical load on the die does not change: cavity pressure at intensification stays at 700 to 1,000 bar, so clamp and die structure are sized exactly as they would be without vacuum. Second, a sealed tool is a different maintenance object, because gaskets, valve seats and seal grooves become consumables with a shot-count interval that belongs in the tool file on day one.
The Vacuum Circuit: Valve, Tank, Pump and Timing
The valve belongs at the far end of the last-filled section, and its bore sets how fast the cavity can be vented. A 70 to 120 mm bore on a structural tool opens in 15 to 30 ms and dumps the cavity gas into a tank of 1.5 to 3 cubic metres. The tank is the buffer that makes the pull fast, because the pump alone cannot move the gas volume of a 2,000 mm cavity in the 0.3 to 0.6 s available.
Pump capacity runs 100 to 600 cubic metres per hour depending on tool size, seal quality and cycling rate. A 400 cubic metre per hour pump on a 3 cubic metre tank holds 20 to 50 mbar through a 6 to 10 s cycle including re-evacuation between shots. Add a second tank only when the cycle drops below 5 s or the tool carries two independent vacuum circuits.

Measuring the vacuum trace every shot is the step most shops skip. Put a sensor on the cavity side rather than on the tank, and log absolute pressure from valve open to valve close. A trace that flattens at 300 mbar says the seal has failed or the valve opened before the plunger passed the pour hole. A trace that reaches 25 mbar in 0.4 s and holds until the valve closes is a healthy shot.
Sequence the valve against plunger position, not against time alone. The controller needs the position signal within 5 ms, because a valve that opens 30 ms early on a 0.25 m/s slow shot lets atmospheric air back through the pour opening and spends the vacuum before the metal moves.
| Component | Typical specification | What fails when it is wrong |
|---|---|---|
| Vacuum valve | 70 to 120 mm bore, opens in 15 to 30 ms, closes at end of fill | Cavity never reaches 50 mbar and porosity lands at 1 to 3 percent by volume |
| Vacuum tank | 1.5 to 3 cubic metres with a 100 to 600 cubic metre per hour pump | Pull is too slow and the cavity sits at 200 to 400 mbar at the moment of fill |
| Parting-line seal | Silicone or FKM cord in a 4 to 6 mm groove rated to 250 °C | A worn seal leaks 0.5 to 2 cubic metres per hour, 3 to 10 percent of the vacuum budget |
| Pressure sensor | Cavity-side absolute sensor, 5 to 1,000 mbar, logged per shot | No trace, so a slow leak is misread as a porosity defect in the casting |
| Sequencing controller | Valve open and close timed to plunger position within 5 ms | Valve opens before the pour hole is passed and metal enters the vacuum line |
| Filter and knock-out pot | 50 to 100 micrometre element, cleaned weekly | Metal dust reaches the pump and the tank loses 30 to 50 percent of its pumping speed |
← swipe to scroll →
Table note: component sizes are typical industry values for a 3 to 8 kg aluminium structural tool. Confirm the valve timing against the machine control manual and record the vacuum trace for the first 50 shots of every trial.
Sealing the Parting Line: O-Rings, Overflows and Leaks
A structural die for a battery housing can present 2,000 mm of parting line, plus four slides and a vacuum channel. Every millimetre of that path has to hold under vacuum and survive a die temperature of 180 to 250 °C. A worn O-ring on a 2,000 mm face leaks 0.5 to 2 cubic metres per hour, which is 3 to 10 percent of the total vacuum budget and is often enough to hold the cavity at 100 to 300 mbar instead of 30 mbar.
Groove geometry decides whether the seal lives. Machine a 4 to 6 mm wide and 2.5 to 4 mm deep groove with 0.2 to 0.3 mm of crush, place it 15 to 25 mm outside the cavity edge, and keep it clear of the flash line. Silicone cord resists the die temperature but tears on flash, while FKM holds to 250 °C with better abrasion resistance at a higher cost. On a tool with slides, seal each slide separately and vent the pocket between seals, so one failure does not open the whole cavity to atmosphere.

Overflows take the place of vents on a vacuum tool. In a conventional die a 0.05 to 0.15 mm vent is the gas path, but under vacuum vents bleed the pressure that the circuit is trying to hold, and the overflows do the work instead. Size overflows at 15 to 25 percent of casting volume with 1.5 to 2.5 mm thickness, and connect them to a slot network that ends at the vacuum port. The seal then runs around the whole assembly, cavity plus overflows, which on a large tool can add 300 to 600 mm to the seal path.
Treat seals as scheduled consumables. Inspect the groove and the cord every 5,000 to 20,000 shots and replace the cord on any flat, cut or 0.5 mm compression set. Record the vacuum trace after each change, because the trace is the only evidence that a new seal performs like the one it replaced.
Shot Profile and Plunger Timing Under Vacuum
The shot profile in a vacuum tool carries one extra constraint: the plunger has to pass the pour hole before the valve opens. If the valve opens while the sleeve is still exposed, atmospheric air rushes in through the pour opening and the vacuum is spent before the metal moves. On a 1,200 mm sleeve with a 120 mm plunger, a slow shot at 0.15 to 0.35 m/s takes 0.5 to 0.8 s to cover the pour hole, so the valve trigger belongs after that point, at 30 to 50 percent of sleeve travel.
The fast shot then runs 4 to 8 m/s for structural walls of 3 to 6 mm, and about 30 to 50 percent of the cavity volume fills during that fast stage. Cavity fill has to complete while the tank still holds vacuum, and the cavity reaches 50 mbar in 0.3 to 0.6 s with a properly sized circuit. Fill time on a 5 kg casting lands between 40 and 90 ms at that speed, so the valve closes within a few milliseconds of the last section filling. Close it late and metal enters the vacuum line. Close it early and the last section fills against 1 bar.
Intensification follows immediately at 60 to 100 MPa of hydraulic pressure, giving 700 to 1,000 bar in the cavity. That pressure feeds shrinkage and sets the density of the casting, and it works only while the biscuit is still molten. Keep biscuit thickness at 20 to 40 mm and the shot sleeve fill ratio at 30 to 50 percent, because a sleeve that is 80 percent full has no room for the biscuit and cannot transmit intensification pressure to the cavity.
Log the profile. Plunger position, velocity, intensification pressure and the vacuum trace on one time base is the only reliable way to separate a gas problem from a fill problem. Two consecutive shots that differ by more than 10 ms in valve timing point to a valve or controller fault rather than to a metal or die temperature problem.
Vacuum Port Placement and Last-Fill Logic
The port has to fill last. Place it at the coldest point of the cavity, which is the far end of the flow path from the gate and usually the thinnest section, because a port that fills early is sealed by solidifying metal while the cavity is still filling. On a 2,000 mm battery housing with four gates that often means two vacuum ports rather than one, each at the end of its own flow region.
Feed the port from a runner of 12 to 20 mm cross section and keep the path free of dead ends. A pocket, a sharp 90 degree turn or a step under 5 mm radius traps metal and blocks the gas route. The port itself carries a 15 to 25 degree taper into the valve, with a 70 to 120 mm bore and a land under 3 mm long so it breaks cleanly at trim.
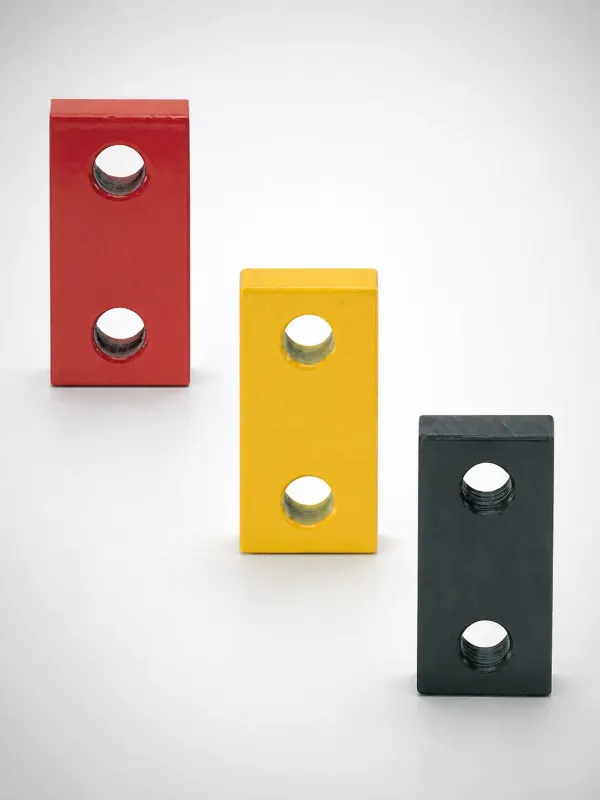
Flow simulation informs the placement, but the last-fill map comes from the trial. Run a short-shot series on the tool and photograph each casting, or use a cavity pressure sensor network at 5 to 10 points. The section that fills last on the short shot is where the port belongs, and it is often 20 to 50 mm from where the first simulation put it.
Keep overflows between the port and the last thin sections. An overflow at the far corner of a 4 mm wall gives the gas a route into the slot network even when the metal reaches that corner 10 to 20 ms before the end of fill. Connect every overflow to one slot network that terminates at the vacuum port, and size the slots at 2 to 3 mm by 8 to 12 mm so they pass gas while the valve is open.
Design Rules That Hold Cavity Pressure
Part geometry and tool geometry both get simpler under vacuum. Closed pockets that trap gas in a conventional tool still have to be avoided, because a pocket that fills last and seals first holds a gas bubble against 700 to 1,000 bar of intensification pressure. If the part needs a pocket, open it to an overflow or move the gate so the pocket fills before the surrounding wall.
Structural castings of 3 to 8 kg with 3 to 6 mm walls are the target of the process. Keep wall transitions under a 2 to 1 ratio, put radii of 1 to 2 mm at internal corners, and draft vertical walls 1 to 2 degrees. A wall step from 6 mm to 2 mm creates a hot spot on the thick side and a cold shut on the thin side, and vacuum changes neither outcome.
The die runs hot, at 180 to 250 °C, so the cooling layout has to remove heat while keeping the cavity face within 2 to 5 °C of setpoint. That is a cooling design problem with its own numbers, covered in our guide to die casting die cooling. Cycle time for the structural parts described here lands at 3 to 8 s, and the vacuum circuit has to re-evacuate the tank inside that window.
Two more rules hold a vacuum tool together. No soft corners near the gate, because a corner that washes out under 60 to 100 m/s metal velocity loses its shape in 20,000 to 50,000 shots. And no seal groove inside a shut-off that moves, because a groove on a sliding face is a leak that returns every shift.
Die Steel and Heat Treatment for Vacuum Tools
Vacuum does not change the metal, so die steel selection follows hot work rules with one addition: a sealed tool runs 20 to 40 °C hotter than a conventional die over the same cycle, because the seal and the vacuum blanket reduce heat loss from the block. 1.2343 or 1.2344 in ESR quality at HRC 44 to 48 is the standard for cavity inserts on structural castings. H11 covers large inserts above about 400 mm where deep hardening matters. Our guide to die casting die steel covers the grade comparison in detail.
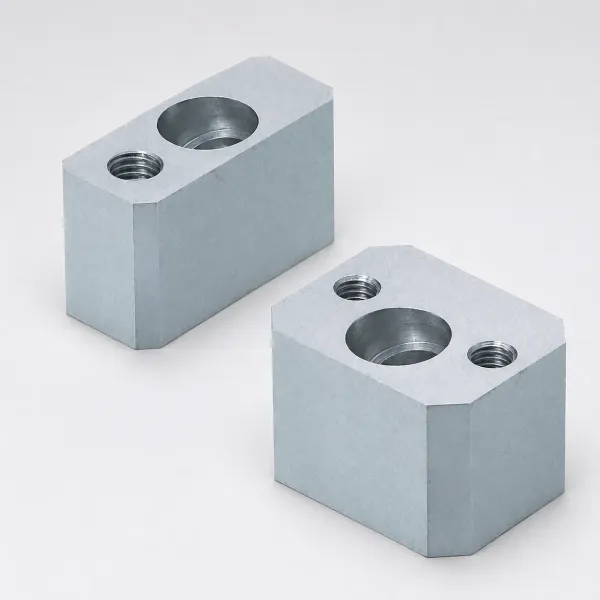
Hardness holds only where the steel is properly treated. Specify vacuum hardening with a double temper, then nitriding at 0.05 to 0.15 mm case depth for gate and overflow areas, which keeps the surface at HV 900 to 1,100 while the core stays tough at HRC 44 to 48. Skip the nitriding at the parting line seal groove, because a brittle case there chips at flash break-out and turns into a vacuum leak that shows up as porosity.
Keep soft corners away from the gate. A 4 mm gate on an aluminium structural casting runs metal at 60 to 100 m/s, and at 680 °C that flow erodes a soft insert quickly. Use a separately hardened gate insert, keyed and replaceable, and inspect it every 20,000 to 50,000 shots. Water at 20 to 40 L/min through a spiral circuit around the gate holds the insert below 350 °C at the surface.
Heat checking remains the dominant failure mode regardless of grade. Thermal cycling between 250 °C and 680 °C at the gate and overflow areas produces a crack network 0.1 to 0.3 mm deep, and it starts at radii under 1 mm. Polish those radii, hold the surface at Ra 0.4 to 0.8 micrometre in high-flow zones, and schedule a re-polish every 50,000 to 150,000 shots.
Thermal Control and Cycle Time
Die temperature on a structural vacuum tool sits at 180 to 250 °C, above the 150 to 200 °C of a conventional aluminium die. The higher setpoint reduces the temperature difference between metal at 650 to 700 °C and the steel, which slows the chill and helps the last sections fill. It also pushes every seal, sensor and hydraulic component into a hotter environment, which is why seal material and sensor placement belong in the design review rather than in the build.
The vacuum circuit has its own thermal load. Gas pulled from the cavity carries metal dust and heat into the valve and the tank. A knock-out pot before the valve, a 50 to 100 micrometre filter after it, and a water-cooled valve body keep the assembly under 200 °C. Without them a valve can seize inside 20,000 to 50,000 shots and the tank loses pumping speed as deposits build on its walls.
Cycle time for a 3 to 8 kg structural casting runs 3 to 8 s, plus 5 to 12 s of spray and extraction. The vacuum part of that cycle is short: 0.3 to 0.6 s to pull down, plus a re-evacuation step between shots that the tank sizing has to absorb. Measure the re-evacuation time during the trial and compare it against the pump curve, because a tank that takes 4 s to recover is either leaking or undersized.
Hold the cavity face within 2 to 5 °C across the tool. A 10 °C spread across a 1,500 mm die face shifts fill order by 5 to 15 ms on a fast shot, which is enough to move the last-fill point away from the vacuum port. Check the thermal map with a surface probe or an infrared camera after 30 to 50 shots, at six points minimum, and correct the circuits before any capability study starts.
Ejection and Part Removal in a Sealed Tool
A sealed die holds the casting differently. With the cavity at 30 to 50 mbar, ambient pressure pushes the part onto the die face, and the effect grows with part area: a 0.5 square metre casting sees roughly 45 kN of extra holding force at 50 mbar. Ejection has to overcome that force, and a larger ejector plate alone does not do it.
Release the vacuum before the die opens. The standard move is a controlled air bleed into the cavity through the same port for 0.2 to 0.5 s, which also helps the casting release from deep ribs. Then eject with a guided ejector plate, 6 to 12 mm ejector pins on a 40 to 120 mm pitch depending on wall stiffness, and a total ejection force sized at 5 to 10 percent of the casting mass in kilograms as kilonewtons.

Keep pins off sealing surfaces and off the seal groove. A pin placed in the seal band deforms the groove inside 10,000 to 30,000 shots and produces a leak that the porosity trace then reports as a process problem. Put ejection on ribs, bosses and overflow lugs, and add a stripper or an air-assist on thin 3 to 4 mm walls where a pin mark would break leak-test acceptance.
Guide the ejector plate on four pins, with return springs sized to the plate mass rather than to habit. An 800 mm by 800 mm ejector plate carrying 40 pins weighs 150 to 250 kg, and a plate that hangs on its own weight opens a 0.3 mm flash path on the parting line over a production week.
Verification: Leak Test, X-Ray and Porosity Maps
Verification for a vacuum casting program has three layers, and all three carry standards that belong in the purchase order. Dimensional and visual checks come first, then leak testing, then radiographic or computed tomography inspection on a sampling basis.
The leak test is the production gate for structural parts. A 1 to 2 bar air test over 5 to 10 s with a 0.5 to 1 cubic centimetre per minute rejection limit catches through-wall porosity and cold shuts, and a chamber test or a helium tracer runs tighter on battery housings. Set the limit from the customer functional requirement rather than from whatever the first tool happens to produce.
| Verification method | Standard or setup | Acceptance target |
|---|---|---|
| Leak test (air) | 1 to 2 bar for 5 to 10 s, limit of 0.5 to 1 cubic centimetre per minute | No flow reading above the limit on any sealed face or weld seam |
| Radiographic X-ray | ASTM E505 with a 1 to 2 percent sensitivity penetrameter | Level 1 to 2, no clustered porosity above 2 mm in a pressure wall |
| Computed tomography | 5 to 50 micrometre voxel size on a sample basis | Gas porosity under 0.5 percent by volume in critical zones |
| Vacuum trace | Cavity-side sensor, 5 to 1,000 mbar range, logged every shot | Pull down to 20 to 50 mbar inside 0.3 to 0.6 s and hold to valve close |
| Metallographic section | 3 samples per trial at gate, mid-wall and last-fill areas | Porosity under 0.5 percent by area, no cold shut at the far end |
← swipe to scroll →
Table note: acceptance levels are typical industry values for aluminium structural castings. Confirm the exact level against the customer drawing and the alloy specification before the first article is submitted.
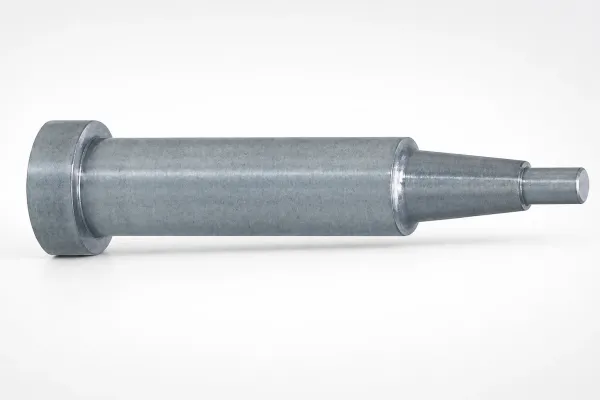
Then tie the results together. A porosity map without the vacuum trace for the same shots cannot tell you whether the tool leaked or the profile was wrong. Keep both in the tool file, and rerun the trace after every seal change, valve service or gate insert replacement.
Cost of a Vacuum Die Casting Cell
Budget the vacuum system separately from the die, because it sits on the machine and not on the tool. A complete circuit, meaning valve, tank, pump, controls, filter and knock-out pot, lands between 80,000 and 250,000 USD installed. The upper half of that band covers a 120 mm valve, a 3 cubic metre tank and a 600 cubic metre per hour pump on a large structural cell.
The die itself carries a 10 to 20 percent premium over a conventional tool of the same size. The extra work is in the seal groove around a 2,000 mm parting line, the vacuum port and overflow slot network, tighter shut-offs, and additional design review time. On a 300,000 USD structural die that premium is 30,000 to 60,000 USD. Our die casting mold service quotes the circuit and the tool as one package, so the seal path, the overflow slots and the valve position are designed together.
Payback comes from scrap and from part capability. A structural cell running at 4 to 8 percent scrap on porosity converts to under 1 percent when the cavity holds 30 to 50 mbar, and the costly rejects are the ones that fail leak test or blister in heat treatment, because the money is already in the casting. On 30,000 to 60,000 parts a year at 20 to 60 USD each, a 3 to 6 percent scrap reduction returns the system cost inside 6 to 18 months.
Add running costs to the model: pump and valve service every 50,000 to 200,000 shots, seal cord every 5,000 to 20,000 shots, and 3 to 8 kW of pump power across a two or three shift week. Those numbers are small against the scrap line, and they belong in the operating budget rather than in a surprise maintenance bill.
When Not to Use Vacuum Assist
Vacuum is not the default for every die. Decorative thin wall parts under 2 mm, phone housings, small brackets and most zinc castings run clean on conventional vents of 0.05 to 0.15 mm and overflows sized at 10 to 20 percent of casting volume. The tolerance for gas in those parts is high, so the circuit buys nothing.
Volume matters too. A vacuum circuit pays back at 30,000 to 60,000 parts a year on a structural casting, and a tool that runs 5,000 parts a year and is then modified cannot recover an 80,000 to 250,000 USD system cost. Small parts under 200 g gain less as well, because the gas volume is small and a well-designed overflow network handles it at a fraction of the cost.
Skip vacuum when the casting does not have to be welded, heat treated or leak tested. Those three downstream operations are what turn porosity into a reject. If the part is painted and the acceptance criterion is visual, conventional tooling with correct vents and overflows meets the print.
Do not add vacuum to a die that cannot seal. A tool with four independent slides, a 2,500 mm parting line and a history of flash will not hold 50 mbar at any gasket cost. Fix the shut-offs and the clamp first, then decide. Castings built for the electrified powertrain segment, which is where most vacuum work sits, are covered on our EV and energy industry page.
The Bottom Line
Vacuum-assisted die casting succeeds on numbers rather than on hardware. Hold the cavity at 20 to 50 mbar before the shot, open a 70 to 120 mm valve in 15 to 30 ms, close it as the last section fills, and keep seal loss under 3 percent of the vacuum budget. Then hold 180 to 250 °C die temperature, a 4 to 8 m/s fast shot and 700 to 1,000 bar of intensification, and the casting lands under 0.5 percent porosity by volume.
The design work sits in the seal path and the port placement. A 2,000 mm parting line that leaks 0.5 to 2 cubic metres per hour, or a vacuum port that fills 20 ms early, undoes a correct valve, a correct tank and a correct shot profile. Both faults are visible in the vacuum trace and the short-shot series, and both are cheap to correct before the die blocks are cut.
DieStrike builds die casting molds to IATF 16949 with ±0.005 mm mold accuracy, ±0.002 mm on EDM and jig grinding, HRC 62 maximum cavity hardness, 120+ machines and tier-1 references that include TE, Amphenol, Luxshare and Dongshan. Standard mold components ship in 3 to 7 days and full tool lead times run 2 to 5 weeks. Send the casting drawing with wall sections and the porosity and leak acceptance criteria, and we will return a vacuum circuit and die concept before the first plate is machined.
KEEP READING
Related Reading
How to Design Die Casting Gates and Runners
Gate area, runner ratios and fill order for aluminium and zinc tools that must fill before the metal freezes.
Read articleArticleDie Casting Die Cooling Design: Circuits and Balance
Channel size, flow rate and thermal balance for dies that run at 180 to 250 °C all shift.
Read articleArticleHow to Select Mold Steel for Die Casting Dies
Hot work grades, ESR quality and hardness bands for aluminium, zinc and magnesium tools.
Read articleServiceDie Casting Mold Manufacturing
IATF 16949 die building with vacuum circuit integration, DFM feedback in 24 hours and 2 to 5 week lead times.
Read articleNEXT STEP
Ready to Start Your Mold?
Send us your element dimensions or part numbers — our team responds within 24 hours with pricing and lead time.

Written by
Ray ChanMold Buyer's Guide Author · Precision Mold Manufacturing Specialist. Ray helps global importers, distributors and OEMs source factory-direct molds and mold parts.