
How to Size a Cold Slug Well and Runner: Trapping the First Freeze
Table of Contents
A tier-1 connector tool ran a 200 g shot for three weeks with a flow line and a silver streak on the first part of every cycle. The well measured 4.2 mm deep against an 8 mm runner. The frozen plug that arrived with every shot had nowhere to sit except the gate. The customer rejected the first article, and the shop lost six days sorting 3,000 parts a shift before the sprue plate was re-cut to hold a 15 mm well.
This guide covers the slug itself, the well sizing math, pull-pin removal and the gate standoff rule. It closes with the trap decision and the inspection numbers that keep the trap working.
The Snapshot
- Well diameter 1.5 to 2 times the runner diameter. An 8 mm runner needs a 12 to 16 mm well. A well at runner diameter fills before it traps, and the slug rides on to the gate.
- Depth of 6 mm minimum, plus a 1 to 3 mm standoff. The well floor sits 1 to 3 mm back from the parting face so the slug cannot be sheared flat at clamp-up.
- 2 to 4 g of trapped cold volume on a 200 g shot. That is 1 to 2 percent of the shot, and it hides inside any shot weight tolerance wider than ±0.5 percent.
- Gate entrance 1 to 2 runner diameters from the part wall. On an 8 mm runner that is an 8 to 16 mm standoff, which keeps the slug out of the part on every cycle.
What the Cold Slug Is and Where It Forms
Every shot carries a small plug of resin that has already lost its heat before it reaches the cavity. The first 5 to 15 percent of the shot sits in the nozzle, the sprue bush and the sprue well while the screw recovers. That resin touches steel held at 60 to 90 °C, so it skins over, oxidizes and picks up volatiles before the next injection stroke pushes it forward as one cold mass.
On a 200 g shot the plug weighs 2 to 4 g. That is 1 to 2 percent of the shot, which is why it never shows in a shop-floor shot weight check and why it survives so many trial runs. The rest of the melt arrives at 230 to 280 °C and flows around the plug, so the slug travels as a semi-solid lump inside a hot stream.
Where it lands depends on the feed system. In a tool with a properly sized well, the slug is captured opposite the sprue and ejected with the runner. In a tool with no well, or with a well shallower than 6 mm, the plug rides the runner and reaches the gate 0.2 to 1.5 seconds into the fill, exactly when the gate is sizing the flow.

A cold slug also carries gas. Resin that sits in the nozzle at 60 to 90 °C degrades slowly, and the layer against the hot barrel wall releases volatiles that stay locked inside the frozen skin. Push that skin through a gate at 60 to 100 MPa of shear and the gas expands in the cavity, which is how a silver streak appears on a part that was dried to 0.02 percent moisture.
Residence time sets the severity. A 20 second cycle gives the plug 20 seconds of contact at the nozzle, and a longer cycle or a stopped screw makes it worse. Hold the recovery and the next shot start within 3 to 5 seconds on a cosmetic part, and the slug never has time to oxidise past the flow line stage.
The Defect Menu a Cold Slug Writes
The slug produces a predictable set of defects, and every one of them points back to the feed system rather than to the machine settings. A molder who chases them with barrel temperature usually makes the next defect worse.
- Flow line. The cold front stalls as it enters the gate, and the hot melt behind it wraps the freeze line into the surface. It shows on a dark or glossy part at 0.05 to 0.15 mm of visible banding.
- Weld line with 20 to 40 percent strength loss. A cold stream and a hot stream meet with a poor bond. A tensile bar cut through that seam carries 20 to 40 percent less load than the base resin data.
- Jetting snake. A frozen plug shoots through the gate and freezes against the far wall without touching it. The result is a serpentine trace that polishing the cavity will not remove.
- Silver streak. Entrained volatiles expand at the gate and streak the surface with a silver sheen. It looks like a moisture problem and survives every hour of additional drying.
- Short shot or dimensional swing. A slug that partly blocks a 0.8 to 1.5 mm gate starves the cavity, and the part falls 0.05 to 0.20 mm short on the last fill dimension.
Sort the defect against seating and timing before you touch the process. A flow line that appears on cavity one only is a runner balance problem. A flow line that appears on the first shot after every stoppage is a cold slug problem.
The strength loss is the expensive item. A weld line at 20 percent loss on a 40 MPa glass-filled grade leaves a 32 MPa seam, which is below the safety factor on many structural brackets and connectors. That is a design defect with a feed system cause, and no cycle change removes it.

Count the parts before you blame the material. If the defect rate tracks stoppages and start-ups rather than shifts, the fix belongs in the well and the sprue, not in the resin dryer.
Sizing the Well: Diameter, Depth and Draft
The well is a blind pocket cut into the runner plate directly opposite the sprue. Its job is to hold the first cold fraction of the shot where the melt cannot drag it into the part. Three dimensions decide whether it works: diameter, depth and draft.
Set the diameter at 1.5 to 2.0 times the runner diameter. An 8 mm full-round runner therefore wants a 12 to 16 mm well. A well at runner diameter or narrower cannot accept the plug, because the plug has a larger diameter than the runner channel it was formed in.
Set the depth at 6 mm minimum for a standard tool, and deeper for a large shot. The plug must sit entirely below the runner centreline so the hot melt flows over the top of it. Add a 1 to 3 mm standoff between the well floor and the parting face, so the slug is not pinched flat when the tool closes.
Draft the sides at 1 to 3 degrees and put a 0.5 mm radius in the bottom corner. A square bottom corner holds the slug and tears it on ejection, and a torn slug leaves a plug bonded in the well that changes the next shot by 1 to 3 percent of weight.
Shot Size to Well Dimension: The Working Table
The three rules above collapse into one table once the shot size is known. Size the well from the runner diameter first, then confirm that the resulting volume can hold the cold fraction of the shot.
| Shot size (PP, 0.9 to 1.2 g/cm³) | Runner diameter | Well diameter | Well depth | Trapped slug volume | Standoff from parting face |
|---|---|---|---|---|---|
| 25 g | 4 mm | 6 to 8 mm | 6 mm | 0.25 to 0.4 g | 1 to 2 mm |
| 60 g | 5 mm | 8 to 10 mm | 7 to 8 mm | 0.4 to 0.7 g | 1 to 2 mm |
| 120 g | 6.5 mm | 10 to 13 mm | 10 mm | 1.0 to 1.5 g | 2 to 3 mm |
| 200 g | 8 mm | 12 to 16 mm | 15 mm | 2.0 to 4.0 g | 2 to 3 mm |
| 400 g | 10 mm | 15 to 20 mm | 18 mm | 5.0 to 7.0 g | 2 to 3 mm |
← swipe to scroll →
Table note: volumes are calculated from the well as a cylinder (π r² h) at a polypropylene density of 0.9 to 1.2 g/cm³. Confirm the target against the actual resin density, the sprue stub length and the shot weight recorded at the trial.
The volume math is simple and worth running before the drawing is released. A 16 mm well at 15 mm deep holds about 3.0 cm³, which is 2.7 to 3.6 g of polypropylene. That matches the 2 to 4 g of cold volume a 200 g shot produces, so the well can swallow the whole plug in one shot.
Cut the well in a hardened insert, not in a soft plate. A working range of HRC 48 to 52 holds the diameter and the 0.5 mm bottom radius for the life of the tool. Hold the well diameter to the same ±0.005 mm mold tolerance used on the rest of the plate, and polish the bore to Ra 0.4 to 0.8 µm so the slug releases instead of tearing.
Pull-Pin and Mechanical Slug Removal
A plain well works as long as the slug freezes onto the runner and travels out with it. Two conditions break that assumption. The first is a well too small for the shot, where the plug is thicker than the pocket it sits in. The second is a part that cannot show a runner stub or a gate witness, which rules out a conventional well at the parting line.
A pull pin solves both. It is a stepped pin set in the well, with a 0.5 to 1.0 mm undercut on the head and a 0.5 to 1.5 mm clearance in the bore. The pin is spring-loaded or mechanically driven, and it grips the solidified slug at mold opening while the runner is pulled clear of it.
Size the pin body at 4 to 8 mm across, with a head 1 to 2 mm larger than the body and a Z-cut or sucker face that bites the resin. Spring preload runs 20 to 40 N on a small tool, and a pneumatic pin needs 1.5 to 3 bar to strip a 3 g slug at 90 °C without marking it.

Timing matters more than force. The pin must hold the slug until the runner has cleared by 3 to 6 mm, then release it into the sprue drop chute. A pin that releases early drops the plug back into the well, and the next shot pushes a double slug into the gate.
Service the pull pin on a fixed interval rather than on failure. Replace the spring at 200,000 cycles and measure the bore clearance every 50,000 shots. A clearance beyond 2 mm lets melt flash past the head, and a slug that welds to the bore is a hand-out job that stops the press for 20 to 40 minutes.
Choose a pull pin on clear optical parts without exception. A polycarbonate lens at 2 mm wall shows any slug trace as a visible streak under 500 lux inspection, and the reject rate on a tool without a pull pin runs 2 to 5 percent against under 0.5 percent with one.
The Gate Standoff Rule
The runner gate entrance belongs at least 1 to 2 runner diameters from the part wall. On an 8 mm runner that is 8 to 16 mm of runner length between the well and the first steel of the cavity. That distance is what gives the melt time to sweep the slug into the pocket instead of into the part.
The mechanism is simple. The slug is a semi-solid lump that follows the flow front for the first 0.2 to 1.5 seconds of the fill. Runner length and a change of direction slow it against the channel wall, where the hot melt shears past it. A gate set immediately at the well passes the lump straight through the gate land, and the gate land is only 0.8 to 1.5 mm long.
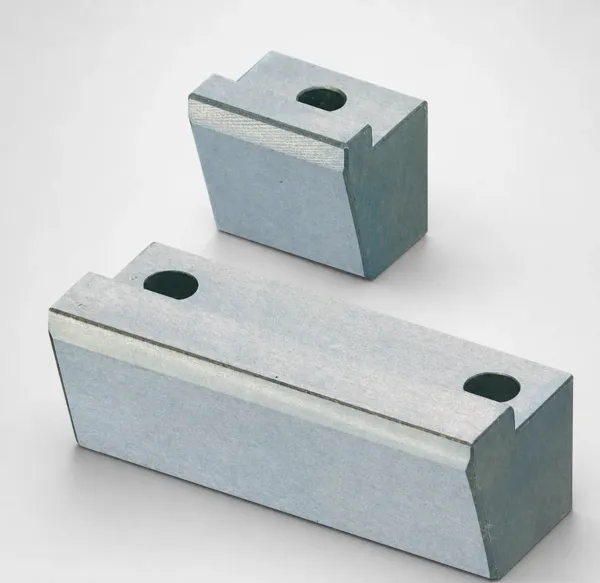
Keep the gate land in that 0.8 to 1.5 mm band and the gate diameter at 0.8 to 2.0 mm for a typical 1 to 50 g part. A land that is too long adds shear and freezes early. A land that is too short loses control of the gate freeze and the vestige.
A direct-sprue part has no standoff at all, because the sprue feeds the cavity face. That geometry needs an insulated sprue bush or an extended sprue with a 2 to 3 mm air gap, so the freeze front moves back into the bush and the part sees the thinner, hotter core of the sprue.
Check the standoff on the drawing, not on the bench. A 6 mm runner at a 4 mm standoff is a 0.67 ratio, and that tool will mark the part on the first cold start of every shift. The gate design best practices walk through land length, gate diameter and vestige together, because all three move the same defect.
Runner and Sprue Geometry That Feed the Well
The well can only trap what the runner delivers to it. Runner diameter runs 3 to 8 mm for most tools, and a full-round section carries the least heat loss per unit of flow. Size the channel so the pressure drop from sprue to gate stays under 20 to 30 percent of the injection pressure, because a starved runner lets the slug stall in place.
Put a radius of at least one runner diameter at every direction change, and hold the bore at Ra 0.4 to 0.8 µm. A sharp corner is a dead zone, and a dead zone becomes a second slug that sits in the tool through every cycle. Keep the runner short, and keep the well directly opposite the sprue on the machine axis.
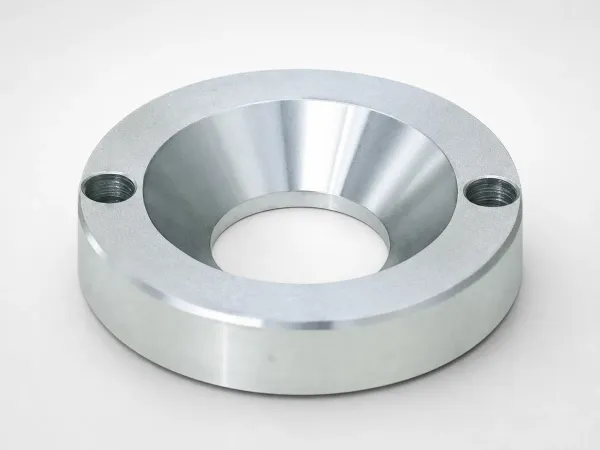
The sprue itself is the coldest steel in the feed system. Taper the bore at 1 to 3 degrees per side so the stub releases, and keep the sprue stub 20 to 60 mm long. A longer stub gives the resin more wall contact and forms a heavier plug, which is why a tall tool needs a bigger well than a short one at the same shot weight.
Match the sprue bushing orifice to the nozzle. A bushing orifice 0.5 to 1.0 mm larger than the nozzle orifice leaves no ledge for cold resin to hang on. The sprue bushing selection guide covers radius, orifice and material for that joint, and the cold runner design guide covers channel balance and diameter across a multi-cavity layout.
Well, Insulated Sprue or Hot Runner: The Decision Tree
Four feed systems deal with the cold slug, and the choice follows the part, the volume and the cosmetic standard. Pick the system before the plate layout, because each one changes the plate stack, the runner plate and the ejection stroke.
| Feed system | Slug handling | Tool cost and lead time | Cycle and scrap effect | Choose when |
|---|---|---|---|---|
| Cold runner with well | Trapped in a 6 to 18 mm deep pocket and ejected with the runner | Lowest cost, 2 to 5 week tool lead time | 1 to 2 percent shot loss to regrind, no cycle penalty | 3-plate or cold runner tool on an opaque part |
| Pull-pin well | Gripped by a stepped pin at 0.5 to 1.0 mm undercut, stripped from the well | Adds 3 to 7 days of component lead time | Reject rate under 0.5 percent on cosmetic parts | Clear or optical parts where no witness is allowed |
| Insulated sprue bushing | Freeze front pushed back by a 2 to 3 mm air gap | Low cost, one-time bushing change | Cuts shot loss to under 1 percent on thick parts | Single-cavity direct-sprue parts with a wall above 3 mm |
| Hot runner with heated sprue | No cold slug forms, the sprue runs at setpoint | Adds 20 to 40 percent to the feed system cost | Cuts cycle 5 to 15 percent and removes regrind entirely | Runs above 500,000 shots a year on an engineering resin |
← swipe to scroll →
Table note: cost and cycle figures are typical industry ranges and scale with cavity count, drop count and resin. Confirm against the tool quote and the molding trial for the specific part.
Run the numbers against volume before you accept the extra cost. A hot runner removes the 1 to 2 percent shot loss and shortens the cycle, but it adds temperature control, drool risk and a maintenance line of its own. A well costs a pocket and a drill cycle. Below roughly 200,000 shots a year, the well almost always wins.
The middle path is often the right one. An insulated sprue bushing on a 3 mm or thicker wall moves the freeze back far enough for a single-cavity part, and it costs a fraction of a hot runner. Above 8 cavities or on a wall under 1 mm, the slug has more gate area to reach and the hot runner becomes the cheaper answer once you count the scrap.
Check the gate witness on the drawing before you commit. A hot runner valve gate leaves a 0.2 to 0.5 mm vestige. A well leaves a runner stub of 0.8 to 1.5 mm. On a visible face of a housing, that difference decides the feed system on its own.
Trap Location Checklist Before Drawing Release
The trap is decided by a handful of numbers that sit on different drawings. Run this checklist once the plate layout and the runner layout exist, and before the pocket is cut into the steel.
- Well directly opposite the sprue. The pocket centreline stays on the machine axis within 0.5 mm, or the plug forms off-centre and sticks in the wall.
- Well diameter 1.5 to 2 times the runner. Check the ratio against the largest runner in the layout, not the average.
- Well depth of 6 mm or more. Confirm the pocket floor still leaves 15 mm of steel above the plate support, or the clamp load will bow it.
- Standoff of 1 to 3 mm from the parting face. Measure it on the section view, not on the runner sketch.
- Draft of 1 to 3 degrees and a 0.5 mm bottom radius. A square corner tears the slug and leaves a plug behind.
- Gate standoff of 1 to 2 runner diameters. A ratio under 1.0 flags the tool on review.
- Cold volume inside the well. Compare the trapped volume in the table above against 1 to 2 percent of shot weight.
- Hardened insert at HRC 48 to 52. The well bore needs the same hardness as the runner insert or it wears oval.
- Cooling within 15 to 25 mm of the well floor. A hot well keeps the slug soft, and a soft slug smears instead of releasing.
- Vent path from the well. A blind pocket with no vent holds 0.5 to 1 bar of gas and pushes the slug back into the runner.
Sign the checklist against the drawing revision. A trap added after the first trial costs a re-cut of the runner plate and 3 to 7 days of machine time, which is the same lead time as a new standard component.
Maintenance and Inspection Numbers
The trap works until it stops working, and it stops quietly. A slug that sticks and tears leaves a plug bonded in the well, and that plug changes the next shot weight by 1 to 3 percent without any change to the machine settings. The part still fills, so the press keeps running while the weight drifts out of tolerance.
Check well cleanliness at every shift change on a cosmetic line. Ten seconds with a brass scraper and a lint-free cloth removes a partly bonded plug before it becomes a permanent one. On a non-cosmetic part, inspect the well every 10,000 shots.
Measure the pocket on a fixed interval. A depth gauge at the 6 mm minimum confirms the well has not filled with degraded resin, and a bore gauge at the diameter checks for oval wear. A bore that has grown 0.05 mm over the drawing size will not hold the slug, and the insert comes out for replacement at that point.
Track shot weight every 500 shots. A drift above 0.5 percent on the same process sheet points to a trapped slug, a partly blocked gate or a worn non-return valve. Check the well first, because it is the cheapest of the three to fix and the most likely to have changed.
Service the surrounding hardware on the same schedule. Replace a pull-pin spring at 200,000 cycles, re-polish the runner bore to Ra 0.4 to 0.8 µm when the surface dulls, and replace the sprue bushing when the orifice wears 0.1 mm over size, because a worn orifice lets the cold plug extrude forward into the runner. Standard sprue bushings, gate inserts and hardened well inserts ship in 3 to 7 days, so the component set belongs in the spare parts inventory from day one.
Record every number in the tool file: well diameter, depth, standoff, insert hardness and the shot count at each inspection. When a flow line returns at 300,000 shots, the history shows whether the well grew 0.05 mm, the sprue orifice wore, or the resin lot changed. That record turns a recurring defect into a scheduled repair.
Verify the result with a short trial. Run 30 to 50 shots, weigh every one, and inspect the first part of each cycle for a flow line or a silver streak. A tool that holds weight within 0.5 percent and passes first-part inspection across 50 shots has a working trap. Anything looser is a well that needs recutting before the next production order.
The Bottom Line
Size the well at 1.5 to 2 times the runner diameter, at least 6 mm deep, with a 1 to 3 mm standoff, a 1 to 3 degree draft and a 0.5 mm bottom radius. That pocket holds the 2 to 4 g of cold resin a 200 g shot delivers, which is 1 to 2 percent of the shot and the source of most flow lines, silver streaks and short shots on a thin-wall part.
Set the gate entrance 1 to 2 runner diameters from the part wall, and choose the feed system from the decision table: a well on a cold runner tool, a pull pin where no witness is allowed, an insulated sprue on a single-cavity thick wall, and a hot runner above roughly 200,000 shots a year. Inspect the well every shift change on a cosmetic line and every 10,000 shots otherwise, and the trap keeps working.
DieStrike builds precision injection molds to IATF 16949 with ±0.005 mm mold accuracy, ±0.002 mm on EDM and jig-ground features, HRC 62 maximum heat treatment, 120+ machines and tier-1 references including TE, Amphenol, Luxshare and Dongshan. Tool lead times run 2 to 5 weeks and standard components ship in 3 to 7 days. Send the part data and the runner layout and we will return a well and gate sizing check before the drawing set is cut.
KEEP READING
Related Reading
How to Prevent Burn Marks in Injection Molding
Vent depth, gas trapping and the cold slug path that scorches a last-fill corner at 200 °C.
Read articleArticleHow to Reduce Weld Lines
Melt temperature, gate position and venting that hold weld line strength above 80 percent of the base resin.
Read articleProductSprue Bushings and Gates
Hardened sprue bushings, gate inserts and cold slug wells machined to ±0.005 mm, with standard component lead times of 3 to 7 days.
Read articleServiceInjection Mold Manufacturing
IATF 16949 tool building with runner, gate and cold slug well design, DFM feedback in 24 hours and 2 to 5 week lead times.
Read articleNEXT STEP
Ready to Start Your Mold?
Send us your element dimensions or part numbers — our team responds within 24 hours with pricing and lead time.

Written by
Ray ChanMold Buyer's Guide Author · Precision Mold Manufacturing Specialist. Ray helps global importers, distributors and OEMs source factory-direct molds and mold parts.