
How to Design Molds for Flame-Retardant Plastics
Table of Contents
A 16 cavity PC/ABS housing tool running a brominated flame-retardant grade came back from its first 90 day service with etched cavity walls. Hydrogen bromide had pitted the P20 surface to a 0.03 mm depth across three cavities. The gloss band on the molded part had moved outside the 2 unit customer limit. That tool had produced 140,000 shots, so the corrosion cost a re-cut insert set and 12 days of lost production. The same additive package pushes outgassing 2 to 5 times above a standard grade.
This guide covers the FR family across ABS, PC/ABS, PA, PBT and PPS. It runs through chemistry and its corrosion bill, steel and barriers, vents, gates, plate-out, the process window and run separation.
The Snapshot
- Corrosion inside 50,000 to 200,000 shots. A brominated package releases hydrogen bromide from 230 to 280 °C, and a stalled screw pushes past 300 °C where the acid pits bare P20.
- 420F or 1.2316 at HRC 48 to 52. Stainless cavity steel, or P20 with a 25 to 50 micrometre chrome or electroless nickel barrier, is the surviving surface on FR work.
- Vents 0.02 to 0.03 mm deep on a 0.5 to 1 mm land. Outgassing runs 2 to 5 times a standard resin, so the land runs around the full perimeter with a 0.1 to 0.2 mm gas channel behind it.
- Plate-out cleaning every 2,000 to 5,000 shots. A cavity polished to Ra 0.05 to 0.2 micrometre wipes clean in minutes, while a rough one bakes the film on and lifts gloss.
FR Chemistry and Its Tool Bill
A flame retardant earns its UL 94 rating by interrupting the combustion chain. The chemistry that does that work decides what the cavity steel has to survive. The additive family splits into three groups, and each one bills the tool differently.
Brominated systems dominate ABS, PC/ABS, PBT and PA. A brominated compound releases hydrogen bromide between 230 and 280 °C in the melt. A stalled screw raises the local temperature past 300 °C, where that release accelerates. Hydrogen bromide plus trace moisture forms hydrobromic acid, and the acid attacks bare P20 until the surface pits.
The antimony trioxide synergist raises the activity further. In the presence of bromine it forms antimony halides that carry the halogen straight to the steel face. A compound running 15 to 25 percent brominated FR with 5 to 8 percent antimony trioxide is the most aggressive package in a mold shop.
Halogen-free systems trade one cost for another. Phosphorus compounds such as DOPO release phosphoric species that etch steel more slowly than hydrobromic acid. They still attack an unprotected cavity. Metal hydrates such as ATH and MDH work endothermically and release water vapour at a 40 to 65 percent load. That load makes the melt abrasive as well as gassy, so gates and vents wear while the cavity corrodes.
| FR family | Release and trigger | Typical load | Tool effect |
|---|---|---|---|
| Brominated plus antimony trioxide | Hydrogen bromide from 230 to 280 °C, faster above 300 °C | 15 to 25 percent FR, 5 to 8 percent synergist | Acid pitting of bare P20 inside 50,000 to 200,000 shots |
| Phosphorus, DOPO and phosphinate | Phosphoric species at melt temperature | 10 to 20 percent | Slower etch, still needs a barrier on polished faces |
| ATH, aluminium trihydroxide | Endothermic water vapour from 200 to 300 °C | 40 to 65 percent | High outgassing plus abrasion at gates and vents |
| MDH, magnesium dihydroxide | Water vapour from 300 to 340 °C | 40 to 60 percent | Vent load on FR PA and FR PPS at the top of the range |
← swipe to scroll →
Table note: loadings and release temperatures are typical published ranges for commercial FR compounds. Confirm the additive package and the release profile with the resin supplier before the steel grade is fixed.
One failure mode repeats across the family: the tool is quoted as a standard mold without a barrier, a vent schedule or a cleaning interval. The PVC mold design guide shows the same arithmetic for one corrosive resin. The flame-retardant family spreads it across five polymers at once. Thin-wall FR ABS and PC/ABS housings for consumer electronics sit at the top of the risk list. High-cavity cosmetic tools magnify every surface defect.
Steel Selection for Flame-Retardant Resins
Two questions pick the steel: how hot the melt runs, and how much halogen reaches the face. Any brominated package above a 250 °C melt needs stainless steel or a coated surface.
420F and 1.2316 stainless are the workhorses. Their 13 to 16 percent chromium content forms a passive oxide layer that slows acid attack. At HRC 48 to 52 they hold a polish and a 0.02 to 0.03 mm vent land for a 500,000 shot program. Both grades re-weld and re-cut after a gate land wears, which keeps a spare insert realistic.
Pre-hardened P20 at HRC 30 to 34 stays the economic choice for short runs, but only behind a barrier. Bare P20 in a brominated tool reaches visible pitting inside 50,000 to 200,000 shots. That pitting shows on the part as a 2 to 5 unit gloss shift and as drag marks near the gate.

High-temperature FR grades reorder the list. FR PPS runs a 300 to 340 °C melt, where halogen release is continuous and thermal fatigue compounds the corrosion. Use 1.2344 or 1.2343 at HRC 48 to 52 for the base plate, then coat every surface that meets melt. Heat treatment is capped at HRC 62, above which the steel loses the toughness a 16 cavity stack needs.
Dimensional work follows the standard of any precision tool. Cavity inserts are cut to ±0.005 mm, with EDM and jig-ground features held at ±0.002 mm. A 25 to 50 micrometre barrier on two mating shut-off faces closes the gap by 0.05 to 0.10 mm. Grind to the pre-plate number and let the coating restore the fit.
| Steel or surface | Hardness | Barrier | Where it belongs on FR work |
|---|---|---|---|
| 420F stainless | HRC 48 to 52 | None needed | Cavity inserts and cores in FR ABS, PC/ABS and PBT |
| 1.2316 stainless | HRC 48 to 52 | None needed | Cosmetic cavities, 16 percent chromium for a polished face |
| P20 pre-hardened | HRC 30 to 34 | Required, 25 to 50 micrometre | Short programs and prototype tools under 100,000 shots |
| 1.2344 and 1.2343 | HRC 48 to 52 | Recommended | FR PA, FR PPS and any 280 to 340 °C melt |
← swipe to scroll →
Table note: grades, hardness bands and barrier builds are typical industry values. Confirm against the steel certificate and the heat treatment report, and keep both in the tool file.
The steel selection guide for corrosive resins sets out the general logic, and the FR version adds melt temperature to the rule. Order steel, heat treatment and the barrier in one release, because an uncoated cavity corrodes while the next purchase order is written.
Coatings, Nitriding and Plating Barriers
Barriers come in three thickness classes, and each one has a job on an FR tool. Pick by the surface it has to protect and the geometry it has to reach, not by hardness alone.
Hard chrome at 25 to 50 micrometre is the standard defense. It resists halogen attack, it can be applied after heat treatment, and it can be stripped and re-plated. That turns corrosion damage into a recoating job instead of a re-cut insert. Chrome throws poorly into deep pockets, so plan the anode geometry with the plater. Expect a re-plate at 300,000 to 500,000 shots.
Electroless nickel at the same 25 to 50 micrometre build throws uniformly into ribs, slots and vent channels. The electroless nickel plating guide covers the bath choice and the masking rules. The nickel layer also survives the repeated wiping that plate-out control demands.
Nitriding builds a 0.05 to 0.10 mm diffusion case at 900 to 1100 HV and adds only 0.01 to 0.02 mm to the dimension. Use it for wear, not for corrosion: a nitrided case can spall at a gate land that sees shear. Once the case breaks, acid reaches the softer core underneath. Nitride a slide or a gate insert, then coat the working face.
DLC at 1 to 3 micrometre belongs on gates, vents, valve pins and ejector sleeves. Those are the features where the additive abrades while the halogen attacks, and a low-friction layer slows both. DLC also delays plate-out, which stretches the cleaning interval on a high-cavity tool. Record the build in micrometre in the tool file, because an unrecorded coating is an unverifiable repair.
Venting a High-Outgassing Melt
FR compounds outgas 2 to 5 times as much as a standard grade of the same polymer. The volume comes from moisture in the fillers and from the additive package breaking down at melt temperature.
The schedule that holds runs 0.02 to 0.03 mm deep on a land 0.5 to 1 mm wide. Cut it around the full perimeter of the cavity instead of at four points. Behind the land, a relief channel 0.1 to 0.2 mm deep carries the gas to atmosphere. Depth is a window: 0.02 mm suits thin-wall FR ABS, while 0.03 mm suits a mineral-loaded ATH compound that fills more slowly.

Trapped gas builds counter-pressure in the last-fill zone. At a 1 to 3 MPa local pressure with the melt at 250 °C, that gas diesels and blackens the wall. A vent that measures correctly when new can close inside 3,000 to 5,000 shots of plate-out. The burn marks then return before any process setting changes.
Clean vents every 2,000 to 5,000 shots and verify them with a 0.02 mm feeler, never by eye. The mold venting guide sets out the depth math for standard resins. FR work keeps that depth, then adds full-perimeter coverage and a shorter cleaning interval.
| Cavity zone | Vent depth | Land and relief | Failure if wrong |
|---|---|---|---|
| Perimeter of a cosmetic face | 0.02 mm | 0.5 to 1 mm land, 0.1 to 0.2 mm gas channel | Burn marks and a 0.02 mm fin if the land goes deeper |
| Last-fill corner on a thick rib | 0.03 mm | 1 mm land, then relief to the plate edge | Dieseling, black streaks and short shots from counter-pressure |
| Vent insert in hardened steel | 0.02 to 0.03 mm | Replaceable insert, 420 stainless block | Worn land opens past 0.05 mm and flashes within 100,000 shots |
← swipe to scroll →
Table note: vent depths are typical practice for FR ABS, PC/ABS, PA and PBT. Verify each vent with a feeler gauge after assembly and re-check the schedule at every plate-out clean.
Gate and Runner Rules for FR Compounds
An undersized gate on an FR compound burns the material twice. Shear heating degrades it, and the hot spot releases halogen. Hold the gate land at 0.8 to 1.2 mm on a 2 mm wall, and resist a smaller land for a cleaner vestige.
A 0.6 mm land on the same wall adds 15 to 30 °C of local shear heat. That is enough to degrade the FR package inside the gate and weaken the flame rating there. It also starts the pitting that the barrier coating exists to prevent.
Runner sizing follows the filler load. A 20 to 30 percent additive load raises melt viscosity, so cold runners run 4 to 8 mm full round depending on shot weight. Radius every turn at one channel diameter. Sharp corners and dead ends hold material through a shift and turn into acid generators.

Multi-cavity FR tools want valve gates, because a valve pin shuts each drop and keeps the manifold full. Size the manifold so the melt inside stays under 15 to 25 percent of shot weight. Hold tip temperature within ±5 °C of setpoint. Pins and tips take the same barrier logic as the cavity, in 420 stainless or DLC at 1 to 3 micrometre.
Balance decides whether 8 cavities mean 8 good parts. Hold part weight within ±3 percent across the tool and verify it with a 30 shot weight study at T1. An FR melt that sits longer in a starved cavity degrades unevenly and shows a colour shift between cavities.
Plate-Out Control and Surface Finish
Plate-out is the FR package leaving the melt and depositing on steel. Antimony trioxide and the brominated species are the usual film formers, and a mineral-filled compound adds a dust layer on the same surfaces.
The first symptom is gloss. A cosmetic housing loses 2 to 5 gloss units inside a shift, then a haze appears on the polished faces. Drag marks at the gates and vents follow, and by then the film has baked on.

Polish the cavity to Ra 0.05 to 0.2 micrometre. A smooth face releases the film to a wipe, while a rougher one holds it and bakes it in. Budget a cavity wipe every 2,000 to 5,000 shots, plus a polish and a coating check at every 50,000 shot service.
A 0.03 mm grain depth hides small flow marks and keeps plate-out inside the texture valleys. That holds the visible surface clean for longer. Avoid sharp-edged high-detail patterns on FR tools, because fine detail fills first and cannot be cleaned without losing the pattern.
Two shop habits cause most plate-out complaints. The first is leaving an EDM recast layer in place, which traps additive against the surface. Remove 0.02 to 0.05 mm of recast by polishing. The second is a spray release agent, which leaves a film that shifts gloss and can change how the part behaves in a flame test.
The Tool-Side Process Window
Set the melt at 230 to 270 °C for FR ABS, PC/ABS, PA and PBT, and hold residence time under 5 minutes. Every extra minute above 280 °C at the screw puts more halogen into the surface chemistry. That erodes a coating which should last 300,000 shots.
Dry the hygroscopic grades. FR PA and FR PBT need moisture below 0.05 percent and PC/ABS below 0.02 percent. A 4 hour dry at 100 to 120 °C covers both. Wet pellets plus a brominated additive generate more hydrobromic acid, and that is the chemistry that pits P20.
Mold temperature runs warmer than on a standard grade. Run 70 to 100 °C for FR ABS and PC/ABS, and 90 to 120 °C for FR PA and PBT. A warm mold keeps the melt moving and cuts the shear the gate has to add. It also holds surface gloss, which makes the first gloss loss from plate-out easy to see at inspection.
Cavity pressure runs 40 to 80 MPa on a brominated compound and 60 to 100 MPa on a mineral-loaded one. Size the clamp tonnage against that pressure, not against the tonnage used for the unfilled grade.
Inspect vents at every shift start on an FR tool and log the shot count at each clean. The interval shortens as the cavity steel wears and the coating thins.
Plan the stoppage rule before the first shot. If the press stops for more than 5 minutes, purge the barrel and drop the barrel temperature by 20 to 30 °C. FR melt resting against steel at 300 °C releases hydrogen bromide into the check ring and the hot runner.
Run Separation and Carryover
FR compounds carry over. A screw, check ring, hot runner manifold and sprue bushing hold enough material to contaminate the next job at the 1 to 5 percent level. That residue leaves specks on a light part and breaks traceability on a non-FR program.
Three rules keep the runs apart. First, dedicate a barrel and screw to FR work where volume allows. Otherwise purge with 2 to 5 kg of a glass-filled purge compound, then virgin natural resin until the purge runs clean. Second, strip and clean the cavity, the vents and the manifold, because residual FR sits in a 0.02 mm vent land. Third, keep FR regrind in its own labelled container and never blend it into a non-FR lot.
A non-FR part that receives FR carryover no longer matches the material named on its UL yellow card. The cosmetic risk is a dark speck on a light part. The compliance risk is a traceability gap that a customer audit finds months later.
Sequence the schedule so FR runs at the end of a campaign where the plant can control it. When that is not possible, run the purge and take 10 to 20 blank shots to a natural part. Inspect the parts at 3x before releasing the line.
What a Tool Spec Must State
An FR tool needs more written into the specification than a standard mold. Most of the cost sits in surfaces that a drawing does not always describe, so the release should state each of the following.
- Steel grade, hardness and chromium content for every cavity insert, core and gate insert.
- Barrier type and build in micrometre, with the pre-plate dimension the grinder has to hit.
- Vent schedule: depth, land width, spacing, gas channel size and the cleaning interval.
- Gate land size, plus the hot runner material, tip control range and manifold residence volume.
- Plate-out baseline: cavity finish in Ra, the first-shift gloss reading and the polish interval.
- Spare gate and vent inserts, because both are wear items on an FR tool and both fall inside the 3 to 7 day standard component window.
Add a corrosion allowance to the cavity dimensions. Cut new cavities toward the low side of the tolerance band, so 0.01 to 0.02 mm of surface change stays inside the part tolerance. On a cosmetic housing with a ±0.05 mm band, that allowance keeps the second year of production on the same drawing.
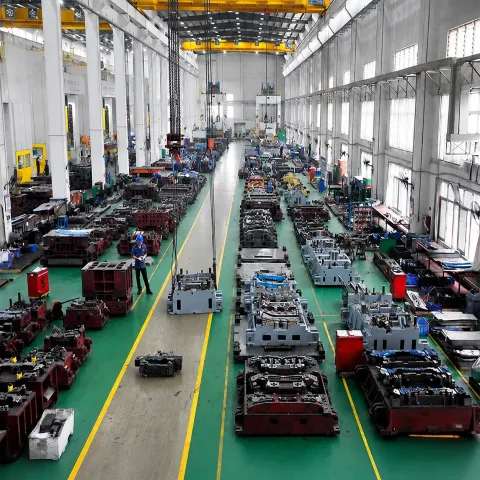
DieStrike builds flame-retardant and precision injection molds to IATF 16949 with ±0.005 mm mold accuracy and ±0.002 mm on EDM and jig-ground features. Cavity heat treatment runs to HRC 62 max across 120+ machines, with tooling shipped for tier-1 programs at TE, Amphenol, Luxshare and Dongshan. Injection mold lead times run 2 to 5 weeks. A DFM review can name the steel, the barrier and the vent schedule before the drawing set is cut.
Flame-Retardant Mold Design FAQ
Q1. Why does a flame-retardant compound pit mold steel?
Brominated systems release hydrogen bromide from 230 to 280 °C, and a stalled screw pushes past 300 °C where that release accelerates. Hydrogen bromide plus moisture forms hydrobromic acid, which attacks bare P20 inside 50,000 to 200,000 shots. Stainless cavity steel or a 25 to 50 micrometre chrome or nickel barrier is the answer.
Q2. How deep should the vents be on an FR tool?
0.02 to 0.03 mm on a land 0.5 to 1 mm wide, cut around the full perimeter. Behind it sits a 0.1 to 0.2 mm gas channel. FR compounds outgas 2 to 5 times a standard resin, so a four-point pattern leaves the last-fill corners to diesel and burn.
Q3. Which coating works best on a brominated FR mold?
Hard chrome at 25 to 50 micrometre for general cavity work and electroless nickel at the same build for deep ribs. DLC at 1 to 3 micrometre suits gates and ejector sleeves where the additive abrades. Plan a re-plate at 300,000 to 500,000 shots.
Q4. How often should an FR cavity be cleaned?
Wipe the cavity every 2,000 to 5,000 shots and polish it at every 50,000 shot service. Finish the steel at Ra 0.05 to 0.2 micrometre so the plate-out wipes off instead of baking on. Clean the vents in the same pass.
Q5. Can an FR mold run a non-FR job?
Only with a dedicated barrel, or a full purge and a stripped cavity. Residual FR carries over at the 1 to 5 percent level, which leaves specks on light parts. It also breaks material traceability on a non-FR program. Keep FR regrind separate and label the hopper.
The Bottom Line
Flame-retardant tooling is a surface problem before it is a geometry problem. First, cavity steel that resists halogen attack: 420F or 1.2316 at HRC 48 to 52, or P20 with a 25 to 50 micrometre barrier. Second, vents 0.02 to 0.03 mm deep around the full perimeter of the cavity. Third, gate lands of 0.8 to 1.2 mm on a 2 mm wall. Fourth, a plate-out clean every 2,000 to 5,000 shots.
Melt temperature of 230 to 270 °C with residence under 5 minutes keeps the additive from breaking down against the steel. Wet PA or PBT at 0.05 percent moisture turns that same heat into hydrobromic acid and starts the pitting. Run separation protects the next job, because residual FR carries over at 1 to 5 percent. Hold all of it and an FR tool reaches 500,000 shots on a single coating. Miss it and the cavity pits inside the first 50,000.
KEEP READING
Related Reading
Electroless Nickel Plating for Mold Surfaces
Uniform 25 to 50 micrometre barriers that stop halogen attack on deep ribs and vent lands.
Read articleArticleMold Venting: Depth, Location and Design Rules
Vent depth, land length and last-fill placement for a melt that outgasses 2 to 5 times normal.
Read articleArticleHow to Design Molds for Glass-Filled Resins: Wear, Gates and Steel
Abrasion rules for mineral and glass loads, which stack on top of a flame-retardant package.
Read articleServiceInjection Mold Manufacturing
IATF 16949 mold building with corrosion-resistant cavity steels and 2 to 5 week lead times.
Read articleNEXT STEP
Ready to Start Your Mold?
Send us your element dimensions or part numbers — our team responds within 24 hours with pricing and lead time.

Written by
Ray ChanMold Buyer's Guide Author · Precision Mold Manufacturing Specialist. Ray helps global importers, distributors and OEMs source factory-direct molds and mold parts.