
How to Drill Cooling Circuits in a Mold Base: Layout, Plugs, Test
Table of Contents
A four-cavity polypropylene container tool came off trial running 22 percent over its cycle-time target while every part dimension read green. The circuit drawing was clean and the lines measured straight, but the failure sat 18 mm from a cross-drilled junction: an internal burr had closed the channel to a quarter of its diameter. Shipping slipped three weeks while the junctions were re-drilled, re-tapped and held at 20 bar for 20 minutes with a witness. This guide covers that shop-floor act: drilling, tapping, plugging and pressure-testing a conventional circuit so the steel delivers what the design asked for.
Layout sits first, then the drill sequence through gun-drilled holes and cross-drilled junctions, then tapping and plug seating, then the pressure test and the water chemistry that keeps the circuit open.
The Snapshot
- 3 to 5 wall thicknesses from the cavity. Gun-drilled lines at 6 to 25 mm diameter belong 3 to 5 part wall thicknesses from cavity surfaces, and deep rib bottoms sit inside the one wall thickness exception.
- Plug seats 0.5 to 1 mm below the surface. Countersink every tapped mouth so the plug head finishes below the datum or the cover plate, never proud.
- Hold 2 to 3 times working pressure for 10 to 30 minutes. A calibrated gauge plus a soap-bath walkdown before assembly, and again after any mold repair.
- Flow velocity 1.5 to 2.5 m per second. That band keeps minerals suspended and the boundary layer turbulent, and it is the cheapest scale prevention a molder ever gets.
Why Drilled Circuits Still Decide Cycle Time
Conformal cooling earns its headlines on cores with deep, curved geometry. The honest split in most factories is one cavity in ten with printed cooling while nine out of ten mold bases run straight gun-drilled lines, cross-drilled junctions and square-head plugs.
The physics reward drilled steel. Polymer puts 60 to 90 percent of its heat into the mold at ejection, and roughly half of a typical injection cycle is cooling time. A line drilled 3 wall thicknesses from the cavity face and run at 1.5 to 2.5 m per second pulls that heat predictably. At 8 wall thicknesses the same steel conducts far slower, and no temperature controller compensates, because the bottleneck is the block.

The cost case is just as stubborn. A 250 by 250 mm base section takes 40 to 90 minutes of gun-drilling for six or eight straight circuits, an hour of tapping, and plugs off a component shelf in 3 to 7 days. Layout strategy belongs to the cooling channel design tips; what follows is the fabrication discipline that turns those drawings into a mold that holds water.
Layout Rules Before the First Hole
Every number below gets checked against slide travel, ejector bore positions and the heat-treatment drawing before the first hole, because a mold base is a fight for the same steel.
Distance from the cavity. Run lines at 3 to 5 wall thicknesses from the nearest cavity surface on a nominal part wall of 1.5 to 4 mm. Closer than 3 wall thicknesses and the line prints temperature stripes onto the part face; farther than 5 and hot spots under ribs vanish only after 15 to 25 more seconds of cycle time. Rib bottoms are the exception that breaks lazy layouts: keep one wall thickness between the rib root and the nearest line, because a rib is a local mass of polymer that cools on the square of its thickness.
Pitch and coverage. Keep adjacent circuits 4 to 5 channel diameters apart, so an 8 mm line gets a 32 to 40 mm pitch. The temperature valley midway between two lines should stay within 5 to 8 degrees of the line itself; wider pitch leaves hot valleys between circuits and shows up as warp on flat parts.
Clearance to everything else. Keep 25 mm minimum between any water line and a slide bore, dovetail, ejector bore or shut-off. Below that distance the pilot for the next operation breaks into a water jack, and the leak is found when the assembled mold sweats at 6 bar. Add it up on a 150 mm cavity block: a 25 mm cover band, a line at 3 wall thicknesses under a 2 mm part wall and 30 mm of ejector clearance consume 75 mm with no margin left. Draw the layout at 1:1 on the thinnest section in the tool and the impossible cases fail on paper instead of on the press.
At DieStrike the layout carries the same tolerances as the rest of the tool: ±0.005 mm on machined mold geometry and ±0.002 mm on jig-ground and EDM work. A line that shifts 0.1 mm off layout in a thin section can end up 1.5 mm from a slide bore instead of 25 mm, and no plug or sealant fixes a wall that thin.
Drill Sequence: Gun Drilling and Cross-Drilling
The standard route for a straight circuit is center drill, pilot, gun drill, then a facing pass where the outlet needs a true surface. Gun drilling runs through-holes from 6 to 25 mm diameter, and at 10 to 20 times depth-to-diameter it holds straightness near 1 mm per 1.5 m of run because the bore rides its own bushing the whole way. A hand-fed twist drill past 4 diameters wanders by multiples of that, and a wandering 15 mm line is a scrapped plate, not a repair.
Straight lines cannot reach everything, so the circuit grid intersects, and every intersection is a fabrication choice. The shop order never varies: drill the line that stays whole first, then cross-drill the one that ends inside it. Two bores that almost intersect, 2 mm apart, leave a web of steel between them; pressure and temperature eventually work that web, and the mold leaks between the lines.
Bring the second circuit in perpendicular from the parting-line side so its outlet mouth opens inside the first bore where the water sweeps the junction. Keep cross bores on centerline within 0.5 mm; an off-center junction leaves a step on the bore wall that catches burr and scale. Where a junction changes elevation between plates, drill the riser after the parting faces are ground, because the ground face is the datum that positions a cross-drilled mouth.

Deburring is the step everyone wants to skip and no shop can afford. Countersink every bore mouth and chase every intersection with a flexible deburring tool until a cloth passes clean. Then cut the plug seat: countersink each tapped mouth so the plug head finishes 0.5 to 1 mm below the surface of the plate or cover. A proud square-head plug will not let a manifold gasket seat, and under an operating mold at 80 to 120 degrees C the proud head tilts the manifold block into a slow external leak.
Where a blind end runs too deep to clean properly, or the layout leaves a dead leg, a baffle or bubbler tube carries flow to the end of the bore. The hardware and sizing rules are in the baffles and bubblers guide.
Tapping Standards: NPT versus BSPP
Two thread families carry almost every mold water fitting. NPT is the American taper pipe thread: the seal forms as the male cone wedges into the female cone, so engagement depth is the seal. BSPP is the British straight parallel thread with a washer face: the threads carry clamp load and the washer seals. A straight thread creeps if the shoulder never seats, and a taper thread dry-torqued into a thin cover plate splits it. Which one the drawing calls for is the difference between a leak and a crack.
Tap drills follow the standard charts and nothing else: 1/8 inch BSPP at 8.8 mm pilot, 1/4 inch at 11.44 mm, 3/8 inch at 14.95 mm and 1/2 inch at 19.02 mm. For NPT the taper tap wants the same pilot but depth matters more: bore at least one full thread beyond the deepest plug engagement, because the first taper threads cut almost nothing and a shallow bore lets the plug bottom.
Engagement is where shops over-cut and under-think. Run tap depth to at least 1.5 times the nominal thread diameter in steel, so a 1/2 inch BSPP plug wants roughly 19 mm of clean thread. Chamfer the mouth so the lead-in never shaves the first thread. Tapping fluid is not optional: a dry tap in pre-hardened P20 at 30 to 34 HRC tears the top threads. After tapping, chase every hole with a bottoming tap carried to full depth, then blow and wipe until a clean cloth shows no curl. A chip left in a tapped mouth is a leak path with a timer on it.
Plug Families, Seating and Torque
Catalog plugs for mold bases come in three working families. Square-head pipe plugs are the shop default: cheap, grippable in any recess, and easy to witness-mark after testing. Hex caps do the same job where a socket reaches. Beryllium-copper thermal plugs are the upgrade: the copper-alloy core conducts 100 to 200 times more heat than the surrounding steel, so a plug that would insulate the dead end of a blind bore becomes a short fin carrying heat out of the block. They belong in the last 20 to 40 mm of a long dead leg and at near-cavity blind ends.
Sealing chemistry is a temperature problem, not a thread problem. Ordinary PTFE tape extrudes under heat cycling, and generic pipe dope softens and washes away at 120 degrees C on a hot-runner-side line. Choose a medium-strength anaerobic threadlocker or a high-temperature PTFE sealant rated past 150 degrees C, and coat the flanks, never the lead threads, so no sealant blocks a baffle. On BSPP with a copper or aluminum crush washer, the washer is the seal and the sealant only guards against rotation.
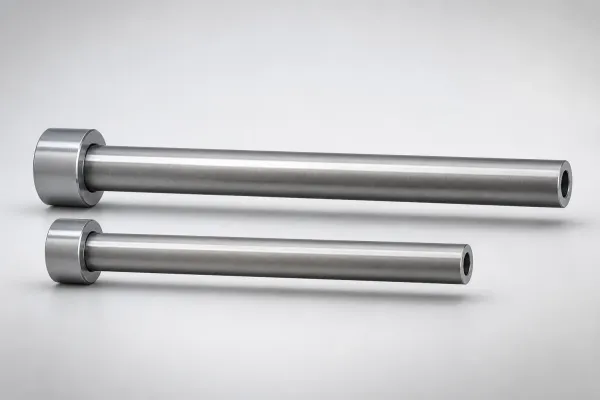
| Plug size | Tap drill | Thread engagement | Seating rule |
|---|---|---|---|
| 1/8 inch BSPP | 8.8 mm | 10 mm minimum | Crush washer, head 0.5 to 1 mm below face |
| 1/4 inch BSPP | 11.44 mm | 12 mm minimum | Washer face flat, no tape on the shoulder |
| 3/8 inch BSPP | 14.95 mm | 14 mm minimum | Countersink before the blind bore ends |
| 1/2 inch BSPP | 19.02 mm | 19 mm minimum | High-flow mains, verify torque after heat |
| 1/4 inch NPT | 11.5 mm | 1.5 x diameter | Seal on thread wedge, 2 to 3 turns past snug |
| 1/2 inch NPT | 19.0 mm | 19 mm minimum | Never in a cover plate under 12 mm thick |
← swipe to scroll →
Table note: tap drills follow standard BSP and NPT charts; engagement and seating are shop practice for pre-hardened mold plates at 28 to 34 HRC. Confirm against the fitting supplier's data before a drawing is released.
Torque is a starting point, not a promise. A 1/4 inch square-head plug in a sound 12 mm-deep thread wants roughly 15 to 25 newton metres; a 1/2 inch plug takes 30 to 45. At the high end the steel fails, not the plug: a thin or hardened cover plate cracks around a torqued taper thread, and the crack walks into the circuit within days of pressure cycling. At the low end a loosely seated plug backs out as the mold swings from 20 to 120 degrees C thousands of times. Re-check plug torque cold after the first production week and mark every head with witness paint. The full fitting families and selection logic live in the pipe plug selection guide.
The Leak Risk Hierarchy
Cooling leaks are not random, and the same three locations carry most of them in order. First: cross-drilled junctions. Every intersection concentrates burr and misalignment; a junction 0.5 mm off centerline can leave a 2 mm land between a water line and a slide bore, and that land cracks. Second: plug threads. Seating-face chips, reused sealant, a stripped first thread or an under-engaged taper all leak at the mouth, the easiest place to fix. Third: cracked lands from drilling too close. A 6 mm wall between a water line and an ejector bore passes the bench test and fails at the press, when clamp pressure and thermal cycling load the same thin section every shot.
Triage runs cheap first: re-seat the plug clean at full torque, and only then chase the junction. A soap-bath walkdown at working pressure finds almost every leak, and a borescope confirms what the soap suggests. If the leak is a cracked land, no sealant saves it: the circuit is plugged out of service, rerouted with a new line at legal clearance, or the plate is repaired by a welder who then re-cuts the affected faces.
Pressure Test Protocol
A drilled and plugged circuit is not finished until it has been proven tight under pressure, and there is no excuse to skip it. Fill the circuit with water at ambient temperature and bleed every high point, because trapped air compresses and masks a slow leak as a stable gauge. Pressurize to 2 to 3 times the working pressure of the temperature controller loop. Typical molded-in water pressure is 3 to 6 bar, so the common shop number is a hold at 12 to 20 bar, capped by the plate thickness and fitting rating.
Hold for 10 to 30 minutes with a calibrated gauge in the circuit and a witness who records the reading. The drop limit is zero visible movement once thermal soak is accounted for: a 0.5 bar drift that stops in the first three minutes is usually cold water warming to room temperature, and a drift that keeps falling is a leak, not physics. For production and medical tools, finish with a soap-bath or electronic leak-detector walkdown of every junction, plug and hose port at full test pressure. Then the rule that keeps the record honest: re-test after any mold repair, any weld, any plug replacement or any new drilled feature, because a circuit is only proven tight until the last thing anyone does to it.
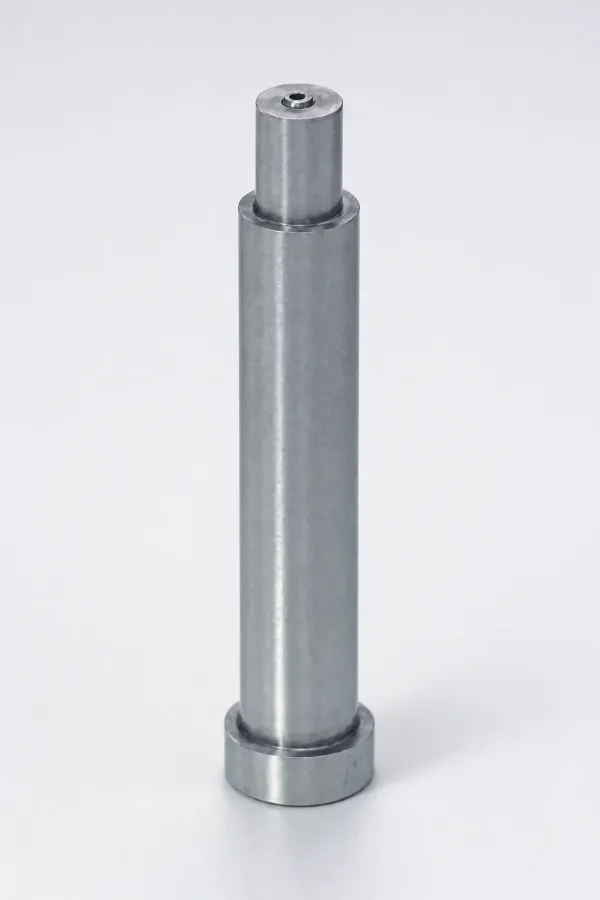
At DieStrike, pressure-test records ship with the tool under the same IATF 16949 paperwork that covers the dimensional reports, with the circuit map, test pressure and hold time signed off before the mold leaves the dock. DFM review flags risky layouts, such as lines closer than three wall thicknesses to a slide bore, before the plate is cut.
Scale Prevention from the Water Side
A tight circuit that flows half its design rate after eighteen months was drilled correctly and operated badly. Scale is the mechanism: tap water carries 100 to 300 mg per litre of dissolved calcium and magnesium, and a hot cavity face at 80 to 120 degrees C bakes that load onto the bore wall as a hard crust. A 1 mm scale layer in an 8 mm line removes a quarter of the flow area and adds a conductive blanket worth 5 to 15 seconds of cycle time.
Keep the velocity in the band that scours itself. Turbulent flow at 1.5 to 2.5 m per second keeps mineral particles suspended and sweeps them out instead of letting them settle in slow corners; below 1 m per second the bore becomes a settling tank, and above 3 m per second erosion and pressure drop climb for no cooling gain. Size circuits for that band and hold the line: no series-chained circuits that rob the far loops of velocity, and no dead-leg branches longer than 3 pipe diameters, because a leg that long stalls, scales and eventually blocks. Closed-loop systems with inhibitors dosed at the maker's concentration beat open towers on hard-water sites, and a hardness reading above 200 ppm triggers water treatment instead of more frequent scrubbing.

Fouled circuits get restored, not tolerated, with descaling intervals and flow-loss thresholds set by a maintenance program, and the hardware side, controllers, couplers and vortex lines, sits under the mold heating and cooling program and ships with the same circuit documentation the mold carries.
Blow-Out, Purge and Storage
Water left in a circuit cools nothing, heats nothing, and corrodes steel steadily. A mold stored wet develops rust bloom inside the bores within two to four weeks, and that rust becomes the next generation of scale the first week back on the press. The shutdown routine takes ten minutes per tool.
Disconnect both circuits and blow compressed air through the supply leg until the return runs dry for five clear seconds, then blow the opposite direction so low points drain. Keep the air under 6 bar so a loose plug or hose never becomes a projectile. Follow the blow-out with a rust inhibitor: a fogged short-term protectant through each circuit, or an inhibitor-dosed water charge for storage beyond a quarter, sealed with clean caps at both ports. Tag the ports, record the date and method with the storage location, and the mold in rack position seven becomes a wipe-down instead of a descaling weekend.
The QC Record Sheet
A circuit map is the mold's plumbing deed, and a tool without one becomes a teardown at the first leak. Every mold should ship with a one-page record a press technician can read in ninety seconds.
- Circuit map. Each loop numbered on the plate outline: supply port, return port, bore diameter and the cavities it feeds, with cross-junction and dead-leg positions marked.
- Test record. Test pressure, hold time, gauge calibration date, ambient temperature, result and the witness signature, one line per loop. Loops re-tested after a weld repair carry a second dated line.
- Water requirements. Design flow in litres per minute per loop, the 1.5 to 2.5 m per second velocity band, recommended inhibitor dose and the hardness ceiling that triggers treatment.
- Service notes. Plug torque values, sealant type, purge method used at shutdown, and the next scale-inspection interval measured by flow meter rather than by memory.
Store the sheet with the tool file and the dimensional reports; under IATF 16949 that paperwork travels with the tool for its life, and a transferred mold with readable circuit history keeps its schedule. The same map tells a repair shop which loop to isolate before a weld. For programs that need the full documentation stack, from DFM through pressure test to trial, the injection mold manufacturing service page lists what ships with each tool.
Cooling Circuit Drilling FAQ
Q1. How close to the cavity can a cooling line be drilled?
Three to five wall thicknesses is the working band for steady-state cooling, with one wall thickness as the emergency minimum at rib bottoms. Closer than 3 wall thicknesses prints temperature stripes and risks a breakthrough on a thin cover.
Q2. Gun drill or twist drill for water lines?
Gun drill from 6 to 25 mm diameter whenever depth exceeds 4 to 5 diameters. Straightness holds near 1 mm per 1.5 m because the bore rides its own bushing; a twist drill past that depth wanders, and a wandering line under a slide bore is a scrapped plate.
Q3. What pressure should a cooling circuit be tested at?
Two to three times working pressure, held 10 to 30 minutes on a calibrated gauge, which puts most mold circuits at 12 to 20 bar for a 3 to 6 bar loop. Re-test after every repair, weld or new drilled feature.
Q4. Should plugs be sealed with tape or sealant?
Neither, where a crush washer does the job on BSPP. On tapered NPT use a high-temperature sealant rated past 150 degrees C on the thread flanks, kept off the first two lead threads and out of the circuit, because PTFE tape extrudes under thermal cycling and washes downstream.
Q5. How fast should water run through a mold circuit?
1.5 to 2.5 m per second keeps the flow turbulent and self-scouring. Below 1 m per second minerals settle and scale builds; above 3 m per second pressure loss and erosion rise without a cooling benefit.
The Bottom Line
A drilled cooling circuit succeeds on five shop numbers: 3 to 5 wall thicknesses from the cavity face, 25 mm clear of every slide and ejector bore, plug seats countersunk 0.5 to 1 mm below the surface, tap engagement at 1.5 times the thread diameter, and a pressure hold at 2 to 3 times working pressure for 10 to 30 minutes with a witness who signs the sheet. The water chemistry then defends what the drill made: velocity in the 1.5 to 2.5 m per second band, no dead legs past 3 diameters, and a dry blow-out before the tool sleeps.
DieStrike drills, taps, plugs and pressure-tests every circuit under IATF 16949 on 120+ machines, holding ±0.005 mm on mold geometry and ±0.002 mm on EDM and jig-ground work, with heat treatment to HRC 62 where the steel calls for it. Standard components ship in 3 to 7 days and tool lead times run 2 to 5 weeks, with the circuit map and signed test record leaving the dock with the mold.
KEEP READING
Related Reading
How to Clean Mold Cooling Channels
Descaling intervals, flow-loss thresholds and the cleaning sequence that restores a fouled circuit.
Read articleArticleHow to Design Conformal Cooling Channels
When printed cores beat drilled lines, and what the drilled work still has to carry.
Read articleProductMold Bases
Precision mold plates drilled, tapped and pressure tested to the circuit drawing.
View productServiceInjection Mold Manufacturing
IATF 16949 mold building with 2 to 5 week lead times and signed pressure test records.
Read articleNEXT STEP
Ready to Start Your Mold?
Send us your element dimensions or part numbers — our team responds within 24 hours with pricing and lead time.

Written by
Ray ChanMold Buyer's Guide Author · Precision Mold Manufacturing Specialist. Ray helps global importers, distributors and OEMs source factory-direct molds and mold parts.