
How to Preheat and Start Up a Die Casting Die
Table of Contents
A die sitting at 20 °C meets aluminium at 680 to 720 °C on the first pour. The cavity face jumps 300 to 500 °C inside one shot. That transient gradient pulls micro-cracks into the hardened surface and seeds heat checking thousands of shots before the steel certificate says it should start. Cold steel also welds to aluminium: soldering begins on surfaces below 150 °C, and one unpreheated start on a 2,000 mm production die can be worth 20,000 USD of early refurbishment. This guide is the shift-level procedure between a cold die on a cart and the first signed-off good shot.
The sequence below covers preheat method selection, soak and measurement rules, spray mapping, warm-up shots, first-shot gating and restart rules after parking, sized for structural aluminium dies on cold chamber machines.
The Snapshot
- Ramp at 40 to 80 °C per hour. Exceed that on the steel core and the gradient between surface and centre does the cracking for you. A die oven at 40 to 70 °C per hour is the safest floor.
- 150 to 180 °C at the insert core, not the surface. Measure with an embedded thermocouple or IR at five points across the parting line. A 20 °C spread means cold water circuits are still open.
- 30 to 60 warm-up shots at 2 to 3 times steady spray. Heavy release-forward spray on the core, thin on the cavity, until the cavity map holds 180 to 250 °C within a ±20 °C band.
- Sign off before speed. Cast 5 to 10 shots, X-ray or section two of them, and raise production speed only after the thermal map stays stable across 50 consecutive shots.
What a Cold Die Start Does to the Steel
Die steel conducts 25 to 45 W/m·K. When 680 to 720 °C aluminium hits a 20 °C cavity face, the surface layer expands in seconds while the core of the insert stays cold. The surface sees transient tensile stress on every one of those first shots, and a hardened H13 surface at HRC 46 to 52 does not absorb that cycling for free.
Micro-cracks are the first bill. They open at grind marks, EDM recast layers and sharp radii, and molten aluminium drives into them at 600 to 900 bar of fill pressure. Once aluminium is inside a crack, each subsequent shot wedges it wider. A heat-check network that should appear at 40,000 to 60,000 shots on a properly preheated die can show up inside 5,000 shots after one cold start.

Soldering is the second bill, and it is a temperature problem before it is a chemistry problem. A clean die surface above roughly 150 °C grows a thin oxide layer that aluminium does not wet easily. Below 150 °C, especially with fresh dross from an unskimed sleeve carrying bare aluminium to the cavity, the metal welds to the steel. Operators then chase it with a scraper, and every scrape removes the protective oxide and takes steel with it.
The third bill is dimensional. A cold die pulls heat out of the casting too fast on the first shots: fill lands short, the biscuit freezes before intensification closes, and wall sections that should read 2.5 mm freeze at 2.2 mm with a distorted skin. Those parts look like process problems. They are temperature problems in a process costume.
A die that received even heat from the design stage preheats faster and more evenly, a circuit-layout question covered in die casting die cooling design.
Preheat Methods Compared: Oven, Cartridge, Torch and Induction
Four methods move a die from 20 °C to working temperature, and they differ by ramp rate, uniformity and how much they cost per start.
A die oven is the slowest and safest answer. Forced-air or gas ovens ramp whole die halves at 40 to 70 °C per hour to 150 to 180 °C uniform, and the soak happens by default because the heat arrives from all faces at once. Use it after a repair, after a weld regrind, or whenever a die has been parked cold for days. The cost is time: a large structural die half can need 6 to 10 hours in the oven.
Cartridge heating is the usual production method. Zones of 2 to 6 kW cartridges run on thermocouple feedback, either installed in the die or clamped to its faces with heating pads. The rule that matters is the ramp: hold the steel core at 40 to 80 °C per hour. Cartridges can push more, and a shop chasing a start-up in half the time will get a hot surface on a cold core, which is the exact gradient that cracks inserts.

Torch preheat is a spot tool, not a startup method. An open flame puts several hundred degrees into a local surface in minutes while the core stays cold, and the surface overload is a direct invitation to heat checking. Reserve torches for drying a die after a water-line flush and for warming a localized cold corner for a few minutes, never for bringing a die to working temperature.
Induction preheat is the new-cell option. Coils bring a die face to 300 °C in minutes with tight control, and cycle times improve on cells with frequent tool changes. The capital cost per cell and a coil per die geometry keep it on high-mix, high-uptime lines rather than every machine.
Match the method to the state of the die. Cold after 48 hours parked: oven or padded cartridges at the slow end of the ramp. Warm within 30 to 60 minutes of a break: spray sequence only. Fresh from a weld repair: full oven soak, because the repaired zone is the one place the gradient will start.
Soak, Measurement and Proof That the Die Is Ready
The target is 150 to 180 °C at the core of the thickest insert, not on the surface. A surface probe can read 220 °C while the centre of a 200 mm steel block sits at 120 °C, and the first pour will find the difference. Preheat is finished when the core has arrived and the spread across the die has closed.
Embedded thermocouples are the honest instrument. Ports placed within 10 to 15 mm of the cavity face in three or four zones tell you what the steel is doing; a thermocouple clamped to an outer plate can lie by 30 to 50 °C on a thick die. Where no ports exist, use an IR pyrometer at five points across the parting line, on the core, the cavity and the slide faces, and record all five readings in the startup log.
Set the pyrometer emissivity correctly or the number is decoration. Bare machined steel emits at roughly 0.6 to 0.8; an oxidized or sooted surface emits near 0.95. Pointing an uncalibrated gun at shiny steel under-reads by 20 to 40 °C, which sends operators preheating a "cold" die that was already hot, or worse, declaring a cold die ready.
Soak time follows section thickness. Diffusion through H13 steel takes roughly 30 to 60 minutes per 100 mm of section after the surface reaches setpoint, so a gate block 180 mm thick needs a long hold, not a bigger heater. After setpoint, hold the die 30 to 60 minutes with the controllers at temperature and re-measure the five points; if the spread has closed inside 20 °C, the die is soaked.

A spread of 20 °C or more across the die usually means one thing: cold water circuits are still open. Every line plumbed to a controller or a machine valve is a heat sink pulling against the cartridges. Close or throttle the water during preheat, let the steel arrive at temperature, then re-open the circuits in stages after the first spray passes. Opening full flow water on a die face at 250 °C also pulls condensation onto the steel, and water in the vent channels goes straight into the next shot as gas.
The same logic applies in reverse to design. A die whose circuits were balanced at design time, with near-face cooling at the gate and last-fill zones, reaches a uniform map in a predictable time. A bolted-on circuit layout never gets there, and startup procedure cannot substitute for thermal design.
Setting the Spray Map During Startup
Once the die is soaked, the startup problem changes. You are no longer adding heat; you are arranging where heat stays and where it leaves, shot after shot, with the spray pattern. The gate, the last-fill zone and thick sections want cooling; the core and deep rib faces want release and insulation from quenching.
Start the pattern release-forward: heavy die-conditioner coverage on the core side where the casting shrinks onto steel, thin film on the cavity side where the part lets go easily. For the first 30 to 60 shots, run 2 to 3 times the steady-state spray volume and timer setting. The extra fluid buys the steel time to arrive at its working temperature instead of being quenched back down before the pour heat replaces it.
Then map, adjust, and map again. Every 10 to 20 shots, take the pyrometer or IR camera pass across the parting line, the gate area and the last-fill end, and adjust the spray timers, nozzle angles and cycle counts to push the map toward target. The target is a cavity surface of 180 to 250 °C working temperature held within a ±20 °C band across the die. The gate zone will sit at the hot end of the band and needs local extra cooling; the extremes matter more than the average, because a mean of 215 °C hiding a 150 °C corner is still a cold-start corner.
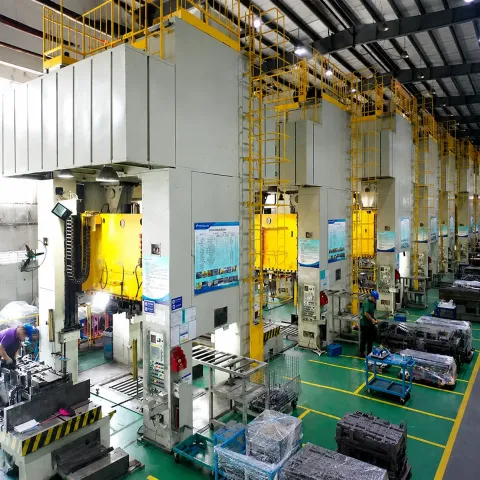
Two failure signatures bracket the spray tuning window. A die drifting cold, with the map falling 10 to 20 °C per ten shots and parts starting to short-fill at the last-fill end, means over-spray or water opened too early: cut spray volume 20 to 30 percent and re-map. A die climbing hot with parts sticking, dragging on the core, or picking up a grey soldered skin means under-spray on the core: add a conditioner pass before production volume returns. The full chemistry and application rules for the fluid itself, including dilution ratios and why silicon-free release matters on painted housings, are in die spray and release agent setup.
Re-map after every stoppage longer than 15 to 20 minutes as well. A die that sits with its spray off loses 30 to 60 °C to radiation and the pattern that held at the end of the run no longer matches the steel.
Running the Warm-Up Shots
The warm-up series does three jobs at once: it finishes the thermal conditioning the preheat started, it proves the spray map under live aluminium, and it gives dimensional samples that mean something. A shot fired into a half-warm die is not evidence about the die, the gates or the machine, so do not send warm-up castings to the CMM lab as first-off data.
Run the first 10 to 15 warm-up shots at reduced shot velocity and full intensification, biscuit and sleeve at their normal fill ratio, and watch three things per cycle: fill completeness at the last-fill end and overflows, ejecta behaviour on the core, and the surface temperature at the gate. Fill weight should move by less than 1 percent shot to shot once the die is thermally honest; a 2 to 3 percent drift across consecutive shots is still a temperature drift, not a metering fault.
Log dimensions on shot 1, shot 25 and shot 50 of the warm-up series. Aluminium solidifies against the steel it touches, and a die climbing from 140 °C to 210 °C changes the extraction rate and therefore the part size; a critical bore measured after 5 shots can be 0.1 to 0.3 mm away from where it will land once the map holds. Treat that drift as the die telling you the thermal map is not finished.
Where a cold chamber cell runs high fill velocity, the warm-up series is also the window to prove the shot curve before pushing production speed. Slow-to-fast transition faults read as porosity on a cold die and get "fixed" with machine settings that were never the problem, so get the map stable first and the process window second.
First-Shot Gating and Sign-Off
Production speed is a decision, not a default. Gate it: cast 5 to 10 shots into the conditioned die, pull them, and X-ray or section two of them before a single part ships. On a thermally stable die those two castings carry real information about gates, overflows and porosity; on a cold die they carry nothing except false alarms. Fill and surface quality sign off first, and only after the thermal map has held stable across 50 consecutive shots does the cell move to production shot velocity and machine-side intensification settings.
Read the two sectioned castings against the fill map, not against a mood. Porosity clustered in the last-fill end with a smooth shiny skin is entrained air, and on a fresh startup the usual source is a die still 30 to 50 °C low at that end, boiling spray residue into the flow front. Irregular jagged cavities at a thick boss are shrink and point at gate freeze, which a thermal startup does not fix but a spray pattern at the gate can move by several seconds. When the die runs a vacuum assist, the startup check adds one item: verify the seal lines and evacuation timing before crediting the porosity result to the shot curve, because a cold die gasket shrinks away from its seal until it warms.

Dimensional sign-off follows the same discipline. Send the shot-50 casting, not the shot-2 casting, to the CMM, and record it against the drawing datums. On structural housings where EV battery trays and drivetrain cases carry the tightest callouts, teams routinely see the first measured casting drift 0.1 to 0.3 mm from the stable production reading purely because the die was still climbing through its band.
The paperwork the startup should leave behind: the five-point preheat log with times, the spray timer and volume settings at the start and at sign-off, the thermal map at sign-off, and the X-ray or section report on the two gated castings. That record is what separates "this die runs at 205 °C" from "someone thinks this die runs hot," and it is the input the maintenance plan needs at the next teardown.
Die Casting Die Startup Checklist
Printed set values beat opinions at the machine. The table below is the startup card: every number from the sections above in the order the shift executes them.
| Stage | Set value | Verify with | Failure signal |
|---|---|---|---|
| Preheat ramp, oven | 40 to 70 °C per hour to 150 to 180 °C | Oven controller log | Surface races ahead of core |
| Preheat ramp, cartridges | 2 to 6 kW per zone, 40 to 80 °C per hour max | Embedded thermocouple | Zone controller hunting above setpoint |
| Water circuits during ramp | Closed or throttled to pilot flow | Valve position walk-down | Spread over 20 °C at target |
| Soak at setpoint | 30 to 60 min, 150 to 180 °C at insert core | IR at 5 points across parting line | Spread of 20 °C or more |
| Spray pattern, startup | Heavy on core, thin on cavity, 2 to 3x steady volume | Timer and nozzle audit | Map falling 10 to 20 °C per ten shots |
| Warm-up series | 30 to 60 shots before production settings | Pyrometer map every 10 to 20 shots | Fill weight drift over 2 percent |
| Working thermal band | Cavity 180 to 250 °C within a ±20 °C band | IR camera or pyrometer passes | Sticking, grey solder skin, drag marks |
| First-shot gate | 5 to 10 shots, X-ray or section 2 of them | Radiograph or sectioning report | Clustered bubbles or jagged shrink |
| Speed release | Only after map stable across 50 shots | Startup log, 50-shot window | Map drift after velocity change |
| Restart after park | Full ramp after 48 h parked; short spray ramp after a 30 to 60 min break | Park-time stamp in die card | Cold-start cracks within 5,000 shots |
← swipe to scroll →
Table note: values are typical for aluminium cold-chamber dies on H13 tooling. Confirm ramp rates against the die maker's thermal report and the alloy datasheet for your pour temperature before printing the card.
Shutdown, Parking and Restart Rules
A startup rule without a parking rule gets broken every holiday season. Two states matter. A die parked warm, meaning within 30 to 60 minutes of a break or a short jam clearance, does not need the preheat ramp again: the core is still inside working distance of temperature, and a shortened spray ramp, three to five heavy conditioner passes followed by re-mapping, returns it to band. Log the break time; if it passes 60 minutes, the die falls to the cold rule.
A die parked at shop temperature for 48 hours or more repeats the full preheat ramp at the slow rate, with the five-point verification, exactly as if it were new to the machine. The steel has no memory of yesterday's map, and an operator who starts it with "a few warm-up shots" is running the cold-start failure mode at full pour temperature. Between those two brackets, the honest answer is a measured one: check the core with the thermocouple or pyrometer, and let the number pick the route.
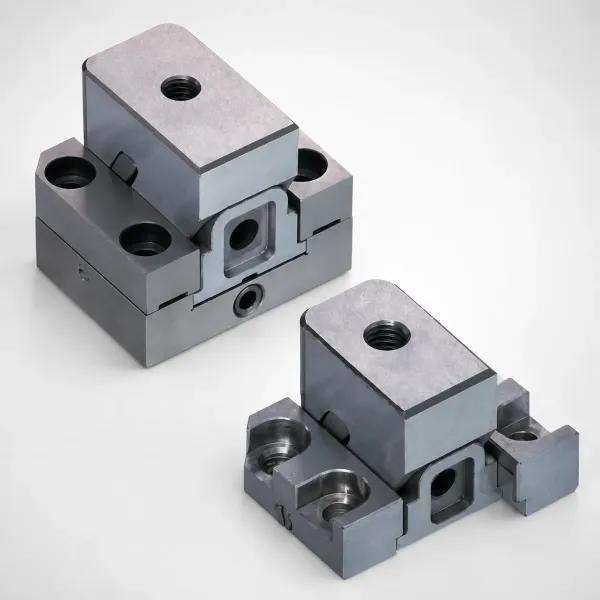
Before a die comes off the machine at all, close the loop on the run record: write down the final thermal map, the spray timer settings that held it, the shot count reached, and anything the first-shot gate flagged. Those values are the preheat plan for the next install and the wear baseline for the next teardown, and the interval logic behind them is laid out in die casting die maintenance planning.
Die Preheating FAQ
Q1. What temperature should a die casting die run at?
Preheat to 150 to 180 °C at the core of the thickest insert, then let the spray map bring the cavity surface to a working band of 180 to 250 °C held within ±20 °C across the die. The band, not a single number, is the specification: the gate sits hot and the last-fill end sits cool by design.
Q2. How long does preheating take?
Plan on the ramp plus the soak. From 20 °C to 160 °C at 40 to 70 °C per hour is about 2 to 3.5 hours, and the soak after setpoint adds 30 to 60 minutes per 100 mm of section thickness. A die oven run overnight removes all three variables at once, which is why high-uptime shops preheat offline.
Q3. Can I skip preheat and just shoot ten warm-up castings?
No. The damage happens in the first shots, before the series can warm anything: a 300 to 500 °C surface spike seeds the heat-check network, and any face below 150 °C is a soldering surface for fresh dross. The warm-up series conditions an already hot die; it is not a substitute for the ramp.
Q4. How many warm-up shots before production?
Run 30 to 60 at two to three times steady spray volume, map every 10 to 20 shots, gate the first 5 to 10 castings with X-ray or sectioning on two, and release production speed only when the map has held stable for 50 consecutive shots.
Q5. Why does a preheated die still show a 25 °C spread across the face?
Almost always an open water circuit or a dead heater zone. Walk the valves first: one line at full flow on a 250 mm block will hold a corner 20 to 30 °C down regardless of what the controllers command. If the valves are correct, check the cartridge or thermocouple in the cold zone before blaming the pyrometer.
The Bottom Line
Cold-start damage is a temperature story told in steel: a 300 to 500 °C first-shot spike seeds heat checking thousands of shots early, soldering starts below 150 °C, and a 20,000 USD refurbishment on a 2,000 mm die usually traces back to a skipped ramp. The defense is four numbers on a card. Ramp 40 to 80 °C per hour to 150 to 180 °C at the insert core, verify five points within a 20 °C spread, hold the working map at 180 to 250 °C within ±20 °C on 2 to 3 times spray for 30 to 60 shots, and gate production speed behind two X-rayed castings and 50 stable shots.
DieStrike builds die casting tooling to IATF 16949 with ±0.005 mm mold accuracy, ±0.002 mm on EDM and jig-grinding features, HRC 62 maximum heat treatment and tool lead times of 2 to 5 weeks, backed by standard components shipping in 3 to 7 days from a 120+ machine plant. A die commissioned with the ramp, the map and the park rules on paper starts producing sooner and refurbs later; the die casting mold service page carries the specification details for buyers writing their own startup cards.
KEEP READING
Related Reading
How to Prevent Heat Checking in Mold Steel
The crack network that a cold start seeds thousands of shots early, and the steel and surface rules that slow it.
Read articleArticleHot Chamber vs Cold Chamber Die Casting
Where the metal comes from, what temperature it arrives at, and why the die still needs preheat either way.
Read articleArticleHow to Choose a Mold Temperature Controller
Heater and controller sizing for die zones that must hold 150 to 180 °C with thermocouple feedback.
Read articleIndustryEV Energy Components
Structural aluminium castings for battery and drivetrain programs, and the tooling discipline behind them.
Learn moreNEXT STEP
Ready to Start Your Mold?
Send us your element dimensions or part numbers — our team responds within 24 hours with pricing and lead time.

Written by
Ray ChanMold Buyer's Guide Author · Precision Mold Manufacturing Specialist. Ray helps global importers, distributors and OEMs source factory-direct molds and mold parts.