
How to Prototype Molds in 2 Weeks
Table of Contents
Your launch date moves up, the first tooling quote says 8 weeks, and someone in the meeting says the word prototype. A 2-week mold sounds like a trade: give up some tool life, get parts in time for the show. Done right, that trade works. Done wrong, you get a mold that cannot hold its own dimensions, parts that fail every functional test, and a schedule that slips anyway.
A 2-week prototype mold is not a cheaper mold. It is a different plan: the scope freezes before the steel is ordered, the cavity set comes from a tooling class chosen for speed, the standard components come from stock, and the DFM review runs in parallel with machining instead of before it. Every day in that schedule is assigned to a task. The reason prototype molds take 6 weeks at most shops is not that the machining is slow — it is that the queue is unmanaged.
This guide walks the full 2-week build, day by day and decision by decision: which tooling class to pick, which tolerances survive the schedule, what the mold will cost, and what it will not survive. Use it before you commit to the date, not after the steel arrives.
The Snapshot
- Aluminum prototype molds (7075-T651, QC-10) run 500 to 10,000 shots and cost about $8,000-$25,000 (published ranges).
- P20 soft-steel tools extend life to 100,000-250,000 shots for roughly 20-40% more cost than aluminum.
- 3D-printed maraging inserts add conformal cooling and cut cooling time 30-50% on difficult cores.
- DieStrike holds ±0.005mm standard and ±0.002mm critical even on 2-week prototype tools; the limit is geometry, not the calendar.
- The 2-week clock starts at scope freeze — a locked 3D file, resin grade and cavity count.
When Two Weeks Is Real (and When It Is Not)
A 14-day mold build assumes three things are true. First, the part file is final — no revision letters that land after day 3. Second, the tooling class fits the resin and the shot count: aluminum for a few thousand shots, P20 for tens of thousands, printed inserts for geometry that needs conformal cooling. Third, the shop has the machines and the capacity: a machining center for the cavity, wire EDM for the shut-offs, and a trial press booked for day 13-14.
When those three conditions hold, the schedule is a planning problem, not a technical miracle. When any one fails — a file that moves, a resin that needs a harder cavity, a shop that quotes from a design review that has not happened — the 2-week number becomes a marketing claim. The difference shows up in the first trial.
Read the quote the same way. A 2-week lead time that starts "after drawing approval" is not a 2-week mold; add your own approval cycle to the number. A lead time that starts at scope freeze is the real thing. Ask which clock the shop is quoting before you compare it to anything.
Plan the schedule around the calendar too. A 2-week build that runs over Chinese New Year or a holiday shutdown is a 3-week build with optimistic labeling. Confirm the shop's working days before you book a customer demo against it.
The resin matters as much as the schedule. A prototype mold running unfilled polypropylene can be aluminum. The same part in 30% glass-filled nylon needs a steel cavity or a coated aluminum surface — and the coating adds days. Tell the shop the exact resin grade at RFQ, not at trial.
One more condition: the trial press. A 2-week mold is worthless without a booked press, resin, and an inspector on day 13. Shops that quote fast tooling and trial into an open queue are quoting the tool, not the delivery.
Step 1: Freeze the Scope Before Day One
The single biggest killer of 2-week schedules is scope movement. Every revision after the steel order pushes machining hours into the critical path. Freeze four things in writing before the clock starts: the 3D file and revision, the resin grade and supplier, the cavity count, and the acceptance criteria.
Lock the 3D file with a revision letter. A part that changes from revision B to C on day 4 costs more than the rework — it costs the parallel schedule. While the cavity machines, the ejector layout and cooling are being cut from the same file. Any change ripples through all of them.
Lock the resin grade. Prototype molds are tuned to one material family: shrinkage, ejection temperature, and chemical attack all change with the resin. A part specified in unfilled POM that shows up at trial in glass-filled POM will load the aluminum cavity differently, and the dimensions will not match the shrink calculation.
Lock the cavity count with the volume plan. A 1-cavity aluminum tool is the fastest build. A 4-cavity tool adds a manifold or a longer runner system and two or three days. If the program needs 20,000 parts before hard tooling, the cavity count decision belongs in the RFQ, not at the kickoff.
Write the acceptance criteria into the same document: dimensions on the drawing, the surface finish grade, and the trial shot count. A prototype mold that meets "dimensions within tolerance, no flash, parts eject" is done. A prototype mold chasing a cosmetic A-surface is not a 2-week job; it is a polishing program with a mold attached.
Our RFQ guide lists every field a complete request should carry. The RFQ for a 2-week mold is the same document with one extra line: the frozen revision and the schedule commitment.
Step 2: Pick the Prototype Tooling Class
The tooling class decides what the 2-week mold can do. There are four practical options, and each one changes the schedule, the price and the shot budget.
Aluminum 7075-T651. The workhorse prototype material. Machinable at high speed, stable after aging, and good enough for 500 to 5,000 shots on unfilled and lightly filled resins (published range). Tool life ends when the gate erodes or the parting line wears. Cost is the lowest of the four classes.
QC-10 and QC-7 aluminum. Mold-grade aluminum alloys with tighter grain structure and better polishability than 7075. They extend the shot budget to roughly 2,000-10,000 shots and hold a better surface on visible parts. The premium over 7075 is small and worth it when the part is cosmetic.
P20 soft steel. Pre-hardened to about HRC 28-32, P20 machines fast and survives 100,000 to 250,000 shots on most resins (published range). It is the right class when the prototype becomes a bridge tool for early production. The cavity takes longer to cut than aluminum, and the mold costs roughly 20-40% more.
3D-printed maraging inserts. Inserts printed in 18Ni300 maraging steel (or similar) and machined to finish. The advantage is conformal cooling channels that follow the cavity contour — typically cutting cooling time 30-50% on deep cores and ribs (published range). The insert itself runs 10,000-100,000 shots. Printing and finishing add days, so this class fits a 2-week schedule only when the conformal geometry is worth the planning.
| Tooling class | Typical shot life | Relative cost | Best fit |
|---|---|---|---|
| 7075-T651 aluminum | 500-5,000 | Baseline | Functional prototypes, 1-2k parts |
| QC-10 / QC-7 aluminum | 2,000-10,000 | +10-20% | Cosmetic parts, longer pilot runs |
| P20 soft steel | 100,000-250,000 | +20-40% | Bridge tooling into early production |
| Printed maraging inserts | 10,000-100,000 | +30-60% | Deep cores needing conformal cooling |
← swipe to scroll →
Shot life and cost figures are typical industry practice, not a DieStrike quote.
Choose the class from the volume plan and the resin, not from habit. A 500-shot validation mold in aluminum that costs $9,000 beats a P20 mold at $13,000 when the program moves to hard tooling anyway. The steel only pays when it actually runs.
Step 3: Parallelize DFM with the Steel Order
In a normal mold project, DFM happens first and machining happens after approval. In a 2-week build, that serial chain costs five days you do not have. The parallel version: the DFM review starts the day the file arrives, the risk list comes back in 24 hours, and the steel order goes out against the pre-DFM geometry while the DFM findings fold into the cavity program.
The DFM review on a prototype mold checks a shorter list than a production review: draft on the shut-offs, wall thickness vs. the resin's flow length, gate location, ejection risk on deep features, and whether the tolerance set is machinable in the chosen tooling class. Everything else — texture, multi-step polishing, exotic steel — is deferred to the production tool.
DieStrike runs the 24-hour DFM on every prototype request: file in, risk list and quote out inside one working day. The two things that kill the 2-week schedule — a geometry that cannot eject and a tolerance that the class cannot hold — are caught before steel, not at trial.
While the DFM runs, the shop should order the mold base and standard components. A DME or HASCO base in stock ships in 3-7 days. The base order is independent of every DFM finding except the ejector count, so it can go out on day 1.
The key DFM questions for a 2-week aluminum mold:
- Does the part have at least 0.5-1 degree of draft on all vertical walls (typical minimum for aluminum tooling)?
- Is the gate location reachable and the land short enough to avoid excessive gate wear?
- Can every deep rib and boss be cooled without a conformal insert?
- Is the wall thickness 0.4-0.8mm thin-wall territory, which needs a steel or coated cavity?
- Which features carry the tightest tolerance, and are they machinable in aluminum or do they need steel inserts?
A DFM that comes back "clean with three notes" is the normal outcome for a good part file. A DFM that comes back with geometry that cannot eject is the outcome you want before the steel order — not on the trial press.
Step 4: Machine the Cavity Set
The cavity set is the critical path. In aluminum, a typical insert machines in one to three days: roughing on the machining center, finishing passes, then wire EDM for the shut-offs and any through-features. In P20 the same work runs longer, which is why steel prototype tools usually quote at 3 weeks, not 2.
High-speed machining in aluminum runs at spindle speeds that finish surfaces with minimal hand work. The finishing pass strategy matters more than the machine: climb milling with a light radial engagement, a ball end mill sized to the smallest internal radius, and a stepover that leaves a surface you can polish in minutes, not hours.
Wire EDM takes the shut-offs. The side walls of the core and cavity, the parting line steps, and any feature that a round cutter cannot reach are wire-cut at ±0.002mm. Wire EDM leaves a uniform finish and no cutter deflection, which is why prototype shut-offs survive repeated open-close cycles without galling.
The tolerance policy on a 2-week tool is the same as production: ±0.005mm standard, ±0.002mm critical. What changes is where the tight tolerances can live. A critical bore in the cavity is fine. A fine-pitch thread that must be EDM'd in aluminum is a geometry risk — aluminum erodes, and the thread wears before the first hundred shots.
Keep the cooling simple on aluminum tools. Straight drilled channels are fine. Conformal cooling belongs on printed inserts or steel tools where the cycle matters. On a prototype, cycle time is a nice-to-have; dimensional proof is the deliverable.
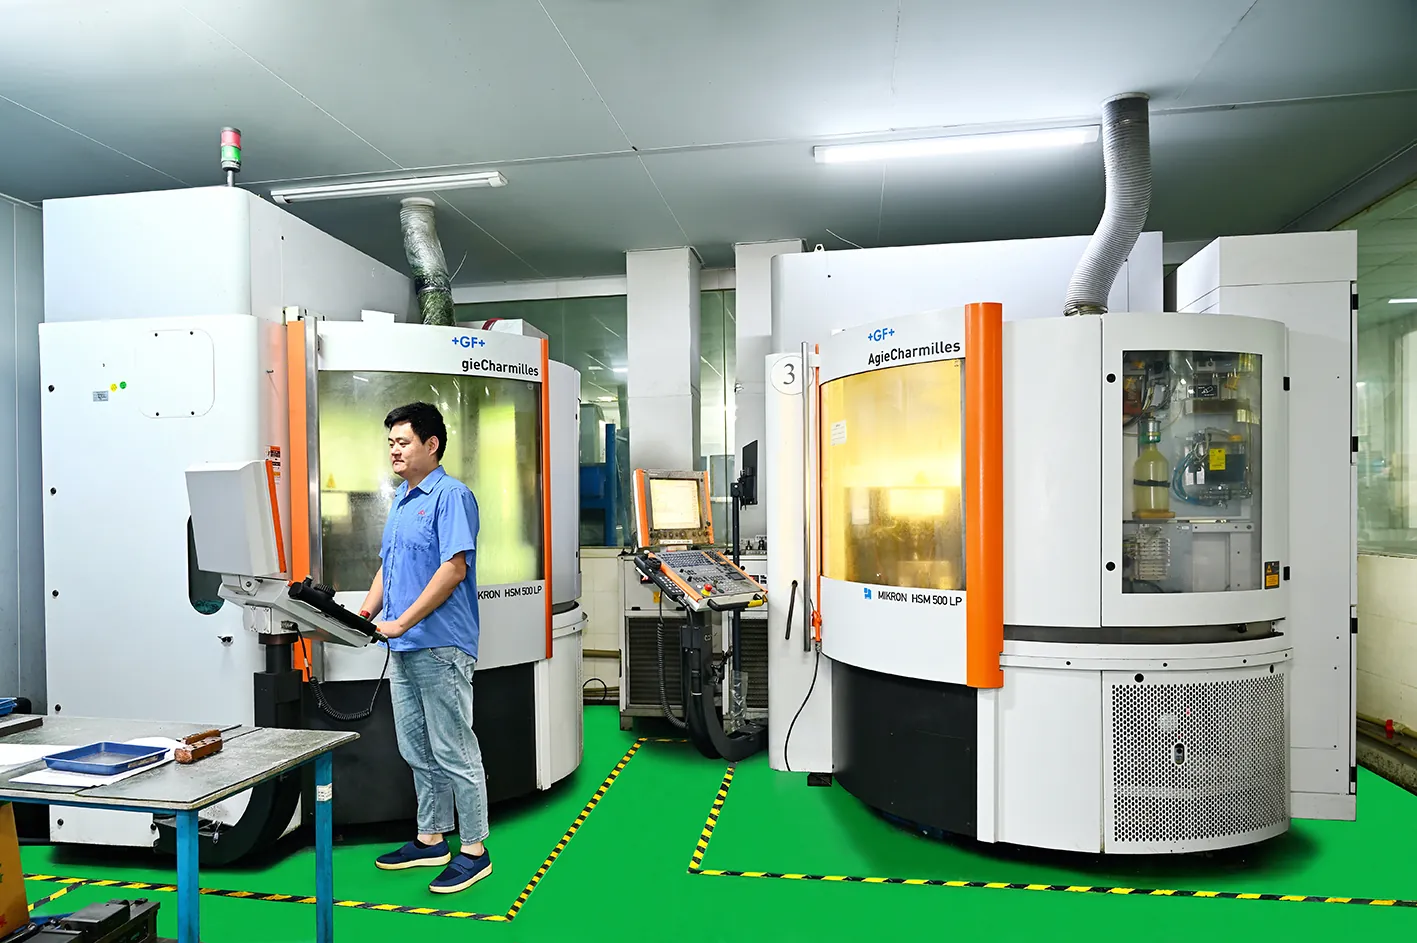
Inspect the cavity set before assembly, not after. A CMM check on the critical features while the insert is still on the bench catches a bad cut for the price of a re-cut, not a failed trial. Prototype molds skip this step more often than they should, and it is the difference between a 2-week delivery and a 3-week delivery with a re-cut in the middle.
Step 5: Buy Standard Components from Stock
The ejector system, the guide system and the return system come from catalogs, not from the machining queue. Standard ejector pins, core pins, springs, guide pillars and bushings ship in 3-7 days from stock. The 2-week schedule is built on that fact: the only custom parts are the cavity, the core, and the insert plates.
DieStrike builds prototype molds to HASCO, DME and MISUMI interchangeability. That choice has a schedule payoff: a DME 4040 base with a standard ejector layout can be assembled the day the parts land, with no custom machining on the frame.
Match the component grade to the tooling class. A 2,000-shot aluminum mold does not need TiN-coated ejector pins; standard SKD61 at HRC 48-52 is the right cost. A P20 bridge tool running 100,000 shots should carry the same pin grade you would put in production — because it will run like production.
Order spares with the prototype. Two extra pins per size and a spare set of springs cost a few dollars and save a trial day when something drops on the bench. For prototype programs, the spare part that matters most is the gate insert, if the design uses one.
Check the mold base for flatness and the guide fit when it arrives. A base with 0.02mm guide play is fine for a prototype; a base with 0.05mm play will show up in every part dimension. The 2-week schedule does not excuse a sloppy frame — it makes the frame check more important, because there is no time to re-cut anything.
Step 6: Assemble and Bench-Test
Assembly on a prototype mold takes one to two days when the parts are right: fit the inserts, set the ejector system, check the guide travel, and bench-cycle the mold before it ever reaches the press. The bench test is the cheapest trial you will ever run.
Check the ejector travel first. Every ejector pin should move freely with no bind, and the return pins should seat fully. A pin that binds on the bench will bind on the press, and on the press it will mark the part or stick.
Set the insert shut-offs. The wire-cut surfaces should kiss evenly around the cavity. A bright spot check — open the mold, look for transfer marks on the shut-off — tells you where the parting line seals. Uneven contact on an aluminum shut-off will flash in the first ten shots.
Check the gate and runner finish. The gate land should be polished to the direction of flow, and the runner should have no steps or cutter marks that create turbulence. On a cold-runner prototype, the sprue puller must be clean or the sprue will stick on every cycle.
Verify the cooling circuit before the press: flow through every channel, no leaks at the connectors. A leak found on the bench is a 15-minute fix. The same leak on the press is a half-day teardown.
Weigh the mold and check the clamp height against the booked press. A prototype mold that does not fit the press is the most expensive mistake on the schedule, because it is discovered last. Send the press sheet with the RFQ so the shop builds to the press, not to a guess.
Step 7: Trial Shots and First-Article Checks
The trial is where the 2-week schedule proves itself. Book the press, the resin and the inspector for day 13-14 before the mold starts cutting. The trial on a prototype mold runs the same way as production: start at the nominal process, take dimensional checks at defined intervals, and stop at the first defect that is a tooling problem rather than a process adjustment.
Run the first articles through the same measurement plan you will use in production. CMM or vision measurement on the critical features, a check on the ejector marks, and a gate vestige measurement if the part has a cosmetic requirement. The first-article report from a prototype mold is the baseline for the production tool.
Expect one or two trial iterations on a cold-runner aluminum mold: gate size, packing time, or ejection tuning. Budget the schedule for them. A 2-week mold with a day-14 trial that needs a second trial on day 16 is still a 2-week-plus-2-day mold, which is a normal outcome — the schedule that fails is the one that books no trial at all and ships the mold "for you to try."
Shrinkage verification is the real deliverable. The prototype mold confirms the shrink factor you used in the cavity calculation. Measure the first articles at 24 hours after molding — plastics continue to shrink after ejection — and feed the measured values into the production tool design. This is why prototype tooling exists: not to make parts, but to make the production tool right.
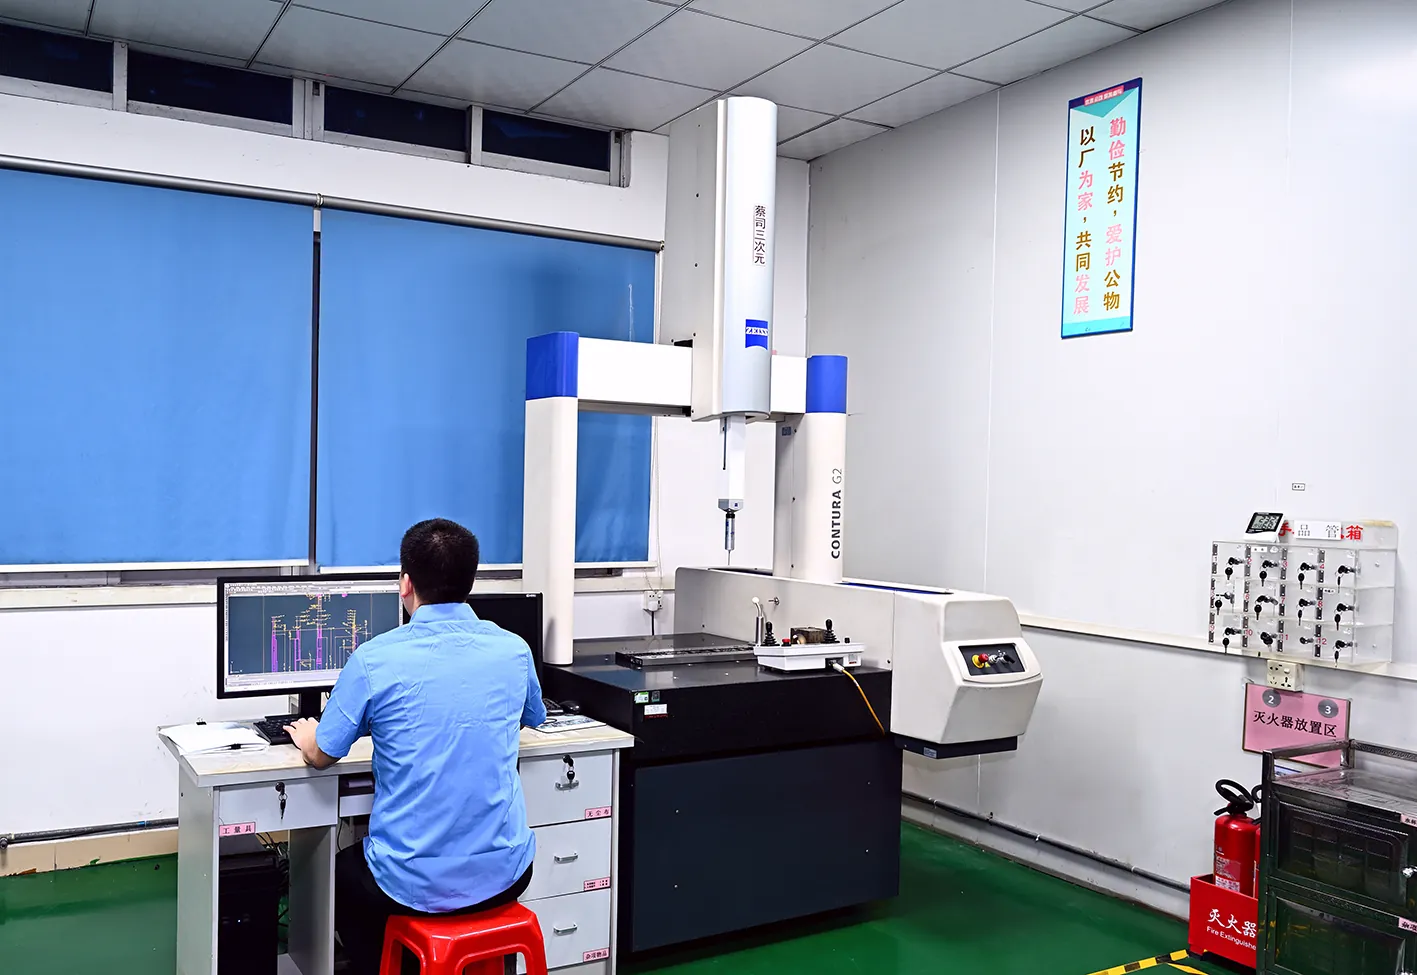
Document everything from the trial: process settings, measured dimensions, defect photos. That record is worth more than the mold itself when the production tool goes into design.
What a 2-Week Mold Can and Cannot Do
A prototype mold is a dimensional and functional proof, not a production asset. Know the limits before you commit to the schedule.
Tolerance. A 2-week aluminum tool holds ±0.005mm on machined features and ±0.002mm on wire-cut criticals — the same policy as production tooling at DieStrike. What it cannot hold is a tolerance that depends on long-term steel stability, because aluminum moves with temperature more than steel does. Tight cylindrical fits and long thin cores belong on the production tool.
Tool life. Aluminum tools are shot-limited: 500-10,000 shots depending on alloy and resin (published range). A P20 prototype stretches to 100,000-250,000 shots and becomes a bridge tool. If the plan calls for 300,000 parts before hard tooling, neither class is a prototype anymore — that is production tooling with a shorter lead time.
Geometry. Fine-pitch threads, sharp corners under 0.2mm radius, and deep rib networks wear out aluminum cavities quickly. Gate erosion on glass-filled resins is the usual failure: the gate opens up, the fill pattern changes, and the part dimensions drift. Coatings (hard anodize, PVD) extend aluminum gate life but add days to the schedule.
Surface finish. Aluminum polishes to a good cosmetic surface but not to SPI A-1 mirror grade on complex geometry. If the prototype must validate an optical surface, plan for steel inserts or accept the finish gap.
Cycle time. A prototype mold is not optimized for cycle. Cooling is straight-drilled, gates are conservative, and the tool runs at a process that protects the cavity. Cycle optimization belongs to the production tool, where the conformal cooling and the tuned gate live.
The honest summary: a 2-week mold answers the questions "does the part work?" and "does the shrink factor hold?" It does not answer "what does this part cost at 1 million pieces?" — that answer comes from the production tool.
The Cost of a 2-Week Mold
Published ranges put prototype molds at roughly $8,000-$25,000, with the spread driven by size, cavity count, tooling class, and geometry complexity (typical industry pricing). The 2-week premium is a scheduling cost, not a materials cost: it pays for the priority machine time, the booked trial slot, and the parallel DFM.
| Cost driver | Range (typical) | Why it moves the number |
|---|---|---|
| Mold base + standard components | $1,500-$5,000 | Size and ejector count; stock items ship in 3-7 days |
| Cavity machining (aluminum) | $3,000-$9,000 | Complexity, depth, surface area of the cavity set |
| Wire EDM shut-offs | $800-$3,000 | Linear length and number of shut-off surfaces |
| P20 or printed-insert upgrade | +20-60% | Steel class or conformal-cooled printed inserts |
| Trial shots + first-article report | $800-$2,500 | Resin cost, press time, CMM/vision inspection |
← swipe to scroll →
Ranges are typical industry practice, not a DieStrike quote.
Compare the prototype spend against the alternative: a production mold at $30,000-$60,000 that ships with a wrong shrink factor is a $10,000+ re-cut. The prototype is the cheapest insurance in the tooling program — when it is used to validate, not to produce.
Budget the change orders too. A prototype program that discovers a gate problem at trial pays for a small insert change, not a full re-cut. That is the point of the class: failures in prototype tooling are cheap; failures in production tooling are not.
When to Say No to a 2-Week Schedule
A 2-week prototype mold is the right answer to a specific question, and the wrong answer to several others. Say no when:
- The part is still moving. If the design team is iterating the file weekly, wait. The 2-week clock burns one revision per build.
- The volume is production. 100,000+ parts is not a prototype program. Build the P20 or hardened tool on a realistic schedule instead of a bridge tool that dies mid-run.
- The resin is abrasive or high-temperature. Glass-filled, carbon-filled, or 120°C+ processing resins punish aluminum cavities. Steel inserts or a coated cavity stretch the budget — and the schedule.
- The tolerance set needs steel stability. If the critical features are cylindrical fits or long cores that depend on low thermal expansion, aluminum is the wrong class regardless of the calendar.
- Regulatory testing depends on the tool. Medical and automotive validation that must trace back to a qualified production process cannot use a prototype mold as the qualified asset.
The decision rule is simple: use the 2-week mold to validate the part and the shrink factor, and to deliver early samples. Move to a proper production tool the moment the volume plan and the regulatory path require it. Our DFM team will tell you which class fits your file within 24 hours.
Frequently Asked Questions
Q1. How much does a prototype injection mold cost?
Published ranges put prototype molds at about $8,000-$25,000, depending on size, cavity count, and tooling class. Aluminum is the low end, P20 steel adds 20-40%, and 3D-printed conformal inserts add 30-60% on top of the base class.
Q2. How many shots does an aluminum prototype mold last?
Typically 500 to 10,000 shots, depending on the alloy and the resin. 7075-T651 runs on the low end for abrasive resins; QC-10 mold-grade aluminum and unfilled resins push toward the high end. Gate erosion is the usual end-of-life.
Q3. Can a prototype mold hold production tolerances?
Yes on machined features: ±0.005mm standard and ±0.002mm critical are achievable in a 2-week build. What a prototype cannot hold is a tolerance that depends on long-term steel stability or on cycle-to-cycle thermal equilibrium — those belong on the production tool.
Q4. What is the fastest a mold can realistically be built?
With a frozen file, a booked press, and stock components, a single-cavity aluminum mold can ship in 14 days. Shorter claims usually mean the clock starts before the design is locked, or the trial is not included.
Q5. Is a prototype mold worth it if I am going straight to production tooling?
Yes, when the part is new or the shrink factor is unverified. The prototype confirms dimensions and ejection before the production tool is cut. The cost of one prototype is typically less than the cost of one re-cut on a production tool.
Q6. Can a prototype mold be used for bridge production?
If it is built in P20 steel, yes — 100,000 to 250,000 shots is realistic (published range), which covers most bridge volumes. Aluminum prototypes are for validation quantities only.
The Bottom Line
A 2-week prototype mold is a schedule discipline, not a machining miracle. Freeze the file, pick the tooling class that matches the volume and the resin, order standard components from stock, and run the DFM in parallel with the machining. The result is a dimensional proof and a verified shrink factor — the two things that make the production tool right the first time.
Send us your part file and your volume plan, and we will tell you within 24 hours which tooling class fits and whether the 2-week date is real for your geometry. Start with a DFM review — the schedule is built on it.
KEEP READING
Related Reading
5 Mold Cooling Channel Design Tips for Faster Cycles
Mold maker's 5 cooling channel design rules: channel-to-cavity distance 2-2.
Read articleArticle5 Shrinkage Compensation Rules for Mold Design
Shrinkage compensation decides mold accuracy. Five rules: material rates from 0.3% to 2.
Read articleArticle5 Ways to Reduce Mold Cost Without Cutting Quality
Five proven ways to reduce injection mold cost without cutting quality: DFM before quoting, right-sized cavity count,…
Read articleArticle7 Gate Design Best Practices for Balanced Filling
Mold maker's 7 gate design rules for balanced multi-cavity filling: gate depth 50-80% of wall thickness, land 0.5-1.
Read articleNEXT STEP
Ready to Start Your Mold?
Send us your element dimensions or part numbers — our team responds within 24 hours with pricing and lead time.

Written by
Ray ChanMold Buyer's Guide Author · Precision Mold Manufacturing Specialist. Ray helps global importers, distributors and OEMs source factory-direct molds and mold parts.